ZoneMinder is a set of application and tools, free and open source, that offers a complete solution for video-surveillance, allowing IP or CCTV cameras, among others.
In this tutorial we will see how to set up a Docker container running it. For this tutorial, Linux Mint 18 and Docker version 1.12.3 have been used.
You may skip Docker installation and jump directly to the beginning of the tutorial below.
1. Installation
Note: Docker requires a 64-bit system with a kernel version equal or higher to 3.10.
We can install Docker simply via apt-get, without the need of adding any repository, just installing the docker.io package:
sudo apt-get update
sudo apt-get install docker.io
For more details, you can follow the Install Docker on Ubuntu Tutorial.
2. Pulling the image from Docker Hub
ZoneMinder has not published an image in the Docker Hub officially, but it’s available “extra-officially”, which can be found in kylejohnson/zoneminder.
So, we would have to pull the following way:
docker pull kylejohnson/zoneminder
Now, we just have to create the container, binding its port 80 to some port in the host:
docker run -p 80:80 --name=zoneminder -d kylejohnson/zoneminder
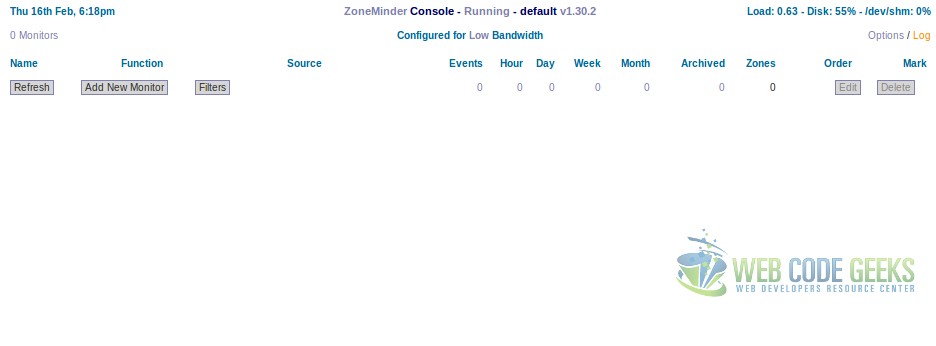
That’s it! Now, we should be able to access the ZoneMinder interface following the localhost<:port>/index.php URL, showing up the interface:
3. Creating a Dockerfile from the scratch
If we want to create our own ZoneMinder image from the beginning, perhaps because we want a more customized system, we can write our own Dockerfile.
This would be actually very easy: just a basic LAMP stack, the installation of ZoneMinder from the apt repositories, and basic user, permission and database setup.
We will use the following directory structure:
.
├── Dockerfile
└── scripts
    └── docker-entrypoint.sh
A Dockerfile for installing ZoneMinder would consist just in:
Dockerfile
FROM ubuntu
MAINTAINER Julen Pardo <julen.pardo@outlook.es>

ENV DEBIAN_FRONTEND=noninteractive

RUN apt-get update
RUN apt-get install -y mysql-server \
    apache2 \
    php7.0 \
    libapache2-mod-php \
    php7.0-mysql \
    zoneminder


RUN adduser www-data video
RUN chmod 740 /etc/zm/zm.conf
RUN chown root:www-data /etc/zm/zm.conf
RUN chown -R www-data:www-data /usr/share/zoneminder

RUN a2enconf zoneminder
RUN a2enmod cgi
RUN a2enmod rewrite

COPY scripts/docker-entrypoint.sh /docker-entrypoint.sh
RUN chmod 777 /docker-entrypoint.sh
ENTRYPOINT ["/docker-entrypoint.sh"]

EXPOSE 80 443
Note that in the last part of the Dockerfile, we set a script as entrypoint. The script consists on the following instructions:
docker-entrypoint.sh
#!/bin/bash

echo "date.timezone = $PHP_TIMEZONE" >> /etc/php/7.0/apache2/php.ini

/etc/init.d/mysql start

mysql -u root < /usr/share/zoneminder/db/zm_create.sql
mysql -u root -e "GRANT ALL ON zm.* to 'zmuser'@localhost identified by 'zmpass';"
mysqladmin reload

systemctl enable zoneminder
/etc/init.d/zoneminder start
/etc/init.d/apache2 restart

tail -F n0 /dev/null
The first instruction (after the shebang, of course), is setting the time zone in the PHP config. Note that we access it with $PHP_TIMEZONE, meaning that we have to set it as environmental variable in the container creation.
After that, with the database running, we just import the database creation script provided by ZoneMinder and grant permissions, and then starting the service and restarting the Apache one (because of the modules we enabled in the Dockerfile).
The last statement is just a never-ending command, to keep the container alive.
Now, we can build our image from the Dockerfile:
docker build --tag=myzoneminder . # Path to the Dockerfile.
And create the container, e.g.:
docker run -p 80:80 \
           -d \
           --name=myzoneminder \
           -e PHP_TIMEZONE="Europe/Berlin" \
           myzoneminder
Once running, if we access the localhost<:port>/zm URL, we should see our ZoneMinder GUI, as we did in the image 1.
4. Summary
This tutorial has shown how to install ZoneMinder, the free and open source video-surveillance solution in a Docker container, pulling the image maintained by the developers (even if it does not appear as an official image at Docker Hub); and building our own ZoneMinder image with a Dockerfile, which could be a more suitable solution if we would want a more customized system.

cool! Personally ZM was a really headache though, try this http://shinobi.video/ . It has docker riles too! :)
There is also a github page : https://github.com/moeiscool/Shinobi