Single Page Apps are becoming increasingly popular as the demand for highly responsive apps is increasing. We could be using Ajax and Javascript to do this, but we will be using Angular as it is a structural framework for dynamic web-apps, efficient and easy to use, as described by the people who built it.
We’re going to create a simple app with only a homepage, an about page and a date page, so as to not need to refresh the page to view changes, but have it reflect them immediately.
We will use:
- AngularJS
- Bower
- Twitter’s Bootstrap
Getting started
To go on with the project you might want to download Bootstrap and also Bower (here you will find every information you need on how to do that).
Firstly, we create a folder named SinglePageApp (you can name it anything you wish), an HTML file named index.html and a Javascript file named app.js inside of it, and we’re good to go.
Setting up AngularJS
First we ask Bower to install the Angular package by executing this in the terminal (make sure you’re in your project’s directory):
bower install angular
Then, again using Bower we install the Angular-Route package by executing:
bower install angular-route
After executing these commands we will notice that in our project’s directory a bower_components directory is added, inside of which are two folders, one named angular and one named angular-route. We will use them later. Then we open the app.js and write the JavaScript code for creating the Angular module, while adding ngRoute dependency to it. It should look like this:
var app=angular.module('app',['ngRoute']);Now is time to define routes by using the config() function, provided by angular.module. Right under the code for the angular module, in the app.js file we place this code:
app.config(function($routeProvider){
	$routeProvider

		//default page
		.when('/',{
			templateUrl : 'pages/homepage.html',
			controller  : 'Homepage'
		})

		//about page
		.when('/about',{
			templateUrl : 'pages/about.html',
			controller  : 'About'
		})

		//date page
		.when('/date',{
			templateUrl : 'pages/date.html',
			controller  : 'Date'
		});
});
We have injected $routeProvider as a parameter to the function. Now the when() function of the $routeProvider can be used to configure the routes. This function takes two parameters: the route name and the route definition object which in itself contains various details for a route. We will use only two of those properties: the templateURL which is a relative location of the view file, starting from index.html; and the controller associated with the view.
We have reached the point where we should create the controllers for the different views. First we create a directory named controllers in the js folder, and inside of it we create a JavaScript file named controllers.js where we will put this code snippet:
app.controller('Homepage',['$scope',function($scope){
	$scope.homepage = "Homepage";
}]);

app.controller('About',['$scope', function($scope){
	$scope.about = "Lorem ipsum...";
}]);

app.controller('Date',['$scope', function($scope) {
	$scope.now = new Date();
}]);
Don’t forget to script the file controllers.js in the index.html file. You can even place the above code in the app.js file but it is not recommended as it could reduce the readability of the code and in heavier applications could complicate stuff.
The HTML markup of our app
An important thing to do if we want our app to function properly is to link and script all the files we’ve downloaded. First we link Bootstrap’s CSS file by adding this right under the </title> tag:
<link rel="stylesheet" href="css/bootstrap.min.css">
Now let’s script Bootstrap’s, Angular’s and Angular-Route’s JavaScript files by adding this code after the <link> tag:
<script src="js/bootstrap.min.js"></script>
<script src="bower_components/angular/angular.min.js"></script>
<script src="bower_components/angular-route/angular-route.min.js"></script>
Also we script the app.js file, as it contains our angular module and also other necessary things, like this:
<script src="js/app.js"></script>
You might want to place all this in the <body> section, right before the </body> tag, for performance reasons, as the browser will render the HTML markup first and then the JavaScript code is loaded. Please bear in mind that the scripting of angular-route and app.js should come after the scripting of angular, and controller.js should come after the scripting of app.js.
Now let’s create a directory named pages inside of which we will place the HTML files for the views. Beware that the files for the views should not be complete HTML files, they should only have the markup for the specific view.
In the homepage.html file we will only place the {{homepage}} expression.
The About page will be a typical descriptive page, so we will only need this code:
{{ about }}
The date page will show us the date of today. The code will go like this:
{{ now | date:'medium' }}
While by now you know that what we have placed inside the double curly brackets is an expression, it is worth noting that
| date:'medium' is a filter, a short way to format some of the most used expressions, such as dates, numbers, currency etc. Angular gives us several built-in filters as well as an easy way to create our own. This particular filter formats the date so as to show the month, date and then the year, and also the time in hours, minutes and seconds in AM/PM format.
Time to have a look at index.html. We will have to tell Angular in which part of the application it should be active. You saw that when declaring the angular module we named it app. To tell it where it should be active we add the attribute ng-app="app" in the tag and everything inside of it turns into an AngularJS application. In our case, as the whole page will be an ng-app it is better to place the attribute in the <html> tag or in the <body> tag. I’m choosing the second.
In the <body> section we will add the buttons, one for each view. We will use Bootstrap to create them easily but also to make them look stylish. The code will go like this:
<a href="#/"><button class="btn btn-danger">Homepage</button></a>
<a href="#/about"><button class="btn btn-success">About</button></a>
<a href="#/date"><button class="btn btn-warning">Date</button></a>
Take a look at the href attribute in each of the links. Familiar? It is the route we specified when we used when() function, only it has a # (hashbang) before it. The class attribute you see in the <button> tags is a class provided by Bootstrap, which makes them look fancy and have specific colors (red for btn-danger, green for btn-success and orange for btn-warning).
But where is the app going to display the views we created? We will tell it where, by placing a <div> element containing the attribute ng-view. It will look like this:
<div class="row">
 <div ng-view>
   <!-- Views go here -->
 </div>
</div>
I have placed it inside another <div> element, but you can place it anywhere in the application’s body. AngularRoute gives it the opportunity to completely replace the <div ng-app> element with the element <ng-app> </ng-app>, but is not recommended if your target users will use IE as it does not support the element version.
You may have noticed the “row” attribute I gave to the div containing the ng-view element. It is there for styling purposes only. To make the website look a little more fancy, you create a styling.css file inside the css folder (don’t forget to link it), and place this code inside it:
.row{
	text-align: center;
	background-color: steelblue;
	font-family: "Georgia", serif , sans-serif;
	font-size: 30px;
}
You can now open your Single-Page App and it will show you different views each time you click the buttons, without reloading the page, looking like this:
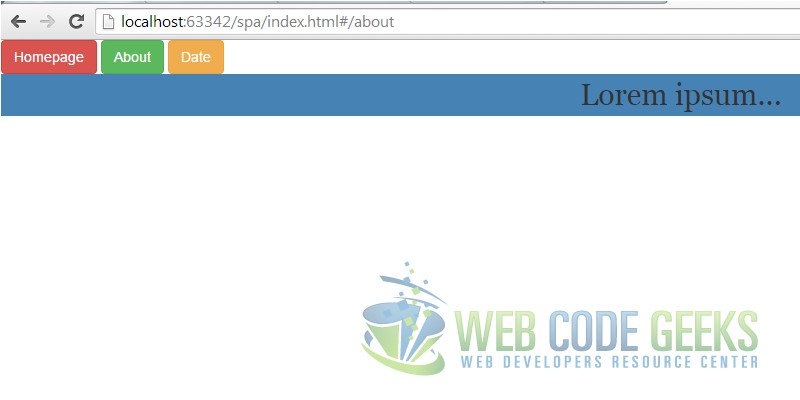
Such is the magic of AngularJS.
Download the source code for Single Page App
This was an example of Single Page Apps in AngularJS.
You can download the source code for this example here: SinglePageApp
