Hello readers, datepicker is an important utility that allows the user to choose a date from the calendar pop-up. In this tutorial, we will understand how the datepicker works in the angular library.
1. Introduction
Angular is a JavaScript MVC or Model-View-Controller framework developed by Google that lets developers build well structured, easily testable, and maintainable front-end applications. But before we start creating a real application using the angular library, let us see what the important parts of an angular application are.
1.1.1 Templates
In Angular, a template is an HTML with added markups. The angular library compiles the templates and renders the resultant HTML page.
1.1.2 Directives
Directives are the markers (i.e. attributes) on a DOM element that tell angular to attach a specific behavior to that DOM element or even transform the DOM element and its children. Most of the directives in the angular library start with the ng. The directives consist of the following parts:
ng-app: Theng-appdirective is a starting point. If the angular framework finds theng-appdirective anywhere in theHTMLdocument, it bootstraps (i.e. initializes) itself and compiles theHTMLtemplateng-model: Theng-modeldirective binds anHTMLelement to a property on the$scopeobject. It also binds the values of angular application data to theHTMLinput controlsng-bind: Theng-binddirective binds the angular application data to theHTMLtags
1.1.3 Expressions
An expression is like a JavaScript code usually wrapped inside the double curly braces such as {{ expression }}. Angular library evaluates the expression and produces a result.
1.2 What is Datepicker?
Datepicker is a utility that allows the users to select a date easily and visually. This utility uses a calendar pop-up for selecting a date or a range of dates. It is made up of several components and directives that work together.
These new APIs make developer’s life easier, really! But it would be difficult for a beginner to understand this without an example. Therefore, let us create a simple datepicker using the angular library.
2. AngularJS Datepicker Example
Here is a step-by-step guide for implementing the datepicker in the angular web applications.
2.1 Tools Used
We are using Eclipse Kepler SR2, JDK 8 and Maven. Having said that, we have tested the code against JDK 1.7 and it works well.
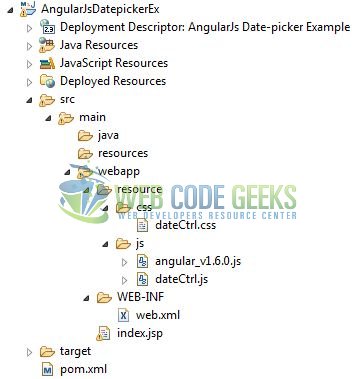
2.2 Project Structure
Firstly, let’s review the final project structure if you are confused about where you should create the corresponding files or folder later!
2.3 Project Creation
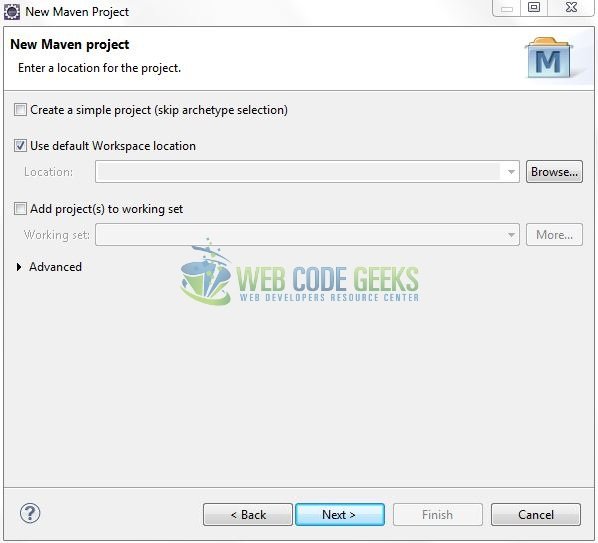
This section will show how to create a Java-based Maven project with Eclipse. In Eclipse Ide, go to File -> New -> Maven Project.

In the New Maven Project window, it will ask you to select project location. By default, ‘Use default workspace location’ will be selected. Just click on next button to proceed.
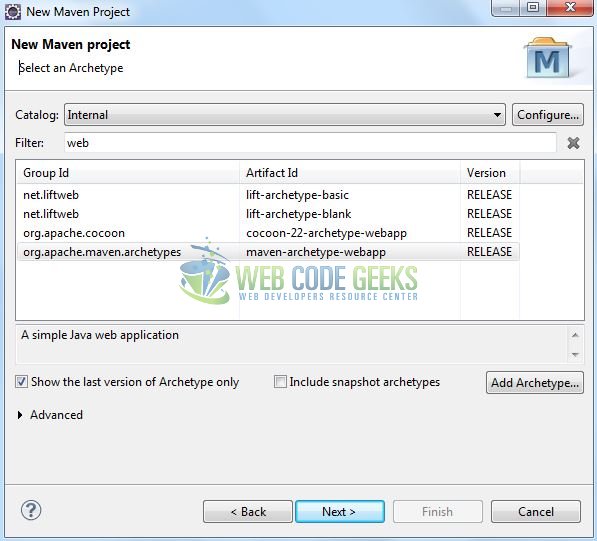
Select the ‘Maven Web App’ Archetype from the list of options and click next.
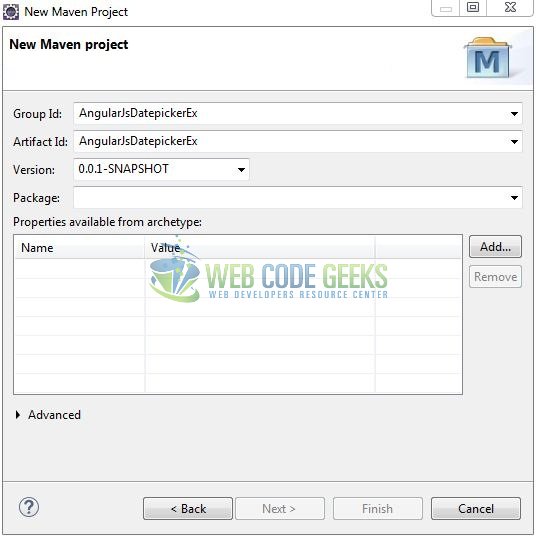
It will ask you to ‘Enter the group and the artifact id for the project’. We will enter the details as shown in the below image. The version number will be by default: 0.0.1-SNAPSHOT.
Click on Finish and the creation of a maven project is completed. If you see, it has downloaded the maven dependencies and a pom.xml file will be created. It will have the following code:
pom.xml
<project xmlns="http://maven.apache.org/POM/4.0.0" xmlns:xsi="http://www.w3.org/2001/XMLSchema-instance" xsi:schemaLocation="http://maven.apache.org/POM/4.0.0 http://maven.apache.org/xsd/maven-4.0.0.xsd">
	<modelVersion>4.0.0</modelVersion>
	<groupId>AngularJsDatepickerEx</groupId>
	<artifactId>AngularJsDatepickerEx</artifactId>
	<version>0.0.1-SNAPSHOT</version>
	<packaging>war</packaging>
</project>
3. Application Building
Let’s start building an application to understand the basic building blocks of the datepicker in the angular library.
3.1 Load the Angular framework
Since it is a pure JavaScript framework, we should add its reference using the <script> tag.
<script type="text/javascript" src="resource/js/angular_v1.6.0.js"></script>
3.2 Define the Angular application
Next, we will define the angular application using the <ng-app> directive.
index.jsp
<div ng-app="myApp">
 ...
</div>
3.3 Create the Datepicker Directive
The JavaScript file i.e. dateCtrl.js initializes the datepicker utility when the application loads. In this tutorial, we are creating a directive that allows the developers to manipulate the HTML DOM i.e. when a user selects a date from the datepicker module, it will be displayed in the angular view. Thus, we are using the link() method to bind the datepicker module to our angular web application.
dateCtril.js
var mainApp = angular.module("myApp", []);

mainApp.directive("datepicker", function () {

	function link(scope, element, attrs, controller) {

		// CALLING THE "datepicker()" METHOD USING THE "element" OBJECT
		element.datepicker({
			onSelect: function (val) {
				scope.$apply(function () {

					// UPDATING THE VIEW VALUE WITH THE SELECTED DATE
					controller.$setViewValue(val);
				});
			},
			dateFormat: "dd-mm-yy"
		});
	}

	return {
		require: 'ngModel',
		link: link
	};
});
3.4 Complete Application
In this example, we have defined the <input> element and registered an attribute named datepicker. This attribute will add the datepicker utility to the text-box and the corresponding ng-model directive will display the selected date using the {{ dateValue }} angular expression. Complete the above steps to understand the usage datepicker in an angular web application.
index.jsp
<!DOCTYPE html>
<html>
	<head>
	    <meta http-equiv="Content-Type" content="text/html; charset=UTF-8">
	    <title>AngularJS Date-picker Example</title>

	    <!-- Date-picker JavaScript File -->
	    <script type="text/javascript" src="https://code.jquery.com/jquery-1.12.4.js"></script>
	    <script type="text/javascript" src="https://code.jquery.com/ui/1.12.0/jquery-ui.js"></script>

	    <!-- AngularJs JavaScript File -->
	    <script type="text/javascript" src="resource/js/angular_v1.6.0.js"></script>
	    <script type="text/javascript" src="resource/js/dateCtrl.js"></script>

	    <!-- Bootstrap CSS -->
	    <link rel="stylesheet" href="https://maxcdn.bootstrapcdn.com/bootstrap/4.0.0/css/bootstrap.min.css">
	    <link rel="stylesheet" href="https://code.jquery.com/ui/1.12.0/themes/base/jquery-ui.css">
	   	<link rel="stylesheet" href="resource/css/dateCtrl.css">
	</head>
	<body>
	    <div id="angularDatepicker" class="container">
	        <h1 align="center" class="text-primary">AngularJS - Date-picker Example</h1>
	        <hr />

	        <!------ ANGULAR JAVASCRIPT DATE-PICKER EXAMPLE ------>
	        <div ng-app="myApp">
	            <div class="container">
	                <div class="form-group">
	                    <label for="date">Select Date:</label><input id="date" name="date" type="text" datepicker ng-model="dateValue" placeholder="Enter Date ..." />
	                    <div id="dateOutput" class="pTop">
	                    	<h6 class="text-success">Date: {{ dateValue }}</h6>
	                    </div>
	                </div>
	            </div>
	        </div>
	    </div>
	</body>
</html>
Do remember, to include the jQuery CDN before the Angular script. If not, it will throw an error.
4. Run the Application
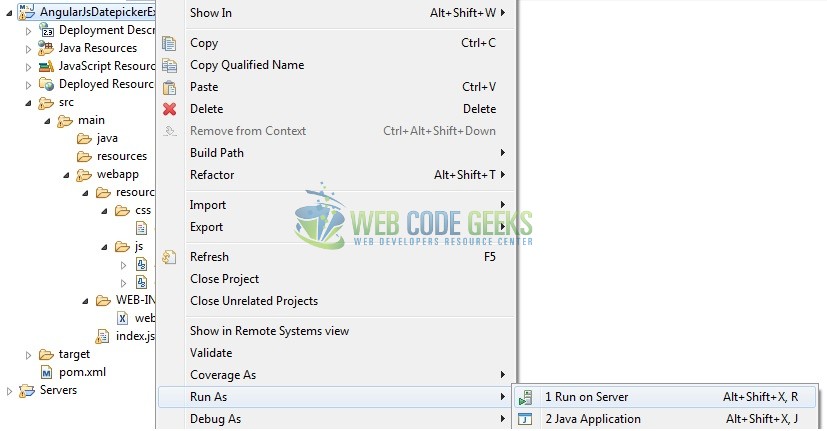
As we are ready for all the changes, let us compile the project and deploy the application on the tomcat server. To deploy the application on Tomat7, right-click on the project and navigate to Run as -> Run on Server.
Tomcat will deploy the application in its web-apps folder and shall start its execution to deploy the project so that we can go ahead and test it in the browser.
5. Project Demo
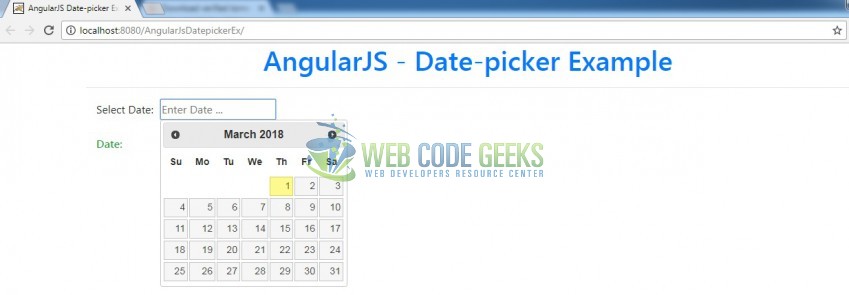
Open your favorite browser and hit the following URL. The output page will be displayed.
http://localhost:8080/AngularJsDatepickerEx/
Server name (localhost) and port (8080) may vary as per your Tomcat configuration.

As the user clicks on the input text-box, the Datepicker module will be displayed as shown below.
That’s all for this post. Happy Learning!!
6. Conclusion
In this section, developers learned how to create a simple datepicker module in the angular library. Developers can download the sample application as an Eclipse project in the Downloads section.
7. Download the Eclipse Project
This was an example of datepicker in the angular library.
You can download the full source code of this example here: AngularJsDatepickerEx
