Introduction
In this article, I will show you how to make use of Mustache.js for client-side templating. In this approach, we get the JSON data from an API, developed by you or a 3rd party API and build the HTML required for rendering the data at the client side.
We will make use of GitHub APIs to demonstrate this technique.
Understanding GitHub APIs
We will use the following GitHub APIs:
- Get user detail: this API will return the public information for a given user, for example, https://api.github.com/users/google
- Get public repositories for user ordered by most stars first, for example, https://api.github.com/search/repositories?q=user:google&sort=stars&per_page=10
Setting up the Javascript and CSS Dependencies
We will make use of the following CSS and Javascript dependencies:
- Bootstrap based simple theme https://bootswatch.com/default/
- Font Awesome icons http://fontawesome.io/
- jQuery https://jquery.com
- Mustache.js https://github.com/janl/mustache.js
The basic HTML for this is given below:
<!DOCTYPE html>
<html>
    <head>
        <title>Mustache Demo</title>
        <link rel="stylesheet" type="text/css"
         href="https://bootswatch.com/bower_components/bootstrap/dist/css/bootstrap.min.css" />
        <script src="https://use.fontawesome.com/e344ad35b2.js"></script>
        <style type="text/css">
            .git-user-avatar {
                width: 100px;
                height: 100px;
            }
            .center{
                text-align: center;
                padding-top: 5px;
            }
            .space{
                margin-top: 10px;
            }
            .git-stars{
                color: goldenrodyellow;
            }
        </style>
    </head>
    <body>
        <div class="container"></div>
        <script src="https://ajax.googleapis.com/ajax/libs/jquery/3.2.1/jquery.min.js"></script>
        <script src="https://bootswatch.classom/bower_components/bootstrap/dist/js/bootstrap.min.js"></script>
        <script src="https://cdnjs.cloudflare.com/ajax/libs/mustache.js/2.3.0/mustache.min.js"></script>
    </body>
</html>
GitHub Username Selection
First, let us populate few usernames in a select component as shown below:
<div class="row">
    <div class="col-md-offset-3 col-md-6">
        <h3>Select user</h3>
        <select id="git-users" class="form-control">
            <option value=""></option>
            <option value="facebook">Facebook</option>
            <option value="google">Google</option>
            <option value="netflix">Netflix</option>
            <option value="flipkart">Flipkart</option>
            <option value="amzn">Amazon</option>
            <option value="microsoft">Microsoft</option>
        </select>
    </div>
</div>
Next is to provide a onChange event handler as shown below:
$(function() {
    $("#git-users").on('change', function(){
        var username = $(this).val();
        //TODO: get user detail and most starred repos
    });
});
Defining Mustache Template for User Detail
Let us create a place holder for adding the user detail as shown:
<div class="row">
    <div class="col-md-offset-3 col-md-6" id="git-user-detail">
    </div>
</div>
Next up is to define the Mustache template as shown below:
<script type="text/html" id="git-user-detail-template">
    <div class="center">
        <img src="{{avatar_url}}" class="git-user-avatar" />
        <div class="space"></div>
        Github User <a href="{{html_url}}">{{login}}</a>
        <div class="space"></div>
        Name <a href="{{blog}}">{{name}}</a>
        {{#bio}}
        <div class="space"></div>
        {{bio}}
        {{/bio}}
    </div>
</script>
Let us write the javascript which does an Ajax call to GitHub API and renders the data using Mustache template created above:
function getUserDetail(username){
    $.getJSON('https://api.github.com/users/'+username, function(data){
        var html = Mustache.to_html(
          $("#git-user-detail-template").html(), data);
        $("#git-user-detail").html(html);
    });
}
Defining Mustache Template for User Repos
First let us see the placeholder for the data:
<div class="row">
    <div class="col-md-offset-3 col-md-6"
        id="git-user-repos">
    </div>
</div>
Next up is the Mustache template:
<script type="text/html" id="git-user-repos-template">
    <ul class="list-group">
        {{#items}}
        <li class="list-group-item">
            <span class="badge">
                <i class="fa fa-star git-stars"></i> {{stargazers_count}}
            </span>
            <a href="{{html_url}}">{{full_name}}</a>
        </li>
        {{/items}}
    </ul>
</script>
And finally the javascript code to load the data via Ajax and render the data using the above template:
function getMostStarredRepos(username){
    $.getJSON('https://api.github.com/search/repositories?q=user:'
        +username+'&sort=stars&per_page=10', function(data){
        $("#git-user-repos").html(Mustache.to_html(
            $("#git-user-repos-template").html(), data));
    });
}
I created a small helper function and Mustache template for showing the loading message while we wait for the Ajax call to complete. The Mustache template for that is:
<script type="text/html" id="loading-template">
    <div class="alert alert-info center">
        <i class="fa fa-spinner fa-spin"></i> Loading ...
    </div>
</script>
And the Javascript method that uses the above template and renders the message is:
function loading(target){
    $(target).html(Mustache.to_html(
        $("#loading-template").html(), {}));
}
Conclusion
In this small article, we saw how to make use of Mustache based client side templates to render the data obtained via REST APIs invoked asynchronously. The complete HTML for this can be found here.
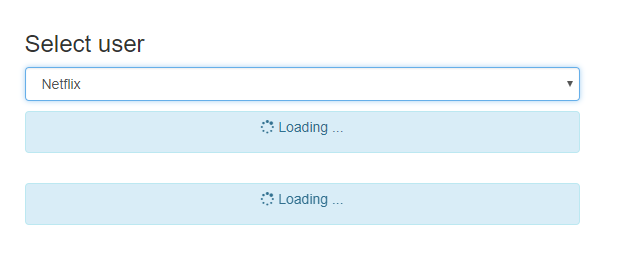
Some screenshots of the sample. Below is while loading the data:
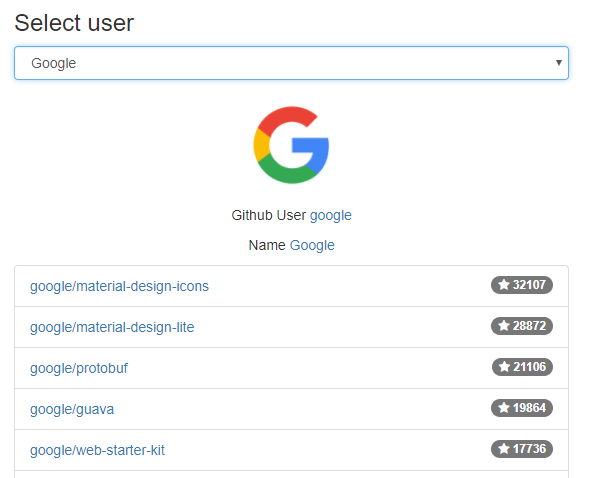
Below is after the data has been rendered using Mustache templates:
| Published on Web Code Geeks with permission by Mohamed Sanaulla, partner at our WCG program. See the original article here: Using Mustache.js for Client-Side Templating Opinions expressed by Web Code Geeks contributors are their own. |
