AJAX is a technology that allows to establish asynchronous communication between the client and the server. That is, to allow a communication between the two points in the background.
In this tutorial we will see how to use this technology, that involves JavaScript, which PHP in the server side.

For this tutorial, we will use:
- Linux Mint (17.03) as Operating System.
- Apache HTTP server (2.4.7).
- PHP (5.5.9).
- MySQL (5.7.13), for a complete example later.
Table of contents
- 1. Preparing the environment
- 2. What is AJAX?
- 3. Using AJAX
- 3.1. Server side
- 3.2. Client side (without AJAX, yet)
- 3.3. Pure JavaScript
- 3.4. jQuery
- 4. Building a simple chat: a more thorough example
- 4.1. Directory structure
- 4.2. HTML
- 4.3. Stylesheet
- 4.4. Database
- 4.5. PHP
- 4.6. JavaScript
- 4.7. Result
- 5. Summary
- 6. Download the source code
You may skip environment preparation and jump directly to the beginning of the tutorial below.
1. Preparing the environment
Below, commands to install Apache, PHP and MySQL are shown:
sudo apt-get update
sudo apt-get install apache2 php5 libapache2-mod-php5 mysql-server php5-mysql
sudo service apache2 restart
Note: if you want to use Windows, installing XAMPP is the fastest and easiest way to install a complete web server that meets the prerequisites.
2. What is AJAX?
Before diving in AJAX, let’s see
When we make a request from the client to the server (e.g. a form submission), the information is sent from to the server, the server performs the required actions, and the client waits until the server generates an answer, which is sent back to it.
The key here is that the client has to wait. This communication is made in a synchronous way. That is, when the client makes a request, the server takes the control, and it can’t do anything until the server sends the response.
This can suppose a notable deterioration in the user experience for some cases.
As a solution for this, AJAX was designed. AJAX stands for Asynchronous JavaScript And XML, although it’s not restricted only to XML. With AJAX, the client can make requests that are processed by the server but in the background, without losing the control; i.e., in an asynchronous way.
We find find several examples of AJAX in almost any website:
- Google, with its search autocompletion.
- Facebook, when we like something, and sends the information to the server without loading other page.
- Twitter, with the user search suggestion.
- Any forum, that checks that a username is available while we are typing it.
- And a large etc.
Remember, AJAX is not a language, but a technology. Actually, is the combination of several technologies.
3. Using AJAX
There’s more than a way to use AJAX in our websites, but all of them involve, obviously, JavaScript. The two main ways are:
- Pure JavaScript, with
XMLHttpRequestobject. - jQuery, which offers other three ways.
The general recommendation is to use jQuery, since it is much more easier to both code and read. But we should also know how AJAX works at the lowest level, in order to understand it properly.
In this section, we will see how to deal with AJAX in every different way.
3.1. Server side
Before we start with the client side that makes the asynchronous request, we will design a server-side page that generates an output.
We will do a very simple page, that receives a name via GET method, and then greets politely the user. It would be as simple as the following:
greeting.php
<?php

if (isset($_GET['name'])) {
    $name = $_GET['name'];
    $response = "Hello, $name, using AJAX!";
} else {
    $response = 'No name was specified.';
}

echo $response;
Note that the script doesn’t do anything special. A PHP script that will be invoked via AJAX doesn’t need any particular change, just generate a response to the client. In this case, with a simple echo, in line 10.
3.2. Client side (without AJAX, yet)
We have a server side script that generates an output for a GET parameter. So, we could design a simple form like the following:
form.html
<!DOCTYPE html>
<html>
<head>
    <meta charset="UTF-8">
    <title>AJAX form</title>
    <script src="1_pure_javascript/ajax.js"></script>
    <style type="text/css">
        .form-input {
            margin-bottom: 20px;
        }
    </style>
</head>
<body>
    <div id="ajax-form">
        <div class="form-input">
            <label for="name">Name</label>
            <input type="text" name="name" id="name">
        </div>
        <div class="form-input">
            <button id="form-submit" onclick="sendAjaxRequest()">Do magic!</button>
        </div>
    </div>

    <div id="ajax-response"></div>

</body>
</html>
Note that it’s not an actual form. With a real form, we would establish a synchronous communication, since we would have to wait until the response is generated by the server. And the aim is to receive the answer asynchronously, generated by the server in the background.
3.3. Pure JavaScript
The following is the JavaScript code that would make the AJAX request to the server side script, and then update the page:
ajax.js
function sendAjaxRequest() {
    var request = new XMLHttpRequest(),
        targetPage = 'greeting.php?name=',
        sendValue = document.getElementById('name').value;

    request.onreadystatechange = function() {
        if (request.readyState === 4 && request.status === 200) {
            var responseElement = document.getElementById('ajax-response');
            responseElement.innerHTML = request.responseText;
        }
    }

    request.open('GET', targetPage + sendValue, true);
    request.send();
}
Let’s examine it carefully:
- The first thing we have done is to instantiate the previously mentioned
XMLHttpRequestclass, in line 2, necessary for the AJAX request. Don’t worry, is a W3C standard, and works for every browser (or is supposed to do), even for Internet Explorer, from IE6 version. - In line 6, we are assigning a piece of code to execute every time the request state changes. The request suffers changes on its state several times from the very beginning, to its end.
- The first thing we do inside the event, in line 7, is to check two things: the state and the status of the request. We have talked about the state in the previous point. The state identified by
4is the one that means that the request is finished, and that the response from the server is ready. On the other hand, thestatusattribute of the object is the HTTP status of the request. And, as you will probably already know, the200status means OK. - In line 9, we are retrieving the response from the server, accessing the
responseTextproperty of theXMLHttpRequestobject. Remember that theresponseTextshould only be accessed when the request is finished and ready, and the HTTP status is 200, as we have done. - Once defined the event to be executed for the state change, we can configure the request. For this, we have to call the
open()method, like in line 13, specifying the method (GET or POST); the request values, if any, inkey1=value1&keyN=valueNformat; and telling that is an asynchronous request (withtrue). - Finally, we send the defined request.
3.4. jQuery
As said before, jQuery library offers AJAX methods that make easier its use.
There are several methods, but the main ones for making AJAX requests are the following three:
$.get(), for GET requests.$.post(), for POST requests..$ajax(), for both.
Before starting, we need to include the jQuery source in the HTML page:
<head>
    <script src="https://code.jquery.com/jquery-1.12.4.min.js"></script>
    <!-- ... --->
</head>
3.4.1. $.get()
The following JavaScript code is for sending a GET request with $.get() method:
ajax.js
$(document).ready(function() {
    $('#form-submit').click(function() {
        var sendValue = $('#name').val();

        $.get('greeting.php', { 'name' : sendValue }, function(data, status) {
            if (status === 'success') {
                $('#ajax-response').html(data);
            }
        })
    });
});
As we can see, is very simple:
- The first parameter is the server side page the request will be sent to.
- The second parameter is a object literal with the values that we want to send with the request.
- Finally, a callback function with the received data from the server, and the status of the request.
Note that we should check if the status indicates an error in the request, to act accordingly.
3.4.2. $.post()
For POST requests, is exactly the same as with GET, but calling $.get() method:
ajax.js
$(document).ready(function() {
    $('#form-submit').click(function() {
        var sendValue = $('#name').val();

        $.post('greeting.php', { 'name' : sendValue }, function(data, status) {
            if (status === 'success') {
                $('#ajax-response').html(data);
            }
        })
    });
});
3.4.3. $.ajax()
Finally, there’s a third method. The $.ajax() method is, probably, the best option. Let’s see an example:
ajax.js
$(document).ready(function() {
    $('#form-submit').click(function() {
        var sendValue = $('#name').val();

        $.ajax({
            url: 'greeting.php',
            data: {
                'name' : sendValue
            },
            type: 'GET',
            success: function(data) {
                $('#ajax-response').html(data);
            },
            error: function(xhr, status) {
                // ...
            }
        });
    });
});
As we can see, this can be considered tidier, more readable and maintainable, since we use a object literal for each element, and because we specify the method with a string, so we could use a variable.
4. Building a simple chat: a more thorough example
We have seen pages with a simple AJAX request, just printing a hardcoded message. In this section, we will see a more realistic example, including a database. For this, we will build a simple chat.
4.1. Directory structure
Before starting, let’s see the directory structure that we will follow:
.
├── css
│   └── styles.css
├── database.sql
├── index.html
├── js
│   └── ajax.js
└── php
    ├── db.php
    ├── readMessages.php
    └── saveMessage.php
4.2. HTML
The HTML can be extremely simple:
index.html
<!DOCTYPE html>
<html>
<head>
    <meta charset="UTF-8">
    <title>AJAX chat</title>
    <script src="https://code.jquery.com/jquery-1.12.4.min.js"></script>
    <script src="js/ajax.js"></script>
    <link rel="stylesheet" type="text/css" href="css/styles.css">
</head>
<body>
    <div id="chat-wrapper">
        <div id="chat-messages"></div>

        <form id="chat-form" action="#" method="POST">
            <input type="text" id="chat-input">
        </form>
    </div>
</body>
</html>
We just need a div to display the messages, and an input for sending the messages.
4.3. Stylesheet
Just the simplest styling for the chat:
styles.css
#chat-wrapper {
    width: 60%;
    margin: auto;
}

#chat-messages {
    border: 1px solid gray;
    height: 400px;
}

#chat-input {
    width: 99%;
    height: 30px;
}

.chat-message {
    display: block;
}

.chat-message .ip {
    font-weight: bold;
}
4.4. Database
We will have a very simple database, with a single table, with two columns. Apart from the messages, we will save the IP of the sender, to be able to identify each message.
database.sql
CREATE DATABASE IF NOT EXISTS chat;

GRANT ALL ON `chat`.* TO 'chat'@'localhost' IDENTIFIED BY 'chat'; -- Creates user if it does not exist yet.

USE chat;

CREATE TABLE messages(
    message VARCHAR(1024),
    ip      VARCHAR(15)
);
To apply it, just access the MySQL command line, e.g., with root:
mysql --user=root --password
After logging in correctly, paste the SQL sentences.
4.5. PHP
In this section, we will see the part of the application that communicates with the database.
We will create a single script for establishing the connection:
db.php
<?php

define('HOST', 'localhost');
define('USERNAME', 'chat');
define('PASSWORD', 'chat');
define('DATABASE', 'chat');
define('PORT', 3306);

/**
 * Creates the connection to the database.
 *
 * @return Connection object.
 */
function connect() {
    $connection = mysqli_connect(
        HOST,
        USERNAME,
        PASSWORD,
        DATABASE,
        PORT
    );

    return $connection;
}
Then, we will have two scripts, one for saving the messages, and another for retrieving them.
The following script is for saving the messages, which, as you can see, only makes an insertion of the received message via POST method, and the IP of the client.
saveMessage.php
<?php

require_once('db.php');

/**
 * Creates a row in the messages table.
 *
 * @param $connection The connection to the database.
 * @param string $message The message to save.
 * @param string $ip The ip of the sender.
 */
function insertMessage($connection, $message, $ip) {
    $sql = 'INSERT INTO messages (message, ip) '
         . 'VALUES (?, ?)';

    $statement = $connection->prepare($sql);
    $statement->bind_param('ss', $message, $ip);

    $statement->execute();
}

// Flow starts here.

$message = $_POST['message'];
$ip = $_SERVER['REMOTE_ADDR'];

$connection = connect();

insertMessage($connection, $message, $ip);

mysqli_close($connection);
And, then, we need to read them. We just have to iterate through the records of the table, constructing the response, like in the following script.
readMessages.php
<?php

require_once('db.php');

/**
 * Reads the messages from the database.
 *
 * @param $connection The connection to the database.
 * @return string The existing messages in HTML format.
 */
function readMessages($connection) {
    $sql = 'SELECT message, ip '
         . 'FROM messages';

    $result = mysqli_query($connection, $sql);

    $messages = '';

    while ($row = mysqli_fetch_array($result, MYSQLI_NUM)) {
        $message = '<span class="chat-message">';

        $message .= '<span class="ip">' . $row[1] . '</span>: ';
        $message .= $row[0];

        $message .= '</span>';

        $messages .= $message;
    }

    return $messages;
}

/**
 * Deletes the messages from the database, once read.
 *
 * @param $connection Connection to the database.
 */
function deleteMessages($connection) {
    $sql = 'DELETE FROM messages';

    mysqli_query($connection, $sql);
}

// Flow starts here.

$connection = connect();

$messages = readMessages($connection);
deleteMessages($connection);
mysqli_close($connection);

echo $messages;
After creating the response, we delete the existing records, not to repeat the response.
4.6. JavaScript
Finally, we need the JavaScript code for the AJAX requests. We will see that, actually, is pretty easy:
ajax.js
$(document).ready(function() {
    $('#chat-form').submit(function(event) {
        event.preventDefault();

        var message = $('#chat-input').val();

        sendMessage(message);

        $('#chat-input').val('');
    });

    /**
     * Sends the message to the server.
     *
     * @param String message The message introduced by the user.
     */
    function sendMessage(message) {
        $.ajax({
            url: 'php/saveMessage.php',
            data: {
                'message' : message
            },
            type: 'POST'
        });
    }

    /**
     * Reads the messages saved in the server, and displays them.
     */
    function readMessages() {
        $.ajax({
            url: 'php/readMessages.php',
            type: 'GET',
            success: function(data) {
                addMessage(data);
            }
        });
    }

    /**
     * Adds a message to the messages div.
     *
     * @param String message The message to add.
     */
    function addMessage(message) {
        message = '<span class="chat-message">' + message + '</span>';
        $('#chat-messages').append(message);
    }

    setInterval(function() {
        readMessages();
    }, 100);
});
We can see that there’s no difficulty. We just need to make a request for sending the message to the server, which is triggered on form submit; and another to retrieve them, for which we need to set an interval, in order to update the displayed messages automatically.
As said before, we should take care of failed request, to try them again, notify the user about it, etc.
An important point in this script is that we prevent the default form behavior (line 3), because, otherwise, the form will submit, and a synchronous communication would start (as said in 3.2. section).
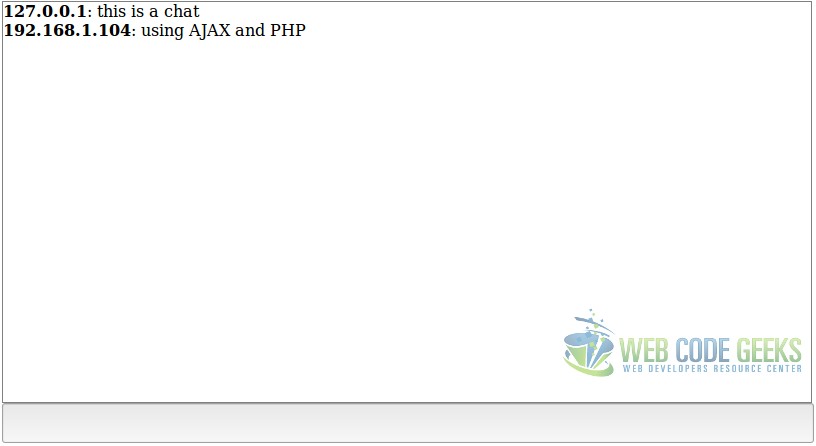
4.7. Result
The following is a screenshot of how looks the chat:
5. Summary
This tutorial has shown how to use AJAX technology to establish an asynchronous communication with the server, where we have used PHP. We have started from the lowest level, with pure JavaScript, to see how the AJAX internals work; and then more appropriate solutions, in terms of difficulty, readability and maintainability, with jQuery, seeing every different option. Finally, we have built a simple chat, to look at AJAX in a more realistic scenario.
6. Download the source code
This was a tutorial of AJAX and PHP.
You can download the full source code of this example here: AJAXPHPTutorial

Anyone online. ..is the code really working