Django is an open source web framework which solves most common problems of a web application development. It has some very useful features like an auto generated admin page and an ORM.
It’s a high-level framework, so we just need to focus on the actual core logic of our business and let Django take care of mappings, filters and such. It works by defining some standards that, if you follow them, will make the application’s development so much easier and faster.
By using Python 3.4.3 and Django 1.9.1, we’ll build a web application which, through an admin site only available to us, will let us upload riddles. Then we’ll make a public user interface which will let the users answer the riddles we upload.
1. Creating the project
If you’ve installed django correctly, when you run django-admin --version, you’ll see the version in the output of that command. Now if we run django-admin startproject django_example, we’ll now have the skeleton of our project. Let’s cd to our project’s directory and see:
- django_example is the actual python package for your project.
- django_example/__init__.py is an empty file that tells python that this directory should be considered a package.
- django_example/settings.py holds the configuration for this Django project.
- django_example/urls.py holds the URL declarations.
- django_example/wsgi.py is an entry-point for WSGI-compatible web servers to serve your project.
- manage.py is a command-line utility that lets you interact with this Django project in various ways. We’ll see some of them below.
Now, let’s see how to run this application. Run python3 manage.py runserver and you’ll see some output on the console to finally see Starting development server at http://127.0.0.1:8000/. Now if we hit that location we’ll see a Django welcome screen telling us that everything worked fine.
You will probably see something like “You have unapplied migrations; your app may not work properly until they are applied.”. We’ll get back to that later, don’t worry about it right now.
2. Creating our application
Now we have our project up and running and we can start writing our application now. Something to notice here is the difference about the terms project and application. An application is a python program that does something, and a project is a group of applications. The same application can be contained in more than one project. A project will almost always contain many applications.
Each application in Django consists of a package that follows some Django standards. One of the many tools that come with this framework is an utility that automatically generates the basic directory structure of an application, so let’s run python3 manage.py startapp riddles, and now there will be a directory called riddles wich will hold our application’s source code.
Let’s write a simple view to see how everything works. Django convention tells us to write them in a file called views.py within our application’s module.
riddles/views.py
from django.http import HttpResponse


def index(request):
    return HttpResponse("Hello, World!")
Now, to map this view to a URL we’ll create a urls.py in our application’s module.
riddles/urls.py
from django.conf.urls import url

from . import views

app_name = 'riddles'

urlpatterns = [
    url(r'^$', views.index, name='index'),
]
And in our project’s urls we include this urls.
django_example/urls.py
from django.conf.urls import include, url
from django.contrib import admin

urlpatterns = [
    url(r'^riddles/', include('riddles.urls')),
    url(r'^admin/', admin.site.urls),
]
Now we run our server and hit http://localhost:8000/riddles/ to see our message “Hello, World!”. If everything worked fine we’ll start with our database.
3. Database Setup
Now, when we see django_example/settings.py, it’s a normal module with some variables representing Django settings. There is a variable named DATABASES which by default uses SQLite which is included within Python, so you won’t need to install anything. For this example, we’ll stick with the default here.
Also, see the variable INSTALLED_APPS, it holds the names of all Django applications which are activated in the project. By default it contains:
- ‘django.contrib.admin’ is the admin site, we’ll be seeing it in no time.
- ‘django.contrib.auth’ as an authentication system.
- ‘django.contrib.contenttypes’ a framework for content types.
- ‘django.contrib.sessions’ a session framework.
- ‘django.contrib.messages’ a messaging framework.
- ‘django.contrib.staticfiles’ a static content framework.
This applications are useful in most cases, but some of them uses databases (like django.contrib.auth), and these are not created yet. That’s why you see that migrations message on the output of the runserver command. To create all tables we just run the command python3 manage.py migrate. You should see something like:
Operations to perform:
  Apply all migrations: admin, sessions, auth, contenttypes
Running migrations:
  Rendering model states... DONE
  Applying contenttypes.0001_initial... OK
  Applying auth.0001_initial... OK
  Applying admin.0001_initial... OK
  Applying admin.0002_logentry_remove_auto_add... OK
  Applying contenttypes.0002_remove_content_type_name... OK
  Applying auth.0002_alter_permission_name_max_length... OK
  Applying auth.0003_alter_user_email_max_length... OK
  Applying auth.0004_alter_user_username_opts... OK
  Applying auth.0005_alter_user_last_login_null... OK
  Applying auth.0006_require_contenttypes_0002... OK
  Applying auth.0007_alter_validators_add_error_messages... OK
  Applying sessions.0001_initial... OK
Now let’s create our model, which is our database layout with some additional metadata. For now we’ll just create Riddle and Option. A Riddle contains the actual riddle, and an Option is one of the possible answers of a riddle, with a flag that will tell us if it’s the correct one.
riddles/models.py
from django.db import models


class Riddle(models.Model):
    riddle_text = models.CharField(max_length=255)
    pub_date = models.DateTimeField('date published')


class Option(models.Model):
    riddle = models.ForeignKey(Riddle, on_delete=models.CASCADE)
    text = models.CharField(max_length=255)
    correct = models.BooleanField(default=False)
This model gives Django all the information needed to create the database schema and the database-access API for accessing these objects, but we need to tell our project that the riddles app is installed, we’ll just add an element to the INSTALLED_APPS in django_example/settings.py:
django_example/settings.py
INSTALLED_APPS = [
    'riddles.apps.RiddlesConfig',
    'django.contrib.admin',
    'django.contrib.auth',
    'django.contrib.contenttypes',
    'django.contrib.sessions',
    'django.contrib.messages',
    'django.contrib.staticfiles',
]
Now we make the migration for this application running python3 manage.py makemigrations riddles and we’ll see:
Migrations for 'riddles':
  0001_initial.py:
    - Create model Option
    - Create model Riddle
    - Add field riddle to option
By doing this we are telling Django that we made some changes to the models and that these should be stored as a migration, these are just files on the disk, you can read them in a directory called migrations within your application. They are designed to be human readable so you would be able to change them if you need.
We can see de actual SQL statements that te migration will run if we want by running python3 manage.py sqlmigrate riddles 0001. That 0001 is the version of the migration we want to check. In the output we’ll see:
BEGIN;
--
-- Create model Option
--
CREATE TABLE "riddles_option" ("id" integer NOT NULL PRIMARY KEY AUTOINCREMENT, "text" varchar(255) NOT NULL, "correct" bool NOT NULL);
--
-- Create model Riddle
--
CREATE TABLE "riddles_riddle" ("id" integer NOT NULL PRIMARY KEY AUTOINCREMENT, "riddle_text" varchar(255) NOT NULL, "pub_date" datetime NOT NULL);
--
-- Add field riddle to option
--
ALTER TABLE "riddles_option" RENAME TO "riddles_option__old";
CREATE TABLE "riddles_option" ("id" integer NOT NULL PRIMARY KEY AUTOINCREMENT, "text" varchar(255) NOT NULL, "correct" bool NOT NULL, "riddle_id" integer NOT NULL REFERENCES "riddles_riddle" ("id"));
INSERT INTO "riddles_option" ("riddle_id", "id", "text", "correct") SELECT NULL, "id", "text", "correct" FROM "riddles_option__old";
DROP TABLE "riddles_option__old";
CREATE INDEX "riddles_option_a7c97949" ON "riddles_option" ("riddle_id");

COMMIT;
Now we run migrate, and this script will be executed in the database. Notice that the sqlmigrate command was only to check the script it will execute, it’s not necessary to run it every time.
Now we can start using the admin page, but we need a user to log in. By running the createsuperuser command we’ll be able to create the root user for our application. It will prompt for a name, a mail and a password. Just run python3 manage.py createsuperuser. Now if you run the server and visit http://127.0.0.1:8000/admin/ you will be able to log in with the credentials you just provided.
Let’s make our model modifiable by the admin. In riddles/admin.py we give Django all the models that are modifiable via the admin page. Let’s change it to look like this:
riddles/admin.py
from django.contrib import admin

from .models import Option, Riddle

admin.site.register(Riddle)
admin.site.register(Option)
Now, let’s check out that admin page. First, we hit http://localhost:8000/admin, it will redirect us to a login page.
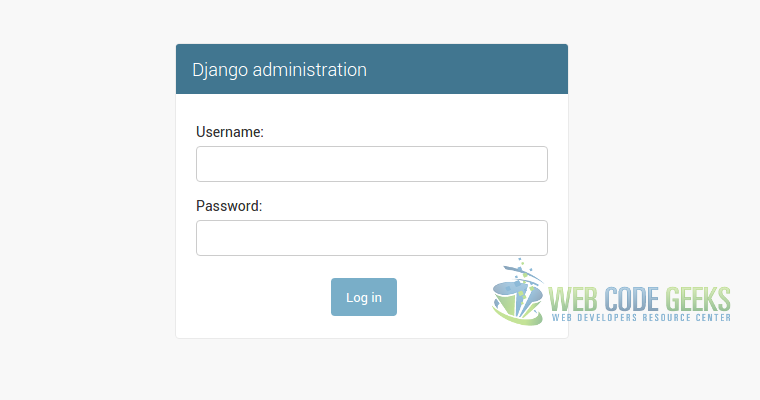
Login Page
We input the credentials of the super user we created before, and now we see the home.
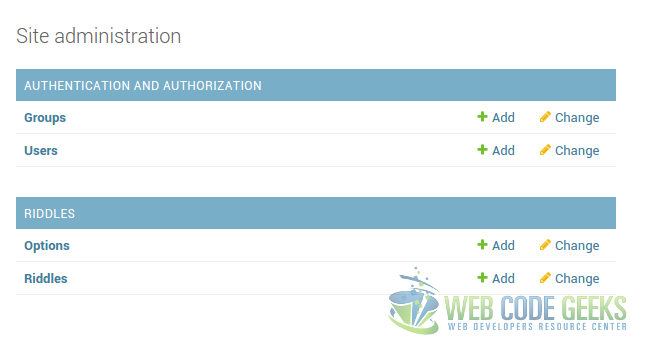
Home
There we see a couple useful things:
- Authentication and Authorization: These are purely administrative data for our project. We can create, modify, delete and list users and groups.
- Riddles: Here it is. We can administer our riddles and options in this page. Full CRUD operations are available out of the box, it all comes free if you follow Django conventions.
Take a little pause here and navigate this admin page. Create a couple riddles and options, even a user. Explore the permissions system and how groups work. It’s pretty awesome.
4. The Public Page
What do we need to make our public page?
- Templates: The skeleton of the page the user will see.
- Views: The python’s function that will serve the page content.
Let’s start with the templates. Create a module called templates within your application module, and there we’ll write our index.html.
riddles/templates/index.html
Available Riddles
{% if message %}{{ message }}
{% endif %} {% if latest_riddles %}
-
{% for riddle in latest_riddles %}
- {{ riddle.riddle_text }} {% endfor %}
No riddles are available right now.
{% endif %}As you can see, this is an actual template with a decision and an iteration. If there are riddles available, it iterates through them and puts its text in a link to try and answer it (will check it out later). If no riddle is available, it informs the user. The answer template looks like this:
riddles/templates/answer.html
{{ riddle.riddle_text }}
{% if error_message %}{{ error_message }}
{% endif %}
Here, we are informing the riddle text and all the options as radio inputs within a form. There is a csrf_token there; its a token provided by Django to avoid Cross Site Request Forgery, every internal form should use it. Pretty simple, but functional. The views to render these templates and answer these requests look like:
riddles/views.py
from django.http.response import HttpResponse
from django.shortcuts import get_object_or_404, render
from .models import Riddle, Option
def index(request):
return render(request, "index.html", {"latest_riddles": Riddle.objects.order_by('-pub_date')[:5]})
def detail(request, riddle_id):
return render(request, "answer.html", {"riddle": get_object_or_404(Riddle, pk=riddle_id)})
def answer(request, riddle_id):
riddle = get_object_or_404(Riddle, pk=riddle_id)
try:
option = riddle.option_set.get(pk=request.POST['option'])
except (KeyError, Option.DoesNotExist):
return render(request, 'answer.html', {'riddle': riddle, 'error_message': 'Option does not exist'})
else:
if option.correct:
return render(request, "index.html", {"latest_riddles": Riddle.objects.order_by('-pub_date')[:5], "message": "Nice! Choose another one!"})
else:
return render(request, 'answer.html', {'riddle': riddle, 'error_message': 'Wrong Answer!'})
Let’s explain one by one each of these functions:
- index: Index uses a function called
render, present in a package calledshortcutsin Django. This function receives the HttpRequest, the location of the template and its context and returns an HttpReponse with the resulting html. - detail: The detail does pretty much the same, but the function
get_object_or_404results in an HttpResponse404 if the object is not found for the given primary key. - answer: This function is a little bit more complicated. It looks for the provided riddle (and results in 404 if it is not found), and then it checks that the given option belongs to the given riddle, if not returns a bad request. Once all checks passed, it only checks that the given option has the correct flag in true, and returns accordingly.
Now we just have to map these functions to some urls to make it navigable. And the mapping in urls.py:
riddles/urls.py
from django.conf.urls import url
from . import views
app_name = 'riddles'
urlpatterns = [
url(r'^$', views.index, name='index'),
url(r'^(?P[0-9]+)/$', views.detail, name='detail'),
url(r'^(?P[0-9]+)/answer/$', views.answer, name='answer')
]
All set, now by hitting http://localhost:8000/riddles/ we now can see all the riddles we uploaded via de admin page, and choose one to try to answer it.
Now, let’s add some CSS to this application. It’s pretty ugly right now, right?
5. Style Sheets
First, we create a directory called static within our application’s module and create a main.css that makes the site a little bit less ugly.
riddles/static/main.css
body{
margin:40px auto;
max-width:650px;
line-height:1.6;
font-size:18px;
color:#444;
padding:0 10px;
}
h1,h2,h3{
line-height:1.2;
text-align: center;
}
a {
color: blue;
}
form {
margin: 0 auto;
padding: 1em;
border: 1px solid #CCC;
border-radius: 1em;
}
form div + div {
margin-top: 1em;
}
label {
display: inline-block;
text-align: center;
width: 40%;
}
input {
font: 1em sans-serif;
-moz-box-sizing: border-box;
box-sizing: border-box;
border: 1px solid #999;
width: 50%;
}
input:focus {
border-color: #000;
}
p, div.button {
text-align: center;
}
p.error-message {
color: lightcoral;
}
Now, let’s change a little bit our templates:
riddles/templates/index.html
{% load staticfiles %}
<link rel="stylesheet" type="text/css" href="{% static 'main.css' %}" />
Available Riddles

{% if message %}
    {{ message }}
{% endif %}

{% if latest_riddles %}
-
{% for riddle in latest_riddles %}
- {{ riddle.riddle_text }} {% endfor %}
No riddles are available right now.
{% endif %}riddles/templates/answer.html
{% load staticfiles %}
<link rel="stylesheet" type="text/css" href="{% static 'main.css' %}" />
{{ riddle.riddle_text }}

{% if error_message %}

        {{ error_message }}

{% endif %}
The first line loads static files, and then we use that {% static '#' %} where # is the location of the resource you want to import. For javascripts is the exact same procedure, you just need to build the url within a script instead of a link.
6. Download the Code Project
This was a basic example of a Python Django application. You can now build your own, you just saw how easy it is.
You can download the full source code of this example here: python-django-example

You have error in html template – answer.html