Despite the controversy and different opinions that Node.js generates among web developers, after all, it’s a technology that it’s widely used, so, sooner or later, a web developer (and sysadmin) will have to face it, meaning this that everyone should have, at least, a basic knowledge about it.
This example will show how to easily set up a Node environment, within a Docker container.
For this example, Linux Mint 18 and Docker version 1.12.6 have been used.
You may Docker installation and jump directly to the beginning of the example below.
1. Installation
Note: Docker requires a 64-bit system with a kernel version equal or higher to 3.10.
We can install Docker simply via apt-get, without the need of adding any repository, just installing the docker.io package:
sudo apt-get update
sudo apt-get install docker.io
For more details, you can follow the Install Docker on Ubuntu Tutorial.
2. Using the official image
Node developers host their Docker images officially in the Docker Hub. There are images available under many tags, but for this simple case, it’s more than enough to use the latest image:
docker pull node
Now, let’s create an extremely simple JavaScript script:
hello_world.js
var args = process.argv.slice(2);

if (args.length === 0) {
    console.error('Please, pass your name as an argument to the script.');
} else {
    console.log('Hello, ' + args.join(' '));
}
Just a polite script that greets the specified name.
The simplest way of executing a Node script within the container, is to do it on its creation, for example:
docker run --rm \
           --name=node_hello_world \
           -v $(pwd):/usr/src/app \
           node:latest \
           node /usr/src/app/hello_world.js Julen
This may seem complicated, but it’s actually very easy. Let’s understand it:
- The
rmoption is just for deleting the container when it exists. - Then, we set a name to the container. Nothing really special.
- With
-voption, we mount a volume from the host to the container. In this case, we mount the current working directory (pwd) of the host, where thehello_world.jsis placed; to the/usr/src/appdirectory, which actually could be any directory in the container. - After that we specifiy the image name. We have done it specifying the tag name, not to mix up with the
nodecommand later. - Finally, we just execute
node, specifying the path of our script, and passing an argument to it.
The output of the above command would be:
Hello, Julen
As expected.
3. Creating a Dockerfile from the scratch
In the previous section we have seen how to make a Node container work, but not in an actually very useful way, since we had to mount a volume just for executing the script. Now, let’s build a Dockerfile for a proper management of the example above.
It can be really simple:
Dockerfile
FROM node:4
MAINTAINER Julen Pardo <julen.pardo@outlook.es>

COPY hello_world.js /usr/src/app/

ENTRYPOINT ["node", "/usr/src/app/hello_world.js", "Julen"]...
So now our script will be inside the container.
We can build the image executing:
docker build -t mynode1 . # Path to Dockerfile.
And, when running it:
docker run --rm mynode1
We will receive the same result as in the previous section.
4. Installing the PM2 process manager
We have just seen how to execute JavaScript scripts with Node, but, usually, when developing Node applications, is for serving them. For this purpose, the most complete process manager is, probably, PM2.
First, let’s create a script that will create a server:
server.js
var DEFAULT_PORT = 3000;

var http = require('http');
var url = require('url');

var server = http.createServer(function (request, response) {
   response.writeHead(
       200,
       {
           "Content-Type": "text/plain"
       }
   );

   var query = url.parse(request.url, as_object = true).query;
   response.end('GET parameters: ' + JSON.stringify(query));
});

server.listen(DEFAULT_PORT);

console.log('Server listening on port: ' + DEFAULT_PORT);
This app just creates a server listening the port 3000, and, when accessing it, displays the GET parameters.
The difference with the previous Dockerfile is that we have to install the NPM pm2 and url packages:
Dockerfile
FROM node:4
MAINTAINER Julen Pardo <julen.pardo@outlook.es>

ENV DEBIAN_FRONTEND=noninteractive

RUN npm install -g pm2
RUN npm install -g url

COPY server.js /usr/src/app/
RUN chown node:node /usr/src/app/server.js
RUN chmod a+rx /usr/src/app/server.js

COPY scripts/docker-entrypoint.sh /
RUN chmod 777 /docker-entrypoint.sh

ENTRYPOINT /docker-entrypoint.sh
Note that we have defined the entry point in a separate file:
docker-entrypoint.sh
#!/bin/bash

su - node -c "pm2 start /usr/src/app/server.js"

sleep infinity
It’s always important not to start the service with the root user, as made in the script. Then, we just keep alive the container with the last command.
Now, we can just build our image:
docker build -t mynode2 . # Path to the Dockerfile.
And create the container, binding the port 3000 to some port in the host. If we don’t have a web server running in the host, we can bind it to the port 80:
docker run -d --name=node_server -p 80:3000 mynode2
That’s it! We can now access our Node application, following http://localhost, and, of course, being able to pass parameters via GET. So, for example, opening the http://localhost?key1=value1&key2=value2 URL, would show in the browser:
GET parameters: {“key1″:”value1″,”key2″:”value2”}
4.1 Troubleshooting
It shouldn’t happen following the steps described above, but it’s always good to know how to act when some error happens.
In this situation, there are two steps we should follow:
- Don’t run the container in dettached mode, for seeing the output of PM2.
- Check the PM2 log.
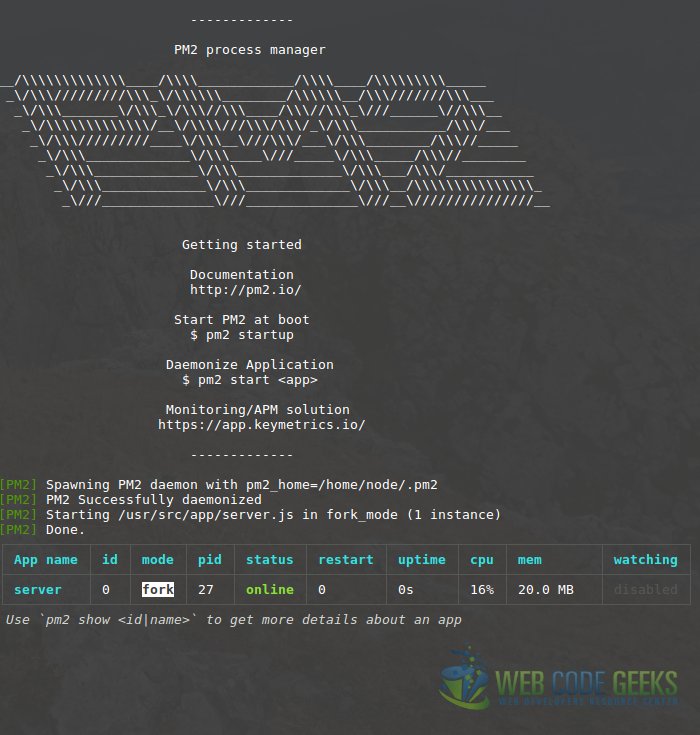
For the first one, we just have to run the container in interactive mode, with the -it option, and without the -d one, like the following:
docker run -it --name=node_server -p 80:3000 mynode2
This way, the output of PM2 will be shown, like in the following image (for which there’s no error):
For the second one, we have to get the shell of the container, and check the PM2 log, in the following way:
docker exec -it node_server /bin/bash # Get shell of the container.
# Inside the container
su - node
pm2 log
Note that we execute the PM2 command as the user that started the PM2 process, since it belongs to it; the users won’t see the PM2 processes of other users.
That command will simply tail the log file. If the tail of the log file is not enough, we can check the full log file, which is placed in the .pm2/logs directory in the home directory of the user that owns the PM2 process. So, in this case, the logs are located in /home/node/.pm2/logs
5. Running Node app behind Nginx
For some scenarios, we may want to run our Node application behind a real web server. Let’s see how to do it easily with a reverse proxy with Nginx as web server.
The Nginx virtual host configuration should be something similar to the following one:
node_app.conf
server {
    listen [::]:80;
    listen 80;

    server_name localhost;

    access_log /var/log/nginx/node_app.log;
    error_log /var/log/nginx/node_app.log;

     location / {
         proxy_read_timeout 300;
         proxy_connect_timeout 300;
         proxy_redirect on;

         proxy_http_version 1.1;

         proxy_set_header Host $http_host;
         proxy_set_header X-Real-IP $remote_addr;
         proxy_set_header X-Forwarded-Ssl on;
         proxy_set_header X-Forwarded-For $proxy_add_x_forwarded_for;
         proxy_set_header X-Forwarded-Proto $scheme;
         proxy_pass http://127.0.0.1:3000;
     }
}
The most important configuration here is the highlighted one, when we set the address and port for the reverse proxy.
Then, we just have to edit the Dockerfile, for installing Nginx and adding the config file:
Dockerfile
# ...

RUN apt-get update
RUN apt-get install -y nginx

COPY files/node_app.conf /etc/nginx/sites-enabled/

# ...
And, restarting Nginx in the entry point script:
docker-entrypoint.sh
# ...

service nginx restart

# ...
Now we can build the image as always:
docker build -t mynode3 . # Path to Dockerfile.
And instantiate the container, but, now, binding container’s port 80 instead of 3000, because our Node process is now behind Nginx, which is running in the port 80.
docker run -d --name=node_server -p 80:80 mynode3
Now, we should be able to access the application in the same way as before.
6. Summary
With this example we have seen how to set up a Node environment, from the most simple case, just pulling the official Node image, for just executing scripts from the command line; to serving Node applications with PM2. We have also seen how to serve these applications behind Nginx, a usual practice that sooner or later we will have to face.
