Big Data is one of the most trending topics in the last times. One of the existing tools for this task is Zeppelin, a Java application developed by Apache, which is an implementation of the concept known as “web notebook”, focused on the interactive data analytics with languages and technologies like Spark, R, etc.
In this tutorial we will see how to set up a Docker container to run it. For this, Linux Mint 18 and Docker version 1.12.3 have been used.
You may skip Docker installation and jump directly to the beginning of the example below.
1. Installation
Note: Docker requires a 64-bit system with a kernel version equal or higher to 3.10.
We can install Docker simply via apt-get, without the need of adding any repository, just installing the docker.io package:
sudo apt-get update
sudo apt-get install docker.io
For more details, you can follow the Install Docker on Ubuntu Tutorial.
2. Creating a Zeppelin image
Unfortunately, Apache doesn’t provide an official image for Zeppelin. So, we will have to build our own image from a Dockerfile. The easiest way is to download from the Apache mirror.
Apache Zeppelin is a Java application, so, we will need Java installed in our container. Apart from that, we will need cURL for downloading Zeppelin from the mirror. For the simplest Zeppelin image we don’t need any other package.
We will be using the following directory structure:
.
├── Dockerfile
└── scripts
 └── docker-entrypoint.sh
A Dockerfile for installing Zeppelin would just consist of:
Dockerfile
FROM ubuntu

MAINTAINER Julen Pardo <julen.pardo@outlook.es>

ENV ZEPPELIN_VERSION 0.7.0
ENV ZEPPELIN_URL http://apache.mirror.iphh.net/zeppelin/zeppelin-$ZEPPELIN_VERSION/zeppelin-$ZEPPELIN_VERSION-bin-all.tgz
ENV ZEPPELIN_DIR /opt/zeppelin

ENV DEBIAN_FRONTEND=noninteractive

RUN apt-get update

RUN apt-get install -y default-jdk \
 curl

RUN mkdir -p $ZEPPELIN_DIR

# Download compressed Zeppelin to tmp dir, and extract contents to Zeppelin dir
WORKDIR /tmp


RUN curl $ZEPPELIN_URL | tar xfz -
RUN cp -r zeppelin-$ZEPPELIN_VERSION-bin-all/* $ZEPPELIN_DIR
WORKDIR $ZEPPELIN_DIR

# Create a Zeppelin user
RUN useradd --home $ZEPPELIN_DIR --shell /bin/bash zeppelin
RUN chown zeppelin:zeppelin -R $ZEPPELIN_DIR

COPY scripts/docker-entrypoint.sh /docker-entrypoint.sh
RUN chmod 777 /docker-entrypoint.sh
ENTRYPOINT ["/docker-entrypoint.sh"]

EXPOSE 8080
A quick overview of what we do with the previous Dockerfile:
- Define Zeppelin version to download, the mirror and the directory where it will be placed.
- Install the JDK (and cURL).
- Download Zeppelin from the given mirror, uncompress the file and move it to the directory previously defined.
- Create a Zeppelin user, owning its directory, for running the service.
The entry point script is just for starting the Zeppelin service:
docker-entrypoint.sh
#!/bin/bash

# Start Zeppelin as "zeppelin" user.
su - zeppelin -c "$ZEPPELIN_DIR/bin/zeppelin-daemon.sh start"

# Non-ending command to keep the container alive.
tail -F n0 /dev/null
Now we can simply build an image executing:
docker build --tag=zeppelin . # Path to the Dockerfile.
Finally, we can create the container, binding container’s port 8080 to some free port in the host:
docker run -d -p 8080:8080 --name=zeppelin1 zeppelin
After some seconds, if we follow localhost:8080 in a browser (depending on the port you chose), we should access the Zeppelin main page:
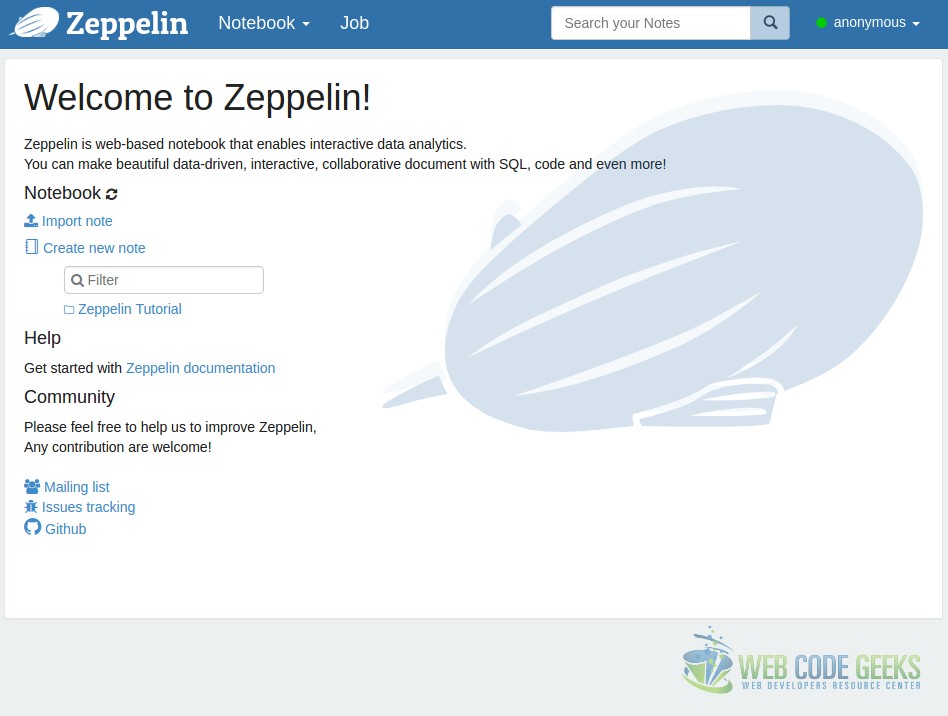
2.1. Securing our Zeppelin instance
As we could notice, we were logged in as “anonymous” user. Obviously, this is not recommended in any scenario.
For authentication, Zeppelin uses a Java framework named Apache Shiro. By default, is not enabled for Zeppelin. For enabling in, we just to create a conf/shiro.ini file. Actually, Zeppelin already provides a example file that we can use as template.
The simplest config/shiro.ini could consist of:
shiro.ini
[users]
admin = adminpassword
user1 = password

[main]
sessionManager = org.apache.shiro.web.session.mgt.DefaultWebSessionManager

securityManager.sessionManager = $sessionManager
securityManager.sessionManager.globalSessionTimeout = 86400000

shiro.loginUrl = /api/login
In this case, we have defined two different logins.
For more details, check the Shiro authentication for Apache Zeppelin section in the documentation.
Now, the remaining step is to add copy the file into the container. Now, our directory structure could look like this:
.
├── conf
│   └── shiro.ini
├── Dockerfile
└── scripts
 └── docker-entrypoint.sh
And, we have to copy the file, the same way we copy the entrypoint script:
# ...
COPY conf/shiro.ini $ZEPPELIN_DIR/conf/shiro.ini
# ...
# Create a Zeppelin user
RUN useradd --home $ZEPPELIN_DIR --shell /bin/bash zeppelin
RUN chown zeppelin:zeppelin -R $ZEPPELIN_DIR
# ...
Note that we add the file before setting the permissions for the Zeppelin user, for making sure that it will have read access.
We don’t have to do nothing more. When the service is started in the entrypoint, Zeppelin will the detect the Shiro config file.
If we re-build the image and create another container, we will see that, in the top-right corner of the site, we will see a “Login” button, instead of being logged in as “anonymous”. For logging in, we just have to introduce the credentials defined in the shiro.ini file.
3. Summary
In this tutorial we have seen how to set up a Docker container running Apache Zeppelin, from the scratch, since there’s no official image in the Docker Hub. As we could see, is a very easy process, and having it in a Docker image will allow us to easily deploy our Zeppelin instances in any host.

I am getting acces denied when i am
Running
Cong/shiro.ini
Please help me with this error