Discover faster, more efficient performance monitoring with an enterprise APM product learning from your apps. Take the AppDynamics APM Guided Tour!
Here at AppDynamics, we’ve developed strong support for .NET, Windows, and Docker users.
But something we haven’t spent much time documenting is how to instrument a Docker-on- Windows app. In this blog, I’ll show you how straightforward it is to get one up and running using our recently announced micro agent. Let’s get started.
Sample Reference Application
Provided with this guide is a simple ASP.NET MVC template app running on an ASP.NET application on the .NET full framework. The sample application link is provided below:
If you have your own source code, feel free to use it.
Guide System Information
This guide was written and built on the following platform:
- Windows Server 2016 Build 14393.rs1_release.180329-1711 (running on VirtualBox)
- AppDynamics .NET Micro Agent Distro 4.4.3
Prerequisite Steps
Before instrumenting our sample application, we first need to download and get the .NET micro agent. This step assumes you are not using an IDE such as Visual Studio, and are working manually on your local machine.
Step 1: Get NuGet Package Explorer
If you already have a way to view and/or download NuGet packages, skip this step. There are many ways to extract and view a NuGet package, but one method is with a tool called NuGet Package Explorer, which can be downloaded here.
Step 2: Download and Extract the NuGet Package
We’ll need to download the appropriate NuGet package to instrument our .NET application.
- Go to https://www.nuget.org/
- Search for “AppDynamics”
- The package we need is called “AppDynamics.Agent.Distrib.Micro.Windows.”

- Click “Manual Download” or use the various standard NuGet packages.

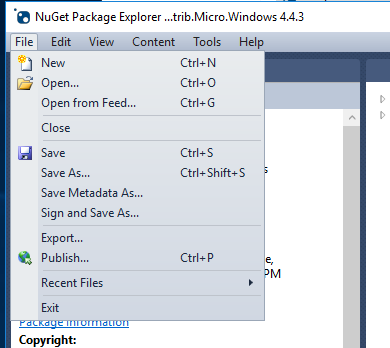
- Now open the package with NuGet Package Explorer.
- Choose “Open a Local Package.”
- Find the location of your downloaded NuGet package and open it. You should see the screen below:


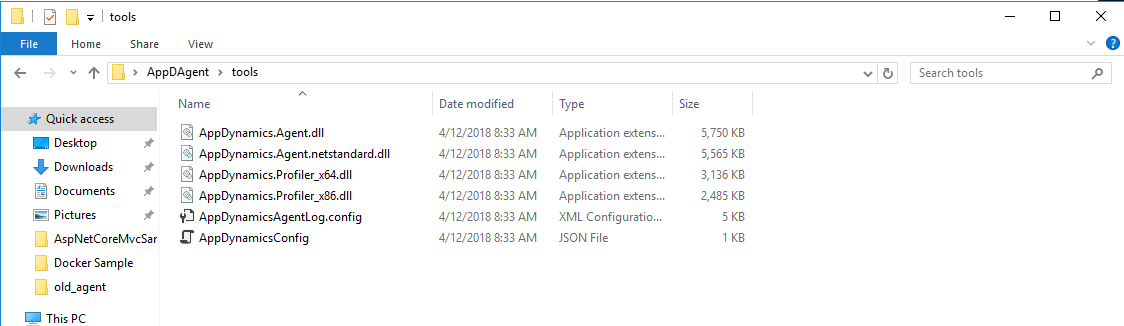
- Choose “File” and “Export” to export the NuGet package to a directory on your local machine.
- Navigate to the directory where you exported the NuGet package, and confirm that you see this:
Step 3: Create Directory and Configure Agent
Now that we’ve extracted our NuGet package, we will create a directory structure to deploy our sample application.
- Create a local directory somewhere on your machine. For example, I created one on my Desktop:
C:\Users\Administrator\Docker Sample\
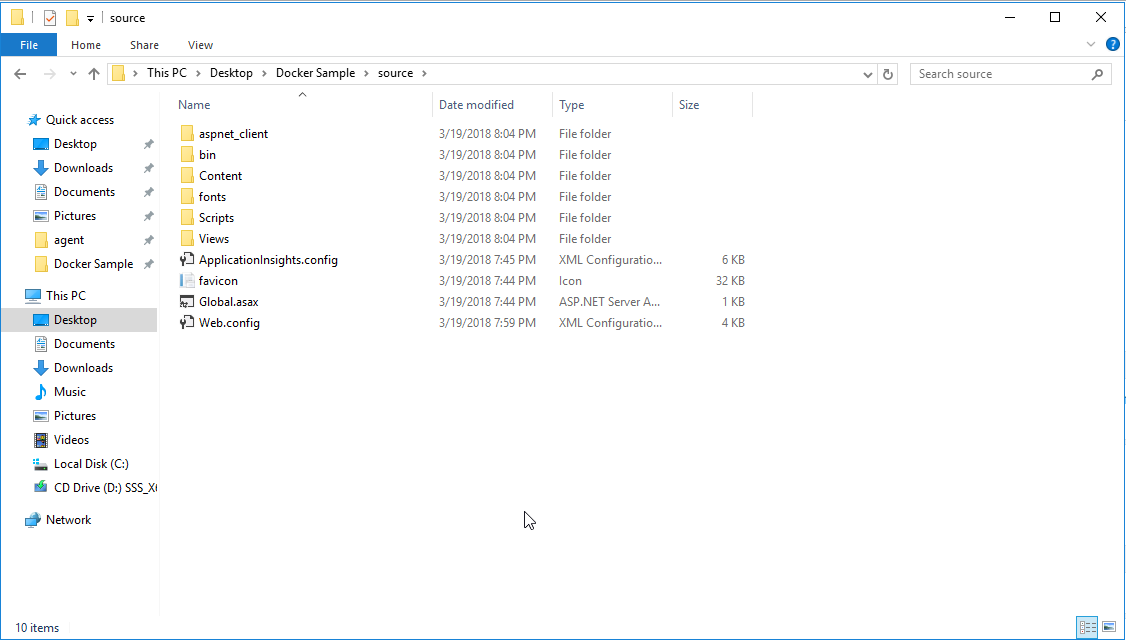
- Navigate to the directory in Step 1, create a subfolder called “source” and add the sample application code provided above (or your own source code) to this directory. If you used the sample source provided, you’ll see this:
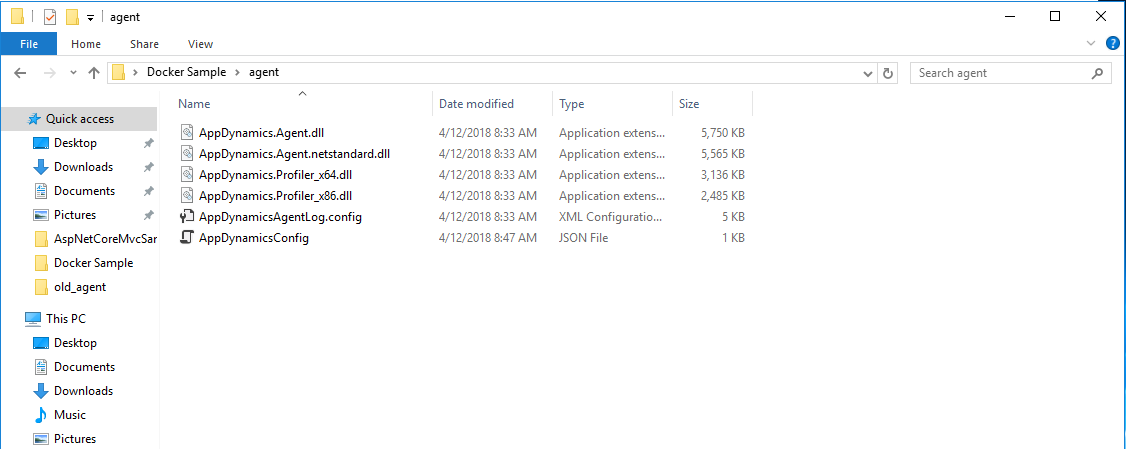
- Go back to the root directory and create a directory called “agent”.
- Add the extracted AppDynamics micro agent components from Step 1 to this directory.

- Edit “AppDynamicsConfig.json” and add in your controller and application information.
  {
  "controller": {
    "host": "",
    "port": ,
    "account": "",
    "password": "",
    "ssl": false,
    "enable_tls12": false
  },
  "application": {
    "name": "Sample Docker Micro Agent",
    "tier": "SampleMVCApp"
  }
}
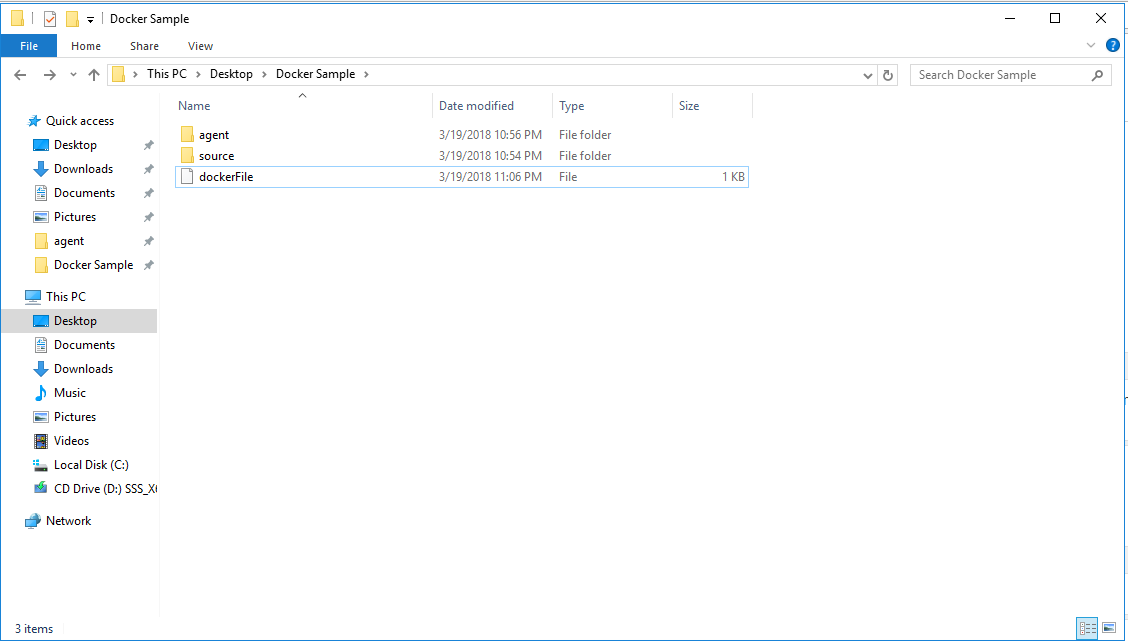
- Navigate to the root of the folder, create a file called “dockerFile” and add the following text:
Sample Docker Config
FROM microsoft/iis
SHELL ["powershell"]

RUN Install-WindowsFeature NET-Framework-45-ASPNET ; \
   Install-WindowsFeature Web-Asp-Net45

ENV COR_ENABLE_PROFILING="1"
ENV COR_PROFILER="{39AEABC1-56A5-405F-B8E7-C3668490DB4A}"
ENV COR_PROFILER_PATH="C:\appdynamics\AppDynamics.Profiler_x64.dll"

RUN mkdir C:\webapp
RUN mkdir C:\appdynamics

RUN powershell -NoProfile -Command \
  Import-module IISAdministration; \
  New-IISSite -Name "WebSite" -PhysicalPath C:\webapp -BindingInformation "*:8000:"

EXPOSE 8000

ADD agent /appdynamics
ADD source /webapp

RUN powershell -NoProfile -Command Restart-Service wmiApSrv
RUN powershell -NoProfile -Command Restart-Service COMSysApp
Here’s what your root folder will now look like:
Building the Docker Container
Now let’s build the Docker container.
- Open Powershell Terminal and navigate to the location of your Docker sample app. In this example, I will call my image “appdy_dotnet” but feel free to use a different name if you desire.
- Run the following command to build the Docker image:
docker build –no-cache -t appdy_dotnet.
- Now build the image:
docker run –name appdy_dotnet -d appdy_dotnet ping -t localhost
- Log into the container via powershell/cmd:
docker exec -it appdy_dotnet cmd
- Get the container IP by running the “ipconfig” command:
C:\ProgramData\AppDynamics\DotNetAgent\Logs>ipconfig
Windows IP Configuration


Ethernet adapter vEthernet (Container NIC 69506b92):

   Connection-specific DNS Suffix  . :
   Link-local IPv6 Address . . . . . : fe80::7049:8ad9:94ad:d255%17
   IPv4 Address. . . . . . . . . . . : 172.30.247.210
   Subnet Mask . . . . . . . . . . . : 255.255.240.0
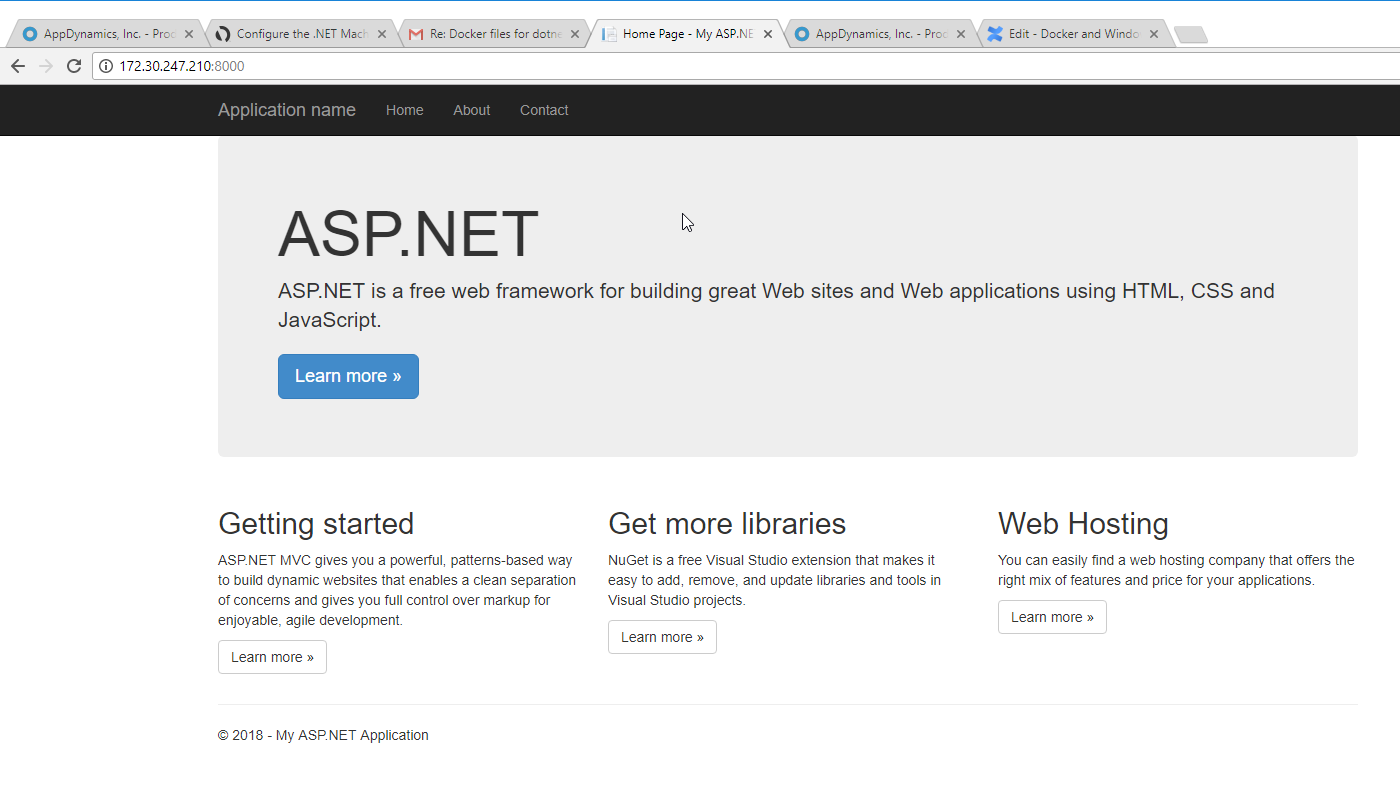
- Copy the IPv4 address, add port 8000, and request the URL from a browser. You should get the following site back (below). This is just a simple ASP.NET MVC template app that is provided with Visual Studio. In our example, the address would be: http://<ip4-address>:8000
Here’s what the application would look like:
- Generate some load in the app by clicking the Home, About, and Contact tabs. Each will be registered as a separate business transaction.Killing the Container (Optional)
Killing the Container (Optional)
In the event you get some errors and want to rebuild the container, here are some helpful commands that can be used for stopping and removing the container, if needed.
- Stop the container:
docker stop appdy_dotnet
- Remove the container:
docker rm appdy_dotnet
- Remove image:
docker rmi appdy_dotnet
Verify Successful Configuration via Controller
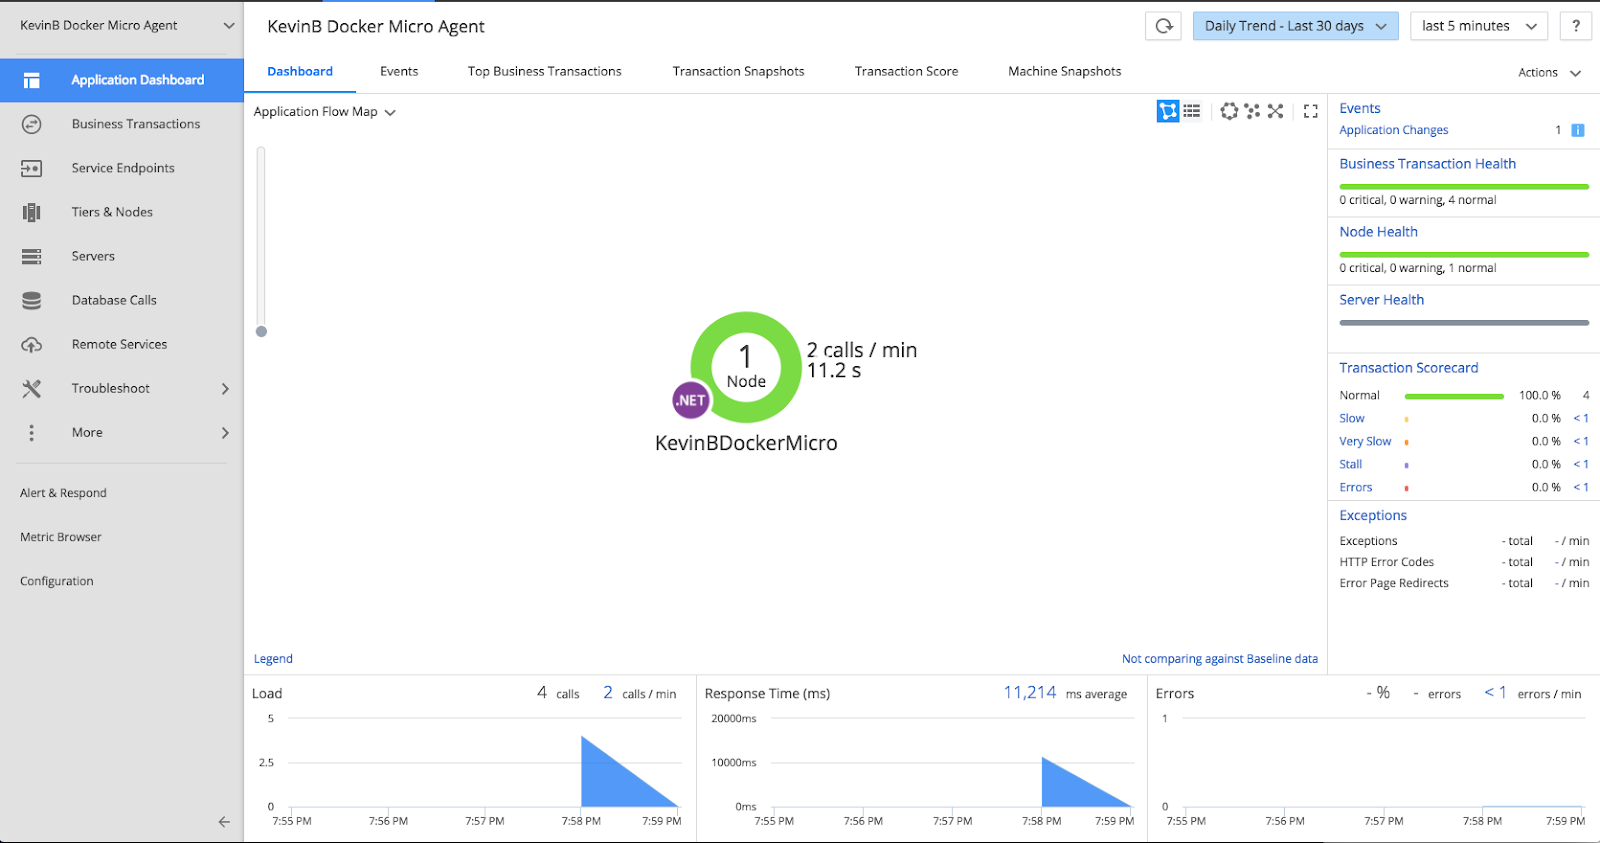
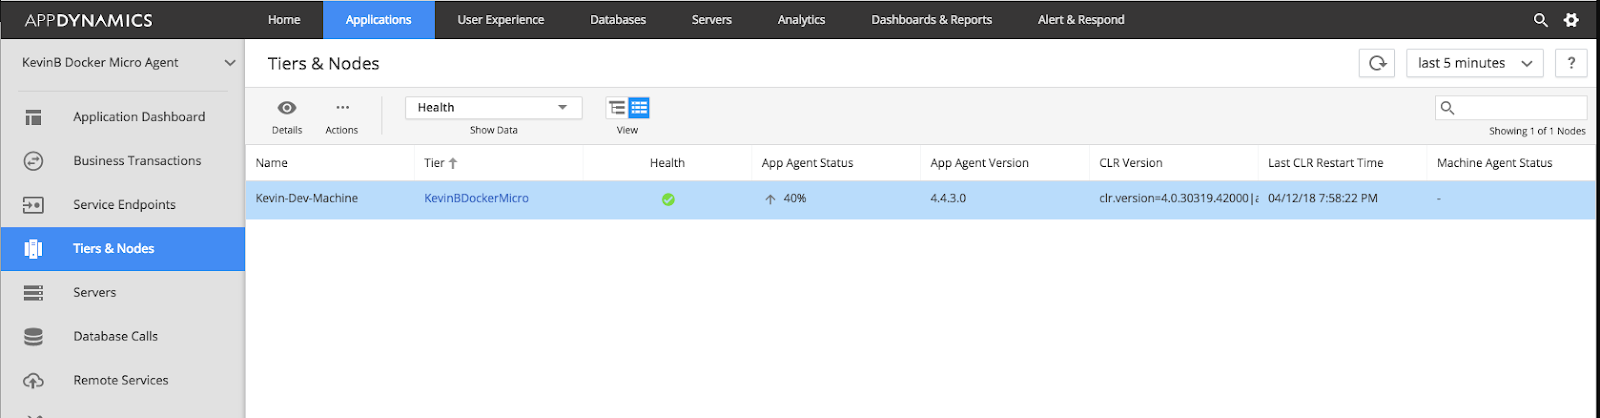
Log in to your controller and verify that you are seeing load. If you used the sample app, you’ll see the following info:
Application Flow Map
Business Transactions

Tier Information
As you can see, it’s fairly easy to instrument a Docker-on-Windows app using AppDynamics’ recently announced micro agent. To learn more about AppD’s powerful approach to monitoring .NET Core applications, read this blog from my colleague Meera Viswanathan.
Discover faster, more efficient performance monitoring with an enterprise APM product learning from your apps. Take the AppDynamics APM Guided Tour!
