Login forms have become part of the norm in the latest years, and their importance increases with the sensitivity of the information being dealt inside your app. Keeping the best interests of your recurring users at heart, the login should be well thought out and impossible to crack, so that the information trusted to you is safe. Login on an Angular app can be tough and it’s important that your integration doesn’t interfere with the flow of your application. It can become a crutch if you’re not really sure whether the user is authenticated and resorting to explicit checks all over the place. How can we do this right? Let’s see!

1. Use cases
The first step for creating a good Login page is determining when and where you need your user to be authenticated. Usually, there are three main cases where you should serve them the login modal:
- When the user is on a Welcome page and should login to continue
- When the user is not logged in and attempts to visit a page that requires login, e.g. their profile page or messages
- When the user attempts to make a request that requires a login, e.g. their session has expired whilst attempting to post something
Let’s take a look at the most basic one, verifying that a username and password are correct or not.
2. Mock validation
What we’ll start with, is a simple validation, which you should be warned is not for production, it’s just a mock one that checks that the username input is Era and the password era16 and if both these are right, echoes correct, otherwise echoes wrong. It would look like this:
check-login.php
<?php
if ( $_POST['username'] === 'Era' &&
   $_POST['password'] === 'era16' ) {
      echo 'correct';
} else {
      echo 'wrong';
}

?>
Now let’s get on with actually creating the login page.
3. A basic login page
Before we start on this, you’ll have to take a look at the code snippet below first, and then we’ll start on the explanations for each line of code:
index.html
<!DOCTYPE html>
<html lang="en">

  <head>

    <meta charset="utf-8">
    <meta http-equiv="X-UA-Compatible" content="IE=edge">
    <meta name="viewport" content="width=device-width, initial-scale=1">

    <title>AngularJS Login Form</title>

   <script src="https://ajax.googleapis.com/ajax/libs/angularjs/1.3.14/angular.min.js"></script>
    <link href="http://maxcdn.bootstrapcdn.com/bootstrap/3.3.4/css/bootstrap.min.css" rel="stylesheet">
   <link href="style.css" rel="stylesheet">
   <script src="app.js"></script>

  </head>

  <body ng-app="postExample" ng-controller="PostController as postCtrl">

    <div class="container">
      <form class="login-form" ng-submit="postCtrl.postForm()">

        <h2>Please sign in</h2>

        <label for="inputUsername" class="sr-only">Username</label>
        <input type="text" id="inputUsername" class="form-control" placeholder="Username" required autofocus ng-model="postCtrl.inputData.username">

        <label for="inputPassword" class="sr-only">Password</label>
        <input type="password" id="inputPassword" class="form-control" placeholder="Password" required ng-model="postCtrl.inputData.password">

      <br>

      <div class="alert alert-danger" role="alert" ng-show="errorMsg">{{errorMsg}}</div>
        <button class="btn btn-lg btn-primary btn-block" type="submit">Sign in</button>

      </form>
    </div>

  </body>
</html>
What we have above is a main file, which could very well be considered the most important part of our app, but however, it’s pretty simple. In the <head> section, you’ll have half default business, and the other half is the linking and scripting of the external files. These would be app.js in which we will place the Angular part of our app, the fleshing of it. Also, you’ll see the self-explanatory style.css and the online hosted files for Twitter’s Bootstrap and AngularJS, both minimized. Now on to the important part of this file: the <body>.
Now we define in which part of the document we want to place our Angular app. In our case we’ve chosen to make the whole document into an Angular app which is why we attached ng-app and ng-controller to the body tag. We gave our app the name postExample and our controller the name PostController which we define in a script which we have placed in the app.js file.
4. Styling the login page
Now on to the form. Inside the “jurisdiction” of the <form> tag we place a header that says Please Sign In, and after that we have placed two input fields with their respective labels and placeholders, obviously Username for the username and Password for the password. The labels, since they contain the class sr-only, will not be visible to the user, only the screen readers will be able to access it. We have also placed custom classes of our own, such as login-form and IDs like inputUsername and inputPassword, which we’ll use later in styling the input fields.
After that we place a button, which submits the information entered when clicked. You will notice quite the number of classes inside the input tags for these. Almost all of them are classes taken from Twitter’s Bootstrap. We have btn which specifies a button, btn-lg which is a class that sizes our button for it to be large, btn-primary and btn-block which style it, etc. Except for this, we have also placed an alert that is only visible when we have an error message, and shows said message. It’s also styled using Twitter’s Bootstrap, through classes such as alert and alert-danger.
However, using only Bootstrap is not enough for an app to have the exact view and feels that you want it to, so that means we will have to do some styling of our own, hence the style.css file. Time to see what it has inside:
style.css
.login-form {
			max-width: 300px;
			margin: 0 auto;
		}
		#inputUsername {
		  margin-bottom: -1px;
		  border-bottom-right-radius: 0;
		  border-bottom-left-radius: 0;
		}
		#inputPassword {
			border-top-left-radius: 0;
  			border-top-right-radius: 0;
		}
With this code snippet, we have made our input fields not take the whole screen in width, but be only 300px, which is a more reasonable value. We have also centered the form horizontally across the page and got rid of the rounded corners on the adjacent sides of the two input box. The margin-bottom of -1px is just to overlap the two abutting borders. These are all small changes that will make our login page finally look like this:
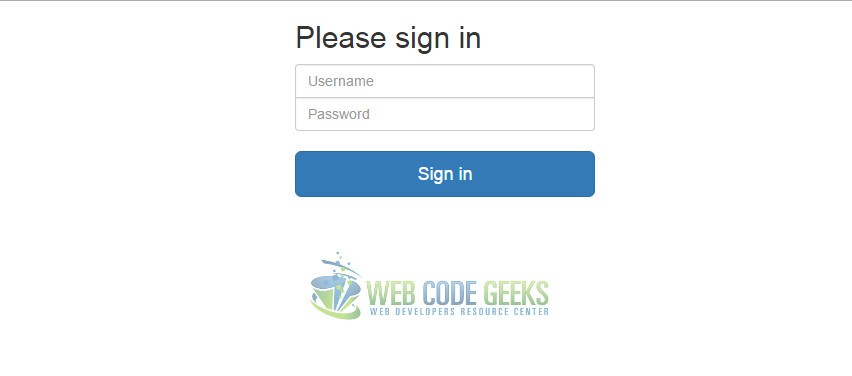
Neat, right? But we haven’t gotten to the functionality yet!
5. The Angular part
We mentioned before that we gave our app the name postExample and our controller the name PostController which we define in a script which we have placed in the app.js file. I think it’s now time to take a look at the app.js file, don’t you? It would look like below:
app.js
angular.module('postExample', [])
	.controller('PostController', ['$scope', '$http', function($scope, $http) {

		this.postForm = function() {

			var encodedString = 'username=' +
				encodeURIComponent(this.inputData.username) +
				'&password=' +
				encodeURIComponent(this.inputData.password);

			$http({
				method: 'POST',
				url: 'check-login.php',
				data: encodedString,
				headers: {'Content-Type': 'application/x-www-form-urlencoded'}
			})
			.success(function(data, status, headers, config) {
				console.log(data);
				if ( data.trim() === 'correct') {
					window.location.href = 'success.html';
				} else {
					$scope.errorMsg = "Login not correct";
				}
			})
			.error(function(data, status, headers, config) {
				$scope.errorMsg = 'Unable to submit form';
			})
		}

	}]);
What we’ve done here is create an Angular module and it’s controller, as said before. Since we know that we know that we will be using the AngularJS $http service to post to our check-login.php, we inject that service into the controller using array syntax. The rest is just the postForm function, which is used to determine how is the $http service to be used.
We pass into the $http call an object with the properties as above. The method is POST, the url is the backend PHP file that we are posting to. The data is the data that we are posting, which is contained in the variable encodedString. The $http call returns a promise that will result in the success function or the error function being called.
We want the postForm function to be called when the form is submitted. We do this by using AngularJS’s ng-submit directive on the <form> element, which if you go back to the first code snippet, you’ll see it’s there. We also need the AngularJS directives ng-model on both input boxes in order to pass the entered data to the controller. The controller gets a hold of these data and encodes it with the Javascript encodeURIComponent method.
The error branch should occur in rare cases, for example when the check-login.php page is missing. If this happens, the console will log out “Unable to submit form”. Since the PHP might have put out some unnecessary whitespaces, we need to trim the data. In case we have a success, we might put out a success page, which might even be a single line of text formatted as an HTML document, or whatever else you want it to be. In case we have an error, we’ll put out an alert, which simply passes back an error message. The AngularJS $scope object is what connects the view with the controller. That means that we have to inject the $scope object in our controller.
With that, we should be fine!
6. Download the source code
This was an example of login using AngularJS.
You can download the full source code of this example here: login

Thanks for your small but pinpointing Login Example. Currently, I’m learning angular and your tutorial helped me a lot to understand angular’s structure and features.
Nice tutorial….but how do you keep the state so that you know the user is logged in…and if she tries to access a page that need protection she’ll be redirected to the login page.