I have been a developer for the past 20+ years and have used some of the ‘big’ languages (C, C++, C#, Java) throughout. I dabbled with JavaScript back before there were frameworks, when its use was to dynamically hide this control or disable that control. While it can still do those trivial tasks, JavaScript has come a long way with a framework for everything now: front-ends, back-end, sockets, 2D/3D games, connecting to all kinds of databases, and robots, among others.
Over the last few years, I have started looking back into JavaScript. The projects I have been working didn’t require any JavaScript, so I have been trying to pick it up here and there through through online tutorials, videos, and podcasts. I chose Angular to get my feet wet. I’m not saying that Angular is the ultimate framework and that everyone should use it, but it can most certainly do quite a few things.
I keep coming back to a tool that has helped my journey through Angular-land: the Angular CLI. The CLI is a useful tool that can help set up and add different elements to your projects. It follows some of the best practices that have been laid down by the Angular team, even handling some of the plumbing for you so that things will work well together.
This post will show some of the basic commands available within the CLI. While we won’t go into every different command provided, we will look at some of the basic commands that can help get a project started and built. We will pay particular attention to the different commands and what they produce, as far as application structure and file layout is concerned.
So do keep in mind that it is not my purpose to describe all the different elements and how they are used (maybe a topic for future articles); we will just be looking at what the CLI lays down. Let’s get started.
What is Angular CLI?
Angular CLI is a command line tool that can aid in creating new Angular projects from scratch or adding various elements to an existing Angular application. This tool is not essential in building an Angular project, but it does provide several benefits, especially for someone who does not have much experience with Angular.
This tool will create a new project that is ready to run immediately and will generate a Hello World-esque project. It will create all needed plumbing to get everything up and running in a matter of minutes, generating an application structure that is based on best practices for an Angular project. When adding new elements, it will create these elements in the appropriate directory structure, generate source code, and in some cases add code to other elements within the project so that the new elements can be used wherever needed.
Prerequisites
In order to install Angular CLI, the following should be installed in the development environment:
Installation
Installing Angular CLI is as easy as typing the follow command:
npm install -g angular-cli
This will globally install angular-cli. This will allow for the use of all the ng commands. As of this writing, this installs version 1.0.0-beta.28.3 of the Angular CLI.
Create New Project
To create a new project, either ng new or ng init can be used. The main difference between these commands is that ng new will create a new directory and ng init will create a new project in the current directory.
Issue the following command to create a new project called my-project.
ng new my-project
This will cause several things to happen:
- directory
my-projectwill be created - directory structure and source files will be generated
- any needed dependencies will be installed
- TypeScript will be configured
- Karma test runner will be configured
- Protractor end-to-end test runner will be configured
- environment files will be created
Here is a screenshot of the project structure that was generated:
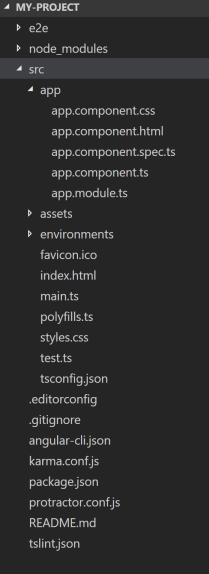
The purpose of this article is not to go into all the files that are generated but there are a few keys files to point out:
src/appdirectory: This directory contains source code, css, and html files. This is where most of the work will be done.app.module.ts: MainNgModulefor the application. Everything must belong to a module (even other modules).main.ts: Bootstraps your application.index.html: Main html file for your application.
Run Application
Change to the my-project directory and run the following:
ng serve
Then open a browser and point it to http://localhost:4200/. The following should be displayed:
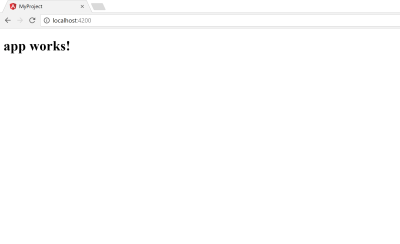
Nothing spectacular, but a running application nonetheless.
Note: Running ng serve from the command line will not return control back to the command prompt. This will detect changes that are made to the project, recompile the project, and then refresh the web page.
Adding Other Elements
To add other elements to your application, either ng generate or ng g command can be used. There are many elements that can be created, but only the following elements will be covered in this article:
- class
- interface
- enumeration
- component
- service
- module
In order to use Angular CLI to add these elements to your application, go to the my-project directory and issue the following commands.
Note: After issuing commands, Angular CLI will display files that are generated and where they are created at.
Create A Class
To create a new class, run the following:
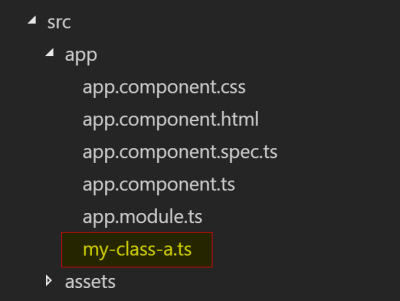
ng g class my-class-a
This will create a file called my-class-a.ts under the src/app directory. Notice that it will add .ts after the name provided.
This file is a basic class file with no decorators generated. It will export a class called MyClassA (removes dashes and uses camel case).
my-class-a.ts
export class MyClassA {
}
Create An Interface
To create a new interface, run the following:
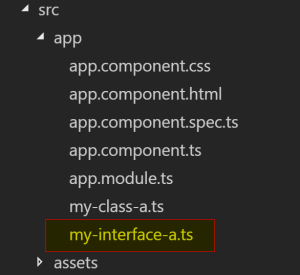
ng g interface my-interface-a
This will create a file called my-interface-a.ts under the src/app directory. Notice that it will add .ts after the name provided.
This file is a basic interface file with no decorator generated. It will export a class called MyInterfaceA (removes dashes and uses camel case).
my-interface-a.ts
export interface my-interface-a
}
Create An Enumeration
To create a new enumeration, run the following:
ng g enum my-num
This will create a file called my-enum.enum.ts under the src/app directory. Notice that it will add .enum.ts after the name provided.
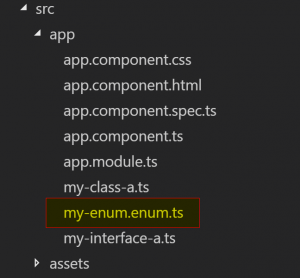
This file is a basic enumeration file with no decorator generated. It will export a class called MyEnum (removes dashes and uses camel case).
my-enum.enum.ts
export enum MyEnum {
}
Creating a class, interface, or enumeration are basic constructs and could be created manually just as easily, but the CLI will format them according to best practices. Now on to things that need a little more to them.
Create A Component
To create a new component, run the following:
ng g component my-component-a
This will do several things:
- create a directory called
my-component-aundersrc/appdirectory - generate four files under that directory
my-component-a.component.css- Contains any css that would be needed for this component
- Optional file that is pointed to by the component.ts file
my-component-a.component.html- Contains any html that would be needed for this component
- Optional file that is pointed to by the component.ts file
- html could be contained within the component.ts file, if desired
my-component-a.component.spec.ts- unit test skeleton for this component
my-component-a.component.ts- exports a class called
MyComponentAComponent - implements an interface called
OnInit - generates empty function called
ngOnInitforOnInitinterface - generates empty constructor function
- decorates class with
@Component- add selector for component,
app-my-component-a - adds templateUrl, points to generated html file for component
- adds styleUrls array, points to generated css file for component
- add selector for component,
- exports a class called
- modifies
app.module.tsfile, addedMyComponentAComponentto declarations (every component has to belong to a module)
my-component-a.component.ts
import { Component, OnInit } from '@angular/core';

@Component({
  selector: 'app-my-component-a',
  templateUrl: './my-component-a.component.html',
  styleUrls: ['./my-component-a.component.css']
})
export class MyComponentAComponent implements OnInit {

  constructor() { }

  ngOnInit() {
  }

}
app.module.ts
import { BrowserModule } from '@angular/platform-browser';
import { NgModule } from '@angular/core';
import { FormsModule } from '@angular/forms';
import { HttpModule } from '@angular/http';
import { AppComponent } from './app.component';
import { MyComponentAComponent } from './my-component-a/my-component-a.component';
@NgModule({
declarations: [
AppComponent,
MyComponentAComponent
],
imports: [
BrowserModule,
FormsModule,
HttpModule
],
providers: [],
bootstrap: [AppComponent]
})
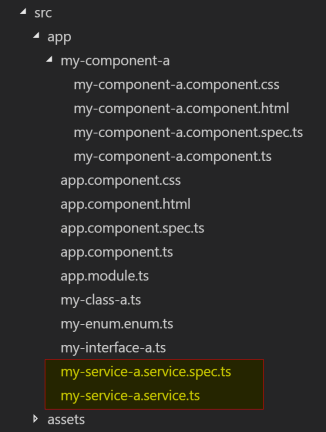
export class AppModule { }Create A Service
To create a new service, run the following;
ng g service my-service-a
This will generate a couple of files under the src/app directory:
my-service-a.service.spec.ts- unit test skeleton for this service
my-service-a.service.ts- exports a class called
MyServiceAService - generates empty constructor function
- decorates class with
@Injectable
- exports a class called
my-service-a.service.ts
import { Injectable } from '@angular/core';
@Injectable()
export class MyServiceAService {
constructor() { }
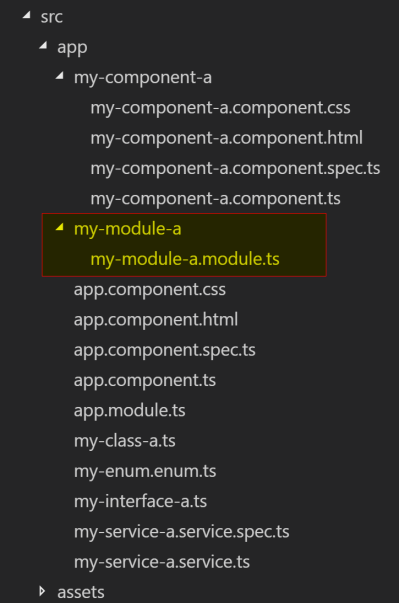
}Create A Module
To create a new module, run the following:
ng g module my-module-a
This will do a couple things:
- create a directory
my-module-aundersrc/app - generate a file under that directory called
my-module-a.module.ts- exports a class name
MyModuleAModule - decorates that class with
@NgModule
- exports a class name
my-module-a.module.ts
import { NgModule } from '@angular/core';
import { CommonModule } from '@angular/common';
@NgModule({
imports: [
CommonModule
],
declarations: []
})
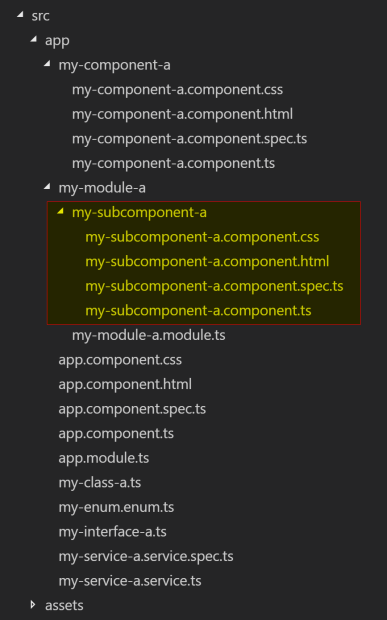
export class MyModuleAModule { }Create Component In A Module
Components can be added to generated module by changing to the module directory:
cd src/app/my-module-a
ng g component my-subcomponent-a
or by prefixing the module name to the front of the new component name:
ng g component my-module-a/my-subcomponent-a
This will do several things:
- create a directory
my-subcomponent-aunder thesrc/app/my-module-adirectory - generate all the component files under this directory (see
Create a componentsection for description of files) - add
MySubcomponentAComponentto themy-module-a.module.tsfile
my-module-a.module.ts
import { NgModule } from '@angular/core';
import { CommonModule } from '@angular/common';
import { MySubcomponentAComponent } from './my-subcomponent-a/my-subcomponent-a.component';

@NgModule({
  imports: [
    CommonModule
  ],
  declarations: [MySubcomponentAComponent]
})
export class MyModuleAModule { }
This same pattern can be used for a class, interface, enum, service, or even another module.
Summary
As you can see, the Angular CLI has a lot to offer. It will create something that will get you up and running within a matter of minutes. It will follow best practices as related to layout and naming conventions. It will allow you to add elements where they are needed and even do some of the plumbing for you.
The CLI is not something that you have to use, but it is definitely helpful. If you haven’t used it before, it is worth checking out especially for someone getting their feet wet.
| Reference: | Getting Started With Angular CLI Commands from our WCG partner Brett Smith at the Keyhole Software blog. |
