EDITORIAL NOTE: In this post, we feature a jQuery dialog example. A dialog is a floating window that contains a title bar and a content area. The dialog window can be moved, resized and closed with the ‘x’ icon by default.
jQuery UI is a collection of jQuery plugins used to enhance the web application user interface. Inside this library we find many reusable components for interactions, effects, widgets and more.
jQuery UI is a curated set of user interface interactions, effects, widgets, and themes built on top of the jQuery JavaScript Library. Whether you’re building highly interactive web applications or you just need to add a date picker to a form control, jQuery UI is the perfect choice. http://jqueryui.com/
What is the jQuery Dialog
jQuery Dialog is a powerful JavaScript popup window built-in the jQuery user interface library (jQuery ui) and it’s mostly used to show an alert message box or simple html forms such as log in/signup forms. The dialog box is mainly composed from two section, header and body but it’s also fully customizable to allow developers makes own structure.
In this example, I will introduce different uses of this overlay, starting with a Hello World example.
1. Hello World dialog
First, you need to download the jQuery and jQuery ui libraries from here and here or use one of CDNs provided on the jQuery Website.
Create an empty HTML file and put into the code like the following:
<!doctype html>
<html lang="en">
<head>
<meta charset="utf-8">
<title>jQuery Dialog Example - Hello World!</title>
<!-- todo: add scripts and css -->
</head>
<body>
<!-- todo: add html anchor and div to show dialog -->
</body>
</html>
Now put the scripts and style references between the head tags.
<!doctype html> <html lang="en"> <head> <meta charset="utf-8"> <title>jQuery Dialog Example - Hello World!</title> <link href="jquery-ui.css" rel="stylesheet"> <img src="data:image/gif;base64,R0lGODlhAQABAIAAAAAAAP///yH5BAEAAAAALAAAAAABAAEAAAIBRAA7" data-wp-preserve="%3Cscript%20src%3D%22jquery.js%22%3E%3C%2Fscript%3E" data-mce-resize="false" data-mce-placeholder="1" class="mce-object" width="20" height="20" alt="<script>" title="<script>" /> <img src="data:image/gif;base64,R0lGODlhAQABAIAAAAAAAP///yH5BAEAAAAALAAAAAABAAEAAAIBRAA7" data-wp-preserve="%3Cscript%20src%3D%22jquery-ui.js%22%3E%3C%2Fscript%3E" data-mce-resize="false" data-mce-placeholder="1" class="mce-object" width="20" height="20" alt="<script>" title="<script>" /> </head> <body> <!-- todo: add html anchor and div to show dialog --> </body> </html>
Your page is now ready, let’s add some code to run the hello world dialog.
I will create between the body tags a DIV element with id="MyDialog", this id is used in the selector to apply the dialog() event. Also, I will add to this DIV the title attribute that should be showed as Dialog header.
By default dialog() has the property autoOpen set to true, so I want to set it false then add a button to lunch the dialog. The full code will be:
index.html
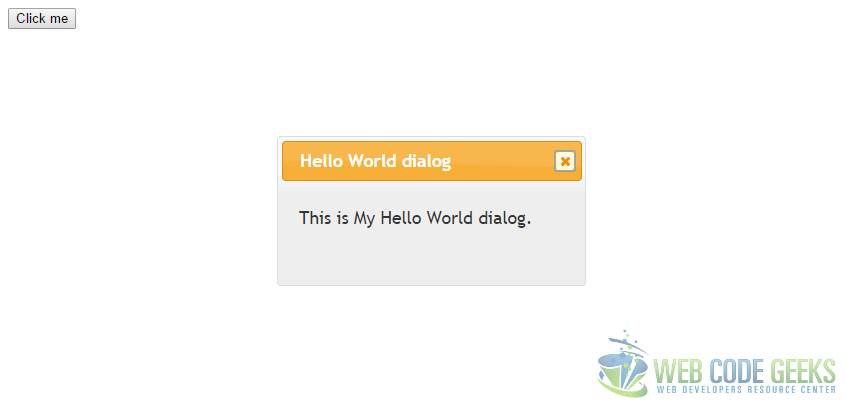
<!doctype html> <html lang="en"> <head> <meta charset="utf-8"> <title>jQuery Dialog Example - Hello World!</title> <link href="jquery-ui.css" rel="stylesheet"> <img src="data:image/gif;base64,R0lGODlhAQABAIAAAAAAAP///yH5BAEAAAAALAAAAAABAAEAAAIBRAA7" data-wp-preserve="%3Cscript%20src%3D%22jquery.js%22%3E%3C%2Fscript%3E" data-mce-resize="false" data-mce-placeholder="1" class="mce-object" width="20" height="20" alt="<script>" title="<script>" /> <img src="data:image/gif;base64,R0lGODlhAQABAIAAAAAAAP///yH5BAEAAAAALAAAAAABAAEAAAIBRAA7" data-wp-preserve="%3Cscript%20src%3D%22jquery-ui.js%22%3E%3C%2Fscript%3E" data-mce-resize="false" data-mce-placeholder="1" class="mce-object" width="20" height="20" alt="<script>" title="<script>" /> <img src="data:image/gif;base64,R0lGODlhAQABAIAAAAAAAP///yH5BAEAAAAALAAAAAABAAEAAAIBRAA7" data-wp-preserve="%3Cscript%3E%0A%20%20%24(function()%20%7B%0A%20%20%20%20%2F%2F%20Apply%20dialog%20to%20MyDialog%20id%0A%20%20%20%20%24(%20%22%23MyDialog%22%20).dialog(%7B%0A%20%20%20%20%20%20autoOpen%3A%20false%2C%0A%20%20%20%20%7D)%3B%0A%20%20%20%20%2F%2F%20Attach%20a%20click%20event%20to%20the%20button%20with%20id%20openDialog%0A%20%20%20%20%24(%20%22%23openDialog%22%20).click(function()%20%7B%0A%20%20%20%20%20%20%24(%20%22%23MyDialog%22%20).dialog(%20%22open%22%20)%3B%0A%20%20%20%20%7D)%3B%0A%20%20%7D)%3B%0A%20%20%3C%2Fscript%3E" data-mce-resize="false" data-mce-placeholder="1" class="mce-object" width="20" height="20" alt="<script>" title="<script>" /> </head> <body> <div id="MyDialog" title="Hello World dialog"> This is My Hello World dialog. </div> <!-- Button lunch dialog --> <button id="openDialog">Click me</button> </body> </html>
The result of this example is:
2. Advanced dialog example
Repeating same steps as above, but this time, I will replace the script section by the following code:
  $(function() {
    $( "#MyDialog" ).dialog({
      autoOpen: false,
      resizable: false, // prevent resize of the dialog
      height:250, // set the height to 250px
      modal: true, // show a modal overlay in background
      buttons: {
        "Save": function() {
		  // do your business code here
		  alert("you've press save");
          $( this ).dialog( "close" );
        },
        Cancel: function() {
          $( this ).dialog( "close" );
        }
      }
    });

    $( "#openDialog" ).click(function() {
      $( "#MyDialog" ).dialog( "open" );
    });
  });
As you see, the function dialog() take new options. The option resizable is used to allow or prevent dialog resizing. I’ve fixed the dialog height to 250px. The modal option is very important in case we need to focused user attention on the alert box, an overlay background is shown behind the dialog that make the box more attractive.
Among these options, I’ve also defined the buttons option that declare 2 buttons for this dialog and we can assign a callback function on each one.
We can do more advanced scripts with the dialog jQuery plugin. Now, I advise you to read carefully the examples and try coding from scratch.
Download the source code for dialog
This was an example of jQuery Dialog.
You can download the full source code of this example here: jQueryDialogExamples
