Hello readers! In this article we will take a look on how to use the JQuery validate plugin. In this specific case this is the validate option called errorPlacement function. We will learn how to implement a few simple examples using the JQuery validate API and its function errorPlacement. We will also check some details about this API. Before we start, check the requirements related to the technologies and the frameworks used to the example below:
- jquery 3.2.1
- jquery validate plugin 1.16.0
- HTML5
- CSS
1. Introduction
A Validate is a JQuery´s plugin for creating validations on HTML forms using some special attributes for the input HTML tags. This plugin allows us to add default and custom validations.
You can specify the validation rules with a single line of jQuery. Select the form to apply the validation plugin, plus a few annotations on each element.
See the code for a basic example below.
validation_example.html
<!DOCTYPE html>
<html>
<head>
<!-- Using the jquery CDN -->
<script src="https://ajax.googleapis.com/ajax/libs/jquery/3.2.1/jquery.min.js"></script>

<!-- Using the jquery validate plugin -->
<script src="https://cdn.jsdelivr.net/jquery.validation/1.16.0/jquery.validate.min.js"></script>

</head>
<body>

    <h1>Test JQuery Form Validation</h1>

<form class="cmxform" id="commentForm" method="get" action="">
  <fieldset>
    <legend>Please provide your name, email address and a comment</legend>
    <p>
      <label for="cname">Name (required, at least 2 characters)</label>
      <input id="cname" name="name" minlength="2" type="text" required><!--using the required annotation-->
    </p>
    <p>
      <label for="cemail">E-Mail (required)</label>
      <input id="cemail" type="email" name="email" required>
    </p>
    <p>
      <label for="ccomment">Your comment (required)</label>
      <textarea id="ccomment" name="comment" required></textarea>
    </p>
    <p>
      <input class="submit" type="submit" value="Submit">
    </p>
  </fieldset>
</form>
<script>
    //using the validation plugin. Just one line of code to add this functionality
$("#commentForm").validate();
</script>
    </body>
</html>
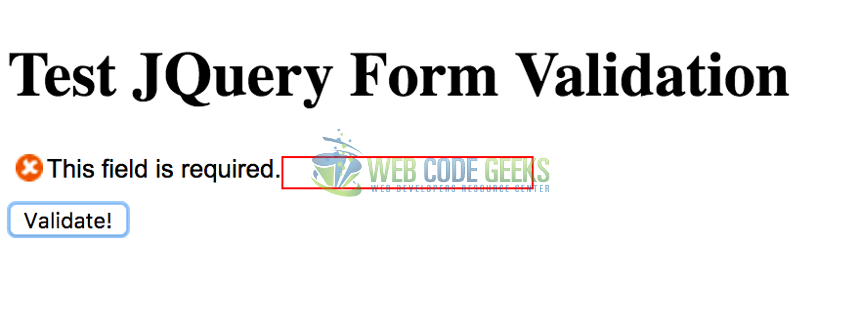
The output of the previous example is an HTML form with the validation functionality.
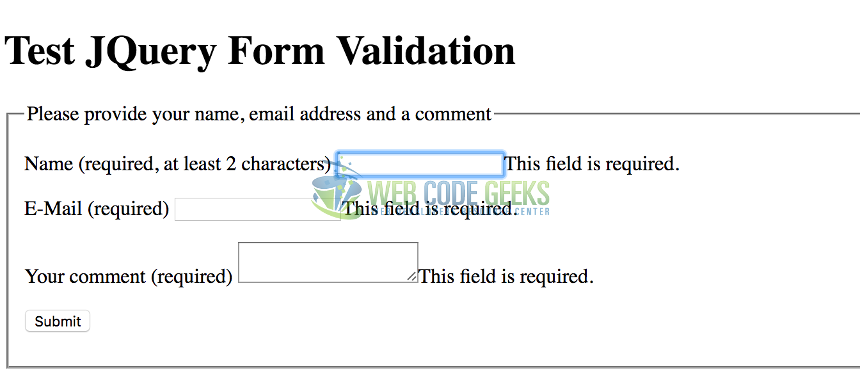
The plugin provides a default way to define rules, but this is not the only way. You also don’t have to rely on those default messages but it is helpful when you start to setup validation for a form.
2. Concepts
In order to be more familiar with the API it is necessary to know 2 important concepts methods and rules.
- method: Is the logic that you use or create to validate an element, like an email or a credit card number checking the right format for the input. The API provides a set of standard methods and allows an easy way to write your own.
- rule: A validation rule associates an element with a validation method, like “validate input with name “creditcard-number” with methods “required” and “creditcardnumber”.
3. Plugin Methods
The validation plugin provides 3 methods to interact with this API.
3.1 Validate Method
The validate() method allows to validate a selected HTML form, which is the main entry point of this API. This method provides the errorPlacement function that we will cover later with a few examples in order to see how it works.
3.2 Valid Method
The valid() method validates if the form passes all the validation rules. Before calling this method it is necessary to first call the validate() method.
See the example below.
valid_example.html
<!DOCTYPE html>
<html>
<head>
<!-- Using the jquery CDN -->
<script src="https://ajax.googleapis.com/ajax/libs/jquery/3.2.1/jquery.min.js"></script>

<!-- Using the jquery validate plugin CDN -->
<script src="https://cdn.jsdelivr.net/jquery.validation/1.16.0/jquery.validate.min.js"></script>
<!-- Using the jquery validate plugin CSS CDN -->
<link rel="stylesheet" href="https://jqueryvalidation.org/files/demo/site-demos.css">

</head>
<body>

    <h1>Test JQuery Form Validation</h1>

<form id="myform">
  <input type="text" name="name" required>
  <br>
  <button type="button">Validate!</button>
</form>
<script>
  var form = $( "#myform" );//select the form
  form.validate();//add the validate functionality
  $( "button" ).click(function() {
    alert( "Valid: " + form.valid() );//checks if all the values on the inputs passed the validation
  });
</script>
    </body>
</html>
The output of the previous example is an HTML form with the validation functionality using the valid method that checks if the entire form has valid values.


3.3 Rules Method
The rules() method allows us to add or remove validation rules from a specific element in an HTML form. When we set the rules, this API also contains a message-object that allow us to specify custom messages for existing HTML elements or added rules.
Add the minimum string size rule to an existing HTML. Add the required input with the id #inputToValidate.
$( "#inputToValidate" ).rules( "add", {
  minlength: 2
});
Remove a rule from an existing HTML input with the id inputToValidate, the minimum string size rule.
$( "#inputToValidate" ).rules( "remove", "min" );
4. Setup Environment
For implementing this example we need the following tools:
- Web Browser (Chrome, FireFox, etc..), to check the Jquery browser compatibility please check this URL
- Text Editor (ATOM, Brackets, Notepad++, etc..)
In order to implement these examples, we’ll use the JQuery CDN. Also, you can download the JQuery library on a non-minified version for development purposes from here.
Also, we’ll use the JQuery’s validation plugin CDN. In order to know how to use the CDN please refer to jqueryvalidation.org. Also, you can download the source code for development purposes with dependencies management tools like NPM and Bower.
5. The errorPlacement Example Implementation
After a quick overview on the validation plugin, now we are ready to implement a few examples using the errorPlacement function that is provided by the validate() API. If you want to review in detail the validate() API, please refer to the official documentation here.
errorPlacement allow us to define in which place we want to display the validation message on an invalid HTML form element.
This function provides 2 parameters: the label error and the element, which is the invalid element as a jQuery object.
 errorPlacement: function(error, element) {
    //code that put the error label on a specific HTML element
  }
The above image shows how the DOM structure is modified to use the div element. The label with the error message is added, using the error.appendTo() method and using the JQuery object, which in this case, is the element parameter.
errorplacement_div_example.html
<!DOCTYPE html>
<html>
<head>
<!-- Using the jquery CDN -->
<script src="https://ajax.googleapis.com/ajax/libs/jquery/3.2.1/jquery.min.js"></script>

<!-- Using the jquery validate plugin CDN -->
<script src="https://cdn.jsdelivr.net/jquery.validation/1.16.0/jquery.validate.min.js"></script>
</head>
<body>

    <h1>errorPlacement Form Validation</h1>

<form id="myform"  method="get" action="">
  <input type="text" name="name" required>
  <br>
    <!-- we will use this div to put the error message
from the name element using the errorPlacement function -->
    <div></div>
    <input type="number" name="id" required>
  <br>
    <!-- we will use this div to put the error message
from the id element using the errorPlacement function -->
    <div></div>
   <input class="submit" type="submit" value="Submit">
</form>
<script>
  var form = $( "#myform" );//select the form
  form.validate({
     errorPlacement: function(error, element) {
      /*here we add the error label to the div that is after the br tag
      using the next method provided by jquery to navigate on the DOM*/
      error.appendTo(element.next().next());
    }
  });//add the validate functionality
</script>
    </body>
</html>
The output of the previous code is the message putting on each invalid form element using a div panel.
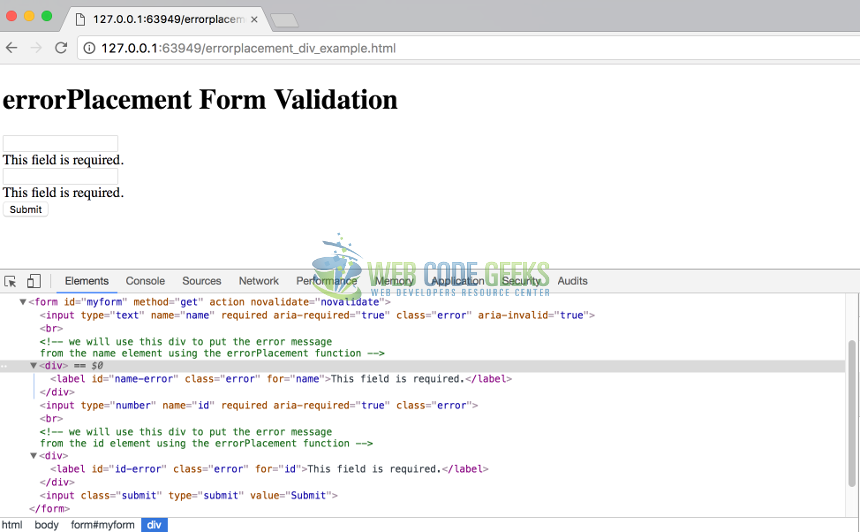
The above image shows how the DOM structure is modified to use the div element. The label with the error message is added, using the error.appendTo() method and using the JQuery object, which in this case, is the element parameter.
6. Conclusion
In this example, we learned how to use the JQuery validation library, some specific API aspects, and we saw some simple examples to get more understanding about this library and its usage.
Also, we examined the functionalities that are provided by default for this API, like validate, valid and rules. This is a powerful library based on JQuery framework that allows the developers to create a fully functional validation on HTML forms inputs.
Although this library comes with powerful validations, it allow us to create our custom validations and for this specific example, we saw how to use the errorPlacement function that let us to define in which HTML element we want to display the label error message using the JQuery’s DOM searching power.
To explore in more detail the API of this library, please refer to the official documentation here.
7. Download The Source Code
These are JQuery validation and errorPlacement examples.
You can download the full source code of this example here: JQueryValidationErrorplacementExample
