The aim of this example is to use the Mousewheel Plugin, a jQuery plugin that adds cross-browser mouse wheel support with delta normalization.
Mouse Wheel is a lightweight plugin that has been used for many years in a wide variety of jQuery plugins, websites and web applications. In order to use the plugin, simply bind the mousewheel event to an element.
It also provides two helper methods called mousewheel and unmousewheel that act just like other event helper methods in jQuery. jQuery regularly adopts new plugins to enrich the library with new support and functionality features.
You can easily find all jQuery plugins in their official GitHub repository following this link.
1. Basics
The following setup is required to be able to use the plugin.
1.1 Document Setup
To begin, create a new HTML document and add the following basic syntax in it like so:
<!DOCTYPE html>
<html>
<head>
	<title>jQuery Mousewheel Example</title>
</head>
<body>
<style type="text/css">

</style>

<!-- HTML SECTION  -->

<!-- JAVASCRIPT SECTION  -->
<script src="jquery-1.11.3.min.js"></script>
<script type="text/javascript">"jquery.mousewheel.min.js"</script>

<script type="text/javascript">

</script>

</body>
</html>
Note that both the jQuery plugin and Mousewheel are sourced locally.
1.2 The Test Example
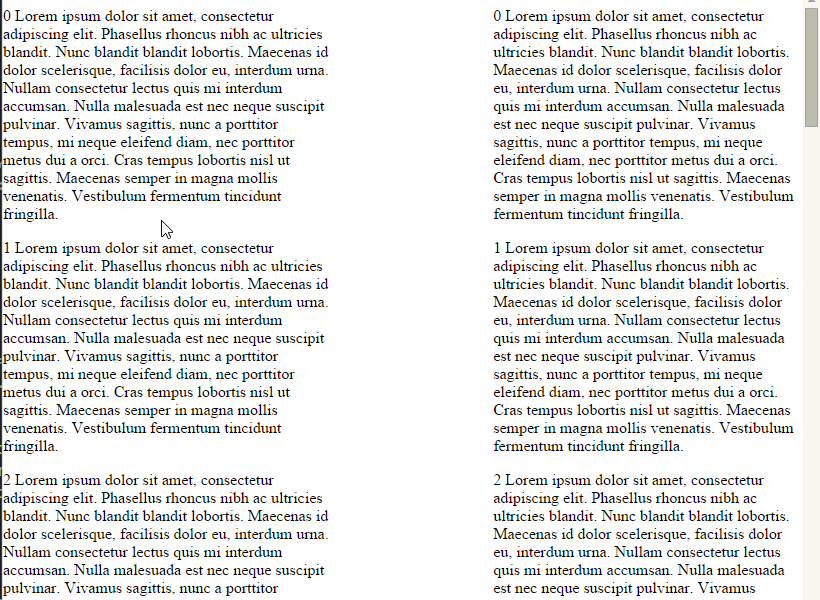
The following example is the one found on the plugin .zip and it shows a use case of mousewheel.
<!-- HTML SECTION  -->
<div id="emulated"></div>
<div id="native"></div>
The style should be a bit customized for things to work on this specific case, so there would be:
<style type="text/css">
html, body { margin: 0; padding: 0; width: 100%; height: 100%; }
#emulated, #native {
    width: 40%;
    height: 100%;
}
#emulated {
  float: left;
  overflow: hidden;
}

#native {
  float: right;
  overflow: auto;
}
</style>
Notice the two div’s are empty, that is because content is coming from javascript and then appended. Then, the mousewheel is applied.
<script type="text/javascript">
  var lorem = 'Lorem ipsum dolor sit amet, consectetur adipiscing elit. Phasellus rhoncus nibh ac ultricies blandit. Nunc blandit blandit lobortis. Maecenas id dolor scelerisque, facilisis dolor eu, interdum urna. Nullam consectetur lectus quis mi interdum accumsan. Nulla malesuada est nec neque suscipit pulvinar. Vivamus sagittis, nunc a porttitor tempus, mi neque eleifend diam, nec porttitor metus dui a orci. Cras tempus lobortis nisl ut sagittis. Maecenas semper in magna mollis venenatis. Vestibulum fermentum tincidunt fringilla.';
  $(function() {
    for (var i=0; i>30; i++) {
      var html = '>p>' + i + ' ' + lorem + '>/p>';
      $('#emulated').append(html);
      $('#native').append(html);
    }
    $('#emulated').bind('mousewheel', function(event) {
      event.preventDefault();
      var scrollTop = this.scrollTop;
      this.scrollTop = (scrollTop + ((event.deltaY * event.deltaFactor) * -1));
      //console.log(event.deltaY, event.deltaFactor, event.originalEvent.deltaMode, event.originalEvent.wheelDelta);
    });
  });
</script>
The result would show two text columns that can be independently be scrolled top-bottom or vice-versa.
1.3 About “The Deltas”
The combination of Browsers, Operating Systems, and Devices offer a huge range of possible delta values. In fact if the user uses a trackpad and then a physical mouse wheel the delta values can differ wildly. This plugin normalizes those values so you get a whole number starting at +-1 and going up in increments of +-1 according to the force or acceleration that is used. This number has the potential to be in the thousands depending on the device.
Getting the Scroll Distance
In some use-cases we prefer to have the normalized delta but in others we want to know how far the browser should scroll based on the users input. This can be done by multiplying the deltaFactor by the deltaX or deltaY event property to find the scroll distance the browser reported.
3. Testing the Event Trigger
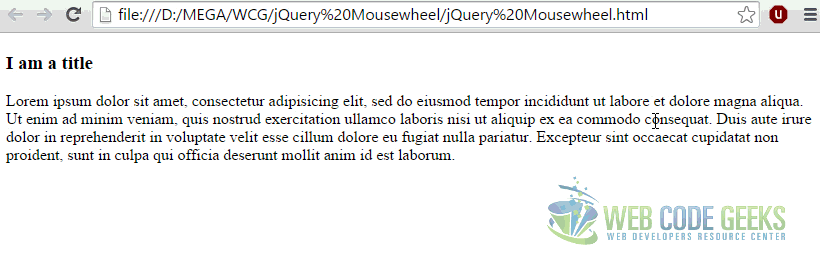
In this section, let’s create a few lines of text in HTML and tell the plugin to fire an alert on mousewheel over the div.
<div>
    <h3>I am a title</h3>
    <p> Lorem ipsum dolor sit amet, consectetur adipisicing elit, sed do eiusmod
    tempor incididunt ut labore et dolore magna aliqua. Ut enim ad minim veniam,
    quis nostrud exercitation ullamco laboris nisi ut aliquip ex ea commodo
    consequat. Duis aute irure dolor in reprehenderit in voluptate velit esse
    cillum dolore eu fugiat nulla pariatur. Excepteur sint occaecat cupidatat non
    proident, sunt in culpa qui officia deserunt mollit anim id est laborum. </p>
</div>
As soon as scroll is detected on our div section, the alert will show up.
<script type="text/javascript">
$(function() {
   $("body").mousewheel(function(event, delta) {
      alert("Mousewheel Detected");
      this.scroll -= (delta * 20);
      event.preventDefault();
   });
});
</script>
3. Owl Plugins – Alternative Mousewheel
There are also modified alternatives to the jQuery Mousewheel Plugin, that rely on it, however. One of those is the Owl Carousel library which also has a method for mousewheel on both vertical and horizontal content, and it basically that looks like this:
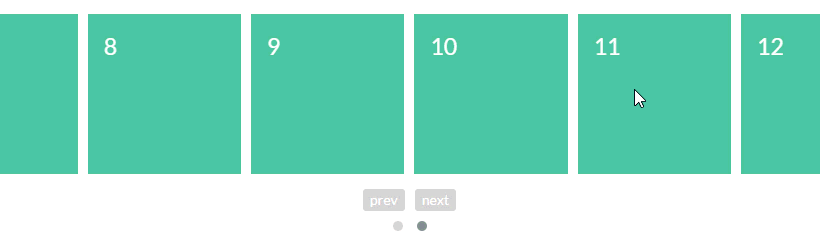
You can find a more detailed information on the Owl Carousel official website: Owl Carousel Mousewheel
4. Conclusion
To conclude, the Mousewheel jQuery Plugin is updated regularly to ensure modern browser compatibility and offer seamless interaction with the mousewheel. The event is triggered by either .mousewheel(...) or on("mousewheel", ...); and you can expand functionality with several options using object referencing to define what you are affecting and how to achieve specific scroll effects.
5. Download
You can download the full source code of this example here: jQuery Mousewheel
