Hello readers, in this tutorial, we will show how to use the jQuery library and the jQuery stop() method to stop an animation or an effect before it is finished.
1. Introduction
jQuery is nothing but a JavaScript library that comes with rich functionalities. It’s small and faster than many JavaScript code written by an average web developer. By using jQuery developers can write less code and do more things, making web developer’s tasks very easy. In simple word, jQuery is a collection of several useful methods, which can be used to carry out many common tasks in JavaScript. A couple of lines of jQuery code can do things which need too many JavaScript lines to do. The true power of jQuery comes from its CSS-like selector, which allows it to select any element from DOM and change, update or manipulate it. Developers can use jQuery to do cool animations like fade in or fade out. They can also change the CSS class of a component dynamically e.g. making a component active or inactive. I have used this technique to make tabbed UI in HTML. I can vouch for jQuery that once developers start using it, they will never go back to plain old JavaScript as jQuery is clear, concise, and powerful.
1.1 Why jQuery?
- It helps in improving the application performance and increasing the developer’s productivity
- It helps in developing the browser compatible web-page
- It helps in implementing the UI related critical functionality without writing the several lines of codes
- It is fast and extensible i.e. developers can use the jQuery library to implement the customized behavior
- It is simpler and easy to learn
1.2 jQuery stop() Method
The jQuery stop() method is an inbuilt function that stops an animation or an effect before it is finished. This method works for all the jQuery effect functions such as sliding, fading, and the custom animations. Here is the simple syntax to use this method.
Snippet
$(selector).stop(stopAll, goToEnd);
Do note:
- The
stopAllis an optional argument that specifies whether the animation queue should be cleared or not. The default value isfalsemeaning that only the active animation will be stopped and the queue animations will be performed later - The
goToEndis an optional argument that specifies whether or not to immediately complete the current animation. The default value isfalse
These new APIs make a developer life easier, really! But it would be difficult for a beginner to understand this without an example. Therefore, let us create a simple application using the jQuery library.
2. jQuery Stop Animations Example
Here is a step-by-step guide for implementing this tutorial using the jQuery library.
2.1 Tools Used
We are using Eclipse Kepler SR2, JDK 8 and Maven. Having said that, we have tested the code against JDK 1.7 and it works well.
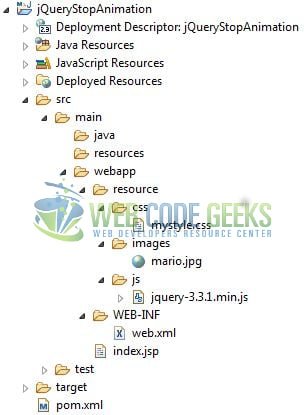
2.2 Project Structure
Firstly, let’s review the final project structure if you are confused about where you should create the corresponding files or folder later!
2.3 Project Creation
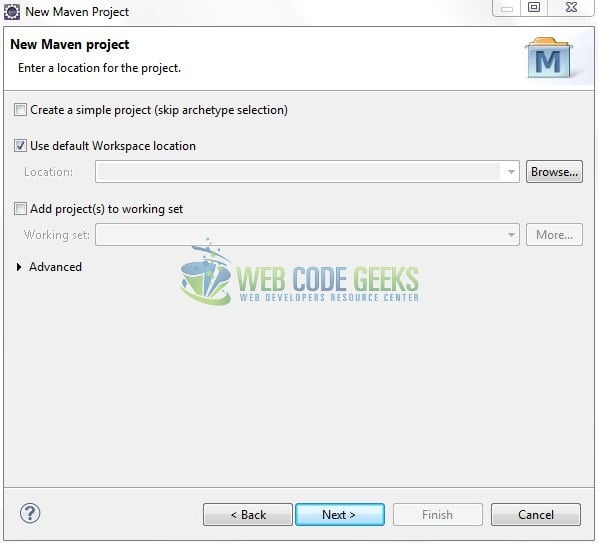
This section will show on how to create a Java-based Maven project with Eclipse. In Eclipse Ide, go to File -> New -> Maven Project.

In the New Maven Project window, it will ask you to select project location. By default, ‘Use default workspace location’ will be selected. Just click on next button to proceed.
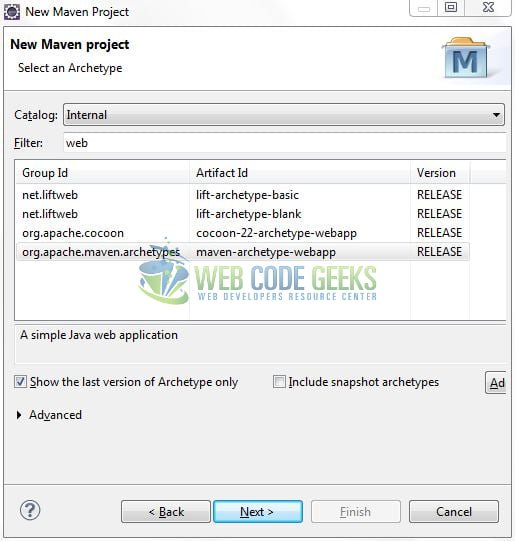
Select the ‘Maven Web App’ Archetype from the list of options and click next.
It will ask you to ‘Enter the group and the artifact id for the project’. We will input the details as shown in the below image. The version number will be by default: 0.0.1-SNAPSHOT.
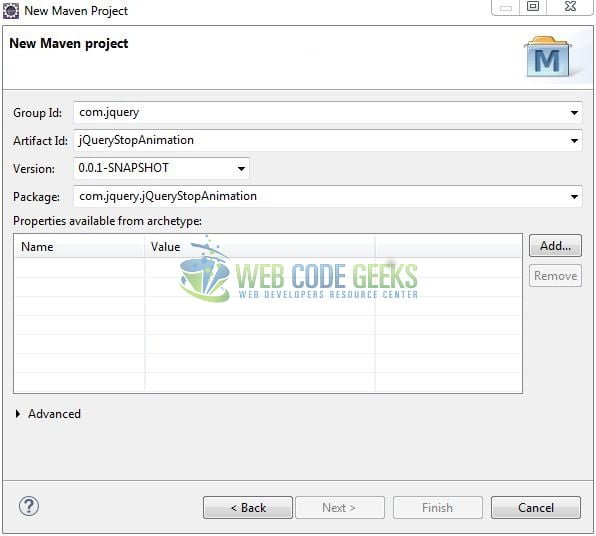
Click on Finish and the creation of a maven project is completed. If you see, it has downloaded the maven dependencies and a pom.xml file will be created. It will have the following code:
pom.xml
<project xmlns="http://maven.apache.org/POM/4.0.0" xmlns:xsi="http://www.w3.org/2001/XMLSchema-instance" xsi:schemaLocation="http://maven.apache.org/POM/4.0.0 http://maven.apache.org/xsd/maven-4.0.0.xsd">
	<modelVersion>4.0.0</modelVersion>
	<groupId>com.jquery</groupId>
	<artifactId>jQueryStopAnimation</artifactId>
	<version>0.0.1-SNAPSHOT</version>
	<packaging>war</packaging>
</project>
Let’s start building the application!
3. Application Building
Let’s create an application to understand the basic building blocks of this tutorial.
3.1 Load the jQuery Library
Since it is a pure JavaScript framework, so developers should add its reference using the <script> tag.
<script type="text/javascript" src="resource/js/jquery-3.3.1.min.js"></script>
Developers can either download the jQuery from the official website and the application will then directly load the jQuery library from the local drive or they can also include the direct CDN link under the script tag.
3.2 Define the Application
Next, we will define the sample application using the HTML tags.
<!------ jQuery stop() Animation Example ------>
<button id="start" type="submit" class="btn btn-success">Start</button>
<span id="space"></span>
<button id="stop" type="submit" class="btn btn-danger">Stop</button>
<div> </div>

<div id="image">
	<img id="myImage" src="resource/images/mario.jpg" alt="Mario" height="125" />
</div>
3.3 Define a jQuery Function
In this step, we’ll demonstrate the jQuery stop() method. Here $() is the default syntax for the jQuery function and is used to define the jQuery part. $(document).ready method gets called when the document is loaded.
$(document).ready(function() {
	// Start animation
	$('#start').click(function() {
		$("#myImage").animate({left: "+=500px"}, 4500);
	});

	// Stop animation
	$('#stop').click(function() {
	  $("#myImage").stop();
	});
});
3.4 First jQuery Application
Complete all the above steps and save the file. Let’s see the sample code snippet.
index.jsp
<%@ page language="java" contentType="text/html; charset=ISO-8859-1" pageEncoding="ISO-8859-1" %>
<!DOCTYPE html PUBLIC "-//W3C//DTD HTML 4.01 Transitional//EN" "http://www.w3.org/TR/html4/loose.dtd">
<html>
	<head>
		<title>IndexPage</title>
	    <meta http-equiv="Content-Type" content="text/html; charset=ISO-8859-1">

	    <link rel="stylesheet" type="text/css" href="https://maxcdn.bootstrapcdn.com/bootstrap/4.1.3/css/bootstrap.min.css">
	    <link rel="stylesheet" type="text/css" href="resource/css/mystyle.css">

	    <script type="text/javascript" src="resource/js/jquery-3.3.1.min.js"></script>
	    <script type="text/javascript">
	        $(document).ready(function() {
	        	// Start animation
		        $('#start').click(function() {
		        	$("#myImage").animate({left: "+=500px"}, 4500);
		        });

		     	// Stop animation
		        $('#stop').click(function() {
		          $("#myImage").stop();
		        });
	        });
	    </script>
	</head>
	<body>
	    <div class="container">
	    	<h2 align="center" class="text-primary">jQuery stop() Animation Example</h2><hr />
	    	<div> </div>

	    	<!------ jQuery stop() Animation Example ------>
	        <button id="start" type="submit" class="btn btn-success">Start</button>
	        <span id="space"></span>
	        <button id="stop" type="submit" class="btn btn-danger">Stop</button>
	        <div> </div>

	        <div id="image">
	        	<img id="myImage" src="resource/images/mario.jpg" alt="Mario" height="125" />
	        </div>
	    </div>
	</body>
</html>
4. Run the Application
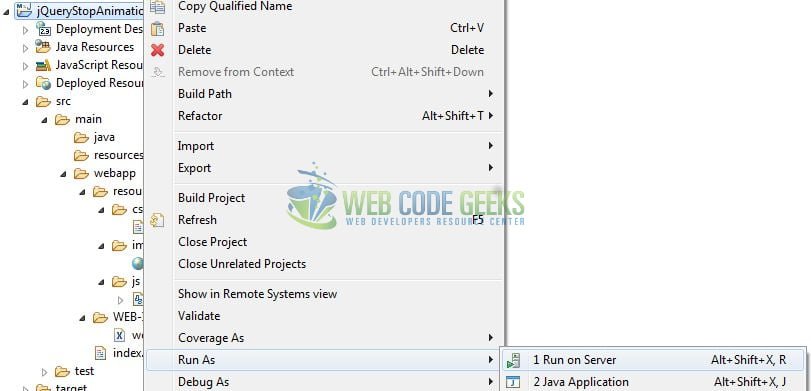
As we are ready for all the changes, let us compile the project and deploy the application on the Tomcat7 server. To deploy the application on Tomat7, right-click on the project and navigate to Run as -> Run on Server.
Tomcat will deploy the application in its web-apps folder and shall start its execution to deploy the project so that we can go ahead and test it in the browser.
5. Project Demo
Open your favorite browser and hit the following URL to display the application’s index page.
http://localhost:8082/jQueryStopAnimation/
Server name (localhost) and port (8082) may vary as per your Tomcat configuration.
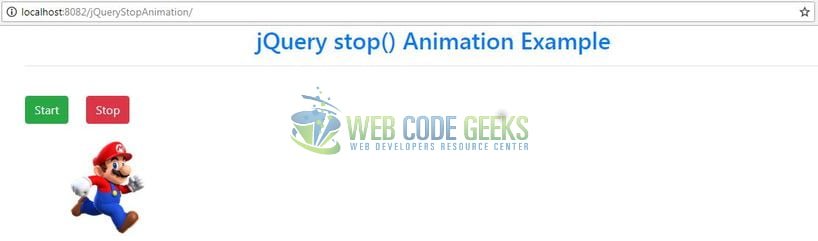
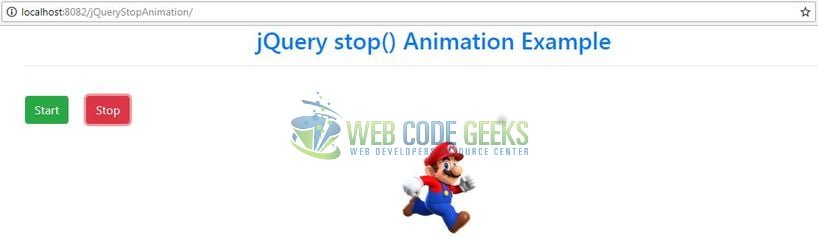
Users can click the Start button to start the animation and the Stop button to stop the animation as shown in Fig. 8.
That’s all for this tutorial and I hope the article served you whatever you were looking for. Happy Learning and don’t forget to share!
6. Conclusion
In this section, developers learned how to create a simple application with the jQuery library. Developers can download the sample application as an Eclipse project in the Downloads section.
7. Download the Eclipse Project
This was an example of jQuery stop() method for the beginners.
You can download the full source code of this example here: jQueryStopAnimation
