This tuorial is about socket programming in NodeJs. Here we will be using socket.io and express Js to create a sample chat application. Using socket.io library for websocket connection is very simple and it is a very powerful javascript library for realtime web applications.Here, we will be creating an application where there will be a server and a client communicating with each other over websocket.
What is Socket.io
Socket.IO is a JavaScript library that provides realtime, bi-directional communication between clients and server ober websocket protocol. It has both client and server included in itself. The client side runs on browser whereas the server side requires NodeJs to run but it does not really require to have a deep knowledge of NodeJs to get started. Just include the socket.io library at server and client side and write few lines to emit and listen the different events raised by the library.
Environment Setup
First of all it is required to have Node JS and NPM installed on your machine. You can visit the Node Js official website to download and install it or follow this link to set up on your local machine.Now once this setup is done we can install express and socket.io library in our machine to get started.Express Js is a lightweight, open source framework for Node Js. Similarly, npm is a package manager for the JavaScript programming language. It is the default package manager for Node.js.
Now let’s create our chat application. Execute following commands to create a blank project and include all the required dependencies such as socket.io and express required for our project.
C:\D\workspaces\node>mkdir chat-app
C:\D\workspaces\node>cd chat-app
C:\D\workspaces\node\chat-app>npm init
C:\D\workspaces\node\chat-app>npm install socket.io express --save
npm install socket.io --save
Node Js Express App
Now we will create a sample node app using express to serve a static .html file.Import the project in your favourite IDE and add a file name index.js add following lines in it.
var app = require('express')();
var http = require('http').Server(app);

app.get('/', function(req, res){
  res.send('<h1>Hello world</h1>');
});

http.listen(3000, function(){
  console.log('listening on *:3000');
});
Above code will initialise express and create a server that is listening on port 3000 and for a request at localhost:3000 Hello world will be served.
Now let us modify the code to serve a html.Create chat.html and add following lines to it.
<body>
<ul id="messages"></ul>
<form action="">
    <input id="m" autocomplete="off" /><button>Send</button>
</form>
</body>
This will create a simple form to enter message in the client side.
Integrating Socket.io
Now add following lines in index.js which will initialize a new instance of socket.io by passing the http object.
var io = require('socket.io')(http);Whenever a client gets connected to a socket a connection event is raised and following code will listen to this event and logs the event for every new connection.
io.on('connection', function(socket){
  console.log('a user connected');
});
Now let us integrate socket in the client side. Add following lines in chat.html before the tag. It will expose a global variable io and connect to the host that serves the page.Once a client gets connected in the browser, connect event is triggered and on a successful connection in the client side, client emits an event – joined which has a callback to send data to the server. And the server that is listening for the event – joined will receive the same data.
chat.html
<script src="/socket.io/socket.io.js"></script>
<script>
  var socket = io();
  socket.on('connect', function(data) {
    socket.emit('joined', 'Hello World from client');
 });
</script>
index.js
io.on('connection', function(socket){
    console.log('a user connected');
    socket.on('joined', function(data) {
        console.log(data);
    });
});
Now, once server finds that a new client has joined it will acknowledge the same to the client.
index.js
socket.on('joined', function(data) {
        console.log(data);
		socket.emit('acknowledge', 'Acknowledged');
    });
chat.html
socket.on('acknowledge', function(data) {
alert(data);
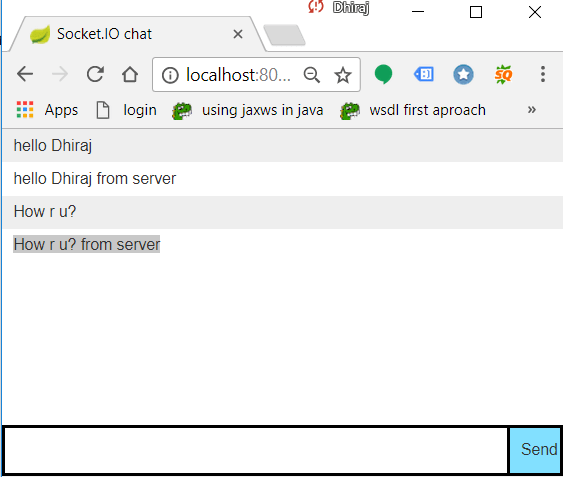
});This completes the initial binding between client and server.Now let us make provision for the chat between client and server.Whenever a client enters any message in the text box and hits enter, chat message event will be raised by the client and the server is listening to the same event. Whenever server finds any event with chat message, it will append ‘from server ‘ in the message and emit ‘response message’ and the client will be listening to this event again and accordingly the chat window will be updated.
chat.html
$('form').submit(function(){
      socket.emit('chat message', $('#m').val());
      $('#m').val('');
      return false;
    });
  });
index.js
socket.on('chat message', function(msg){
        console.log('message: ' + msg);
    });
Broadcasting Message
Above configuration will enable chat between a client and a server. We can also broadcast a same message to all the connected clients. For this purpose, we have broadcast flag.
index.js
socket.broadcast.emit('response message', msg + ' from server');Conclusion
I hope this article served you that you were looking for. If you have anything that you want to add or share then please share it below in the comment section.You can download the source code from github.
| Published on Web Code Geeks with permission by Dhiraj Ray, partner at our WCG program. See the original article here: Node Js Chat Socket IO Example(Client + Server) Opinions expressed by Web Code Geeks contributors are their own. |
