Drawing my short series to a close (we’ve talked about testing code examples in documentation and automating spelling and grammar checks in documentation), let’s cover one of the hardest elements of documentation to create and keep up to date: screenshots.
If you have an application with an interface, then screenshots are a great way to show users important components and concepts. However, ensuring that they are current, and thus useful, is a time-consuming task. Wouldn’t it be great if you could automate this task? Good news! I’m going to show you how.t
Screenshotting Services
I typically prefer to assemble a string of open-source tools, but if you would like to use a commercial service, there are plenty available as a quick search will confirm.
If you are an Android or iOS developer, I also recommend Fastlane. Among other features, it includes screenshot generation with the ‘snapshot‘ tool for iOS and ‘screengrab‘ for Android. Fastlane maintains a suite of other tools that you can integrate with CI systems or run locally. As app store customers will often use screenshots to select apps they want to download, these tools will save you hours of time. Now, as part of Twitter fabric, they are free to use.
Python-powered Robots
Much like my last post, the Python community again has some of the best examples of automating documentation. The Plone project generates screenshots of their interface on every build, ensuring up-to-date documentation. If you dig through the codebase, you will see that the setup for each screenshot example is reasonably simple.
Take this example from the ‘changing the logo‘ page:
...
Since Plone 5 you can directly change the logo in the Site control panel. Just upload your custom logo image with the Site logo field.


.. figure:: ../_robot/change-logo-in-site-control-panel.png
   :alt: Change site logo image
   :align: center

.. code:: robotframework
   :class: hidden

   *** Keywords ***

   Highlight field
       [Arguments]  ${locator}
       Update element style  ${locator}  padding  0.5em
       Highlight  ${locator}

   *** Test Cases ***

   Take annotated screenshot
       Go to  ${PLONE_URL}/@@site-controlpanel
       Highlight field  css=#formfield-form-widgets-site_logo
       Capture and crop page screenshot
       ...    ${CURDIR}/../_robot/change-logo-in-site-control-panel.png
       ...    css=#content
       ...    css=#formfield-form-widgets-site_logo
This sets up the file name for the screenshot and defines a test to generate the screenshot, resulting in the documentation page here.
Great! But how you do you use this in your own projects? Plone is using the Robot framework, a test automation suite to generate the screenshots. It’s using it in a clever way, but you can draw inspiration from their implementation and figure out how to use components of it.
You can use Robot for other tasks, but I will focus purely on generating screenshots.
For this example, I will assume that I am responsible for the Codeship website. As part of my tests, I’ll create a test that will check for a valid login and take a screenshot. I will run these tests on the Codeship service.
Dependencies
I will use PhantomJS to generate the browser screenshots, so install that first. Steps depend on your platform.
You will need Python installed as the remaining dependencies are all Python packages. I have used [easy_install](http://setuptools.readthedocs.io/en/latest/easy_install.html), but you can also use pip.
easy_install robotframework
easy_install robotframework-selenium2library
Automate away
Create a screenshots folder and then a resource.robot resource file for variables and keywords that the testing scripts can reuse in other test files. Replace the login credentials with your own:
*** Settings ***
Documentation     A resource file with keywords and variables.
Library           Selenium2Library

*** Variables ***
${SERVER}         app.codeship.com
${BROWSER}        PhantomJS
${DELAY}          0
${USER}           username
${VALID USER}     login
${VALID PASSWORD}    password
${LOGIN URL}      https://${SERVER}/sessions/new
${PROJECTS URL}    https://${SERVER}/projects

*** Keywords ***
Open Browser To Login Page
    Open Browser    ${LOGIN URL}    ${BROWSER}
    Maximize Browser Window
    Set Selenium Speed    ${DELAY}
    Login Page Should Be Open

Login Page Should Be Open
    Title Should Be    Hosted Continuous Delivery for free | The Codeship.

Go To Login Page
    Go To    ${LOGIN URL}
    Login Page Should Be Open

Input Username
    [Arguments]    ${username}
    Input Text    user_email    ${username}

Input Password
    [Arguments]    ${password}
    Input Text    user_password    ${password}

Submit Credentials
    Click Button    signin

Projects Page Should Be Open
    Location Should Be    ${PROJECTS URL}
    Title Should Be    Dashboard - ${USER}
And next, create a valid_login.robot file for the test. Thanks to the framework’s English-like ‘keywords‘, it’s moderately simple to understand what is going on with little experience. Most complexity comes from ordering steps and setup.
*** Settings ***
Documentation     A test suite with a single test for valid login.
Library           Selenium2Library
Resource          resource.robot

*** Test Cases ***
Valid Login
    Open Browser To Login Page
    Input Username    chriswhward@gmail.com
    Input Password    VO^kVza4#TkP
    Submit Credentials
    Projects Page Should Be Open
    [Teardown]    Close Browser
Nothing here is capturing screenshots. It opens the Codeship login screen, inputs valid credentials, and then checks to see if the projects page loaded.
If you now run the robot screenshots command on the folder, it will run the tests you configured, issue a command summary, and produce a log.html and report.html file that you can read in a browser.
Give me pictures already
Great, but I promised screenshots! There are two ways you can do this.
Add the Capture Page Screenshot keyword to valid_login.robot file and then rerun the tests:
Valid Login
Open Browser To Login Page
Input Username username
Input Password password
Submit Credentials
Projects Page Should Be Open
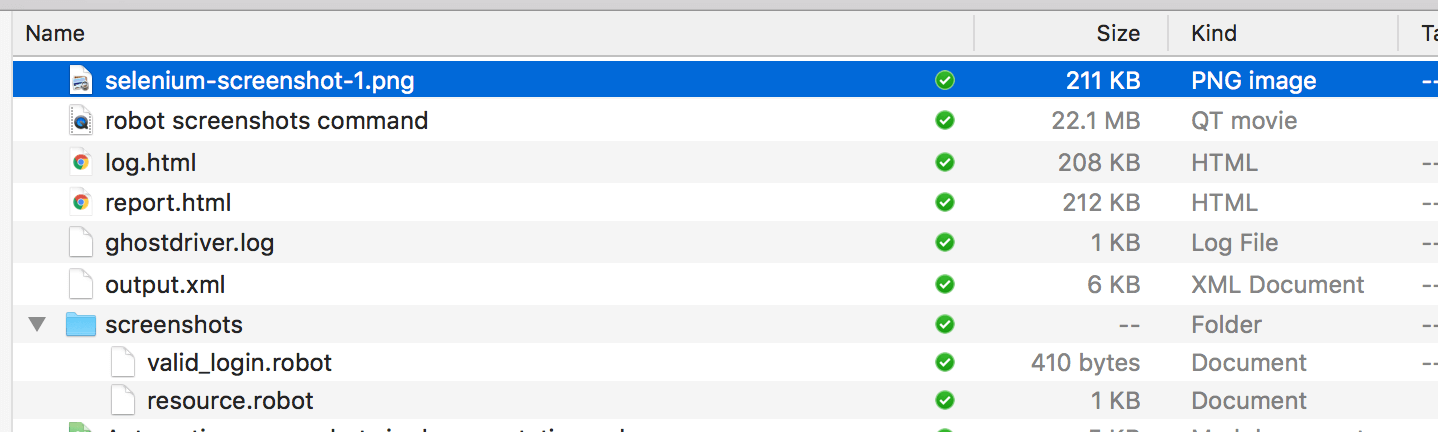
Capture Page Screenshot
[Teardown] Close BrowserYou will now find an autogenerated screenshot capture named selenium-screenshot-1.png, you can find more options for this command in its reference.
This whole screen capture may be enough for your needs, but there are other options. One is using the ‘Screenshot‘ library that is also part of the Robot framework. It offers flexibility, but needs configuration, or it will take a photo of the screen you have open, not necessarily what you want a screenshot of. On a CI server, this may not be a problem, but when run locally, it will be your terminal window.
Another option is the robotframework-selenium2screenshots library. Install it and its dependencies with:
easy_install image
easy_install robotframework-selenium2screenshots
Add the library to the valid_logins.robot file:
...
Library           Selenium2Screenshots
...
Take a screenshot of the login form by specifying its CSS selector:
*** Test Cases ***
Valid Login
    Open Browser To Login Page
    Capture and crop page screenshot  login_page.png
    ...    css=.Session
...
Run robot screenshots again, and you’ll have a more specific screenshot.
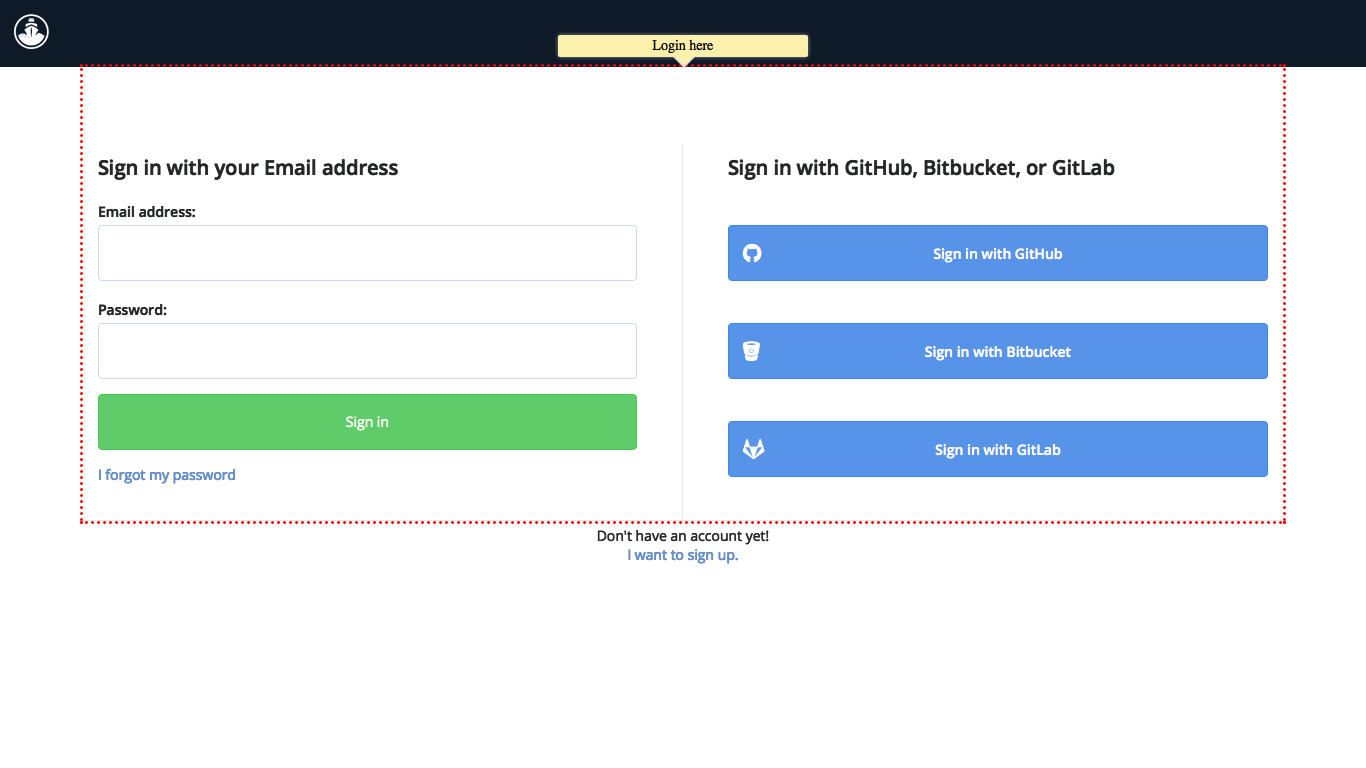
There’s a lot more you can do. What about annotating a screenshot? Try this:
...
*** Test Cases ***
Valid Login
    Open Browser To Login Page
    Bootstrap jQuery
    Highlight form  css=.Session
    ${note1} =  Add pointy note
    ...    css=.Session
    ...    Login here
    ...    width=250  position=top
    Capture and crop page screenshot  login_page.png
    ...    form   ${note1}
...
This bootstraps JQuery, needed for selecting page elements, adds a text note, and then captures a screenshot with that note.
And there’s more you can configure too. Read the documentation for more details.
Hooking It Up to a CI
Fantastic, let’s hook this up to Codeship.
Create a new project, set the language to ‘Python’, and add the following commands:
pip install -r requirements.txt
Move the dependencies to a requirements.txt file:
robotframework
robotframework-selenium2library
image
robotframework-selenium2screenshots
You don’t need to install PhantomJS as it’s already installed on Codeship.
And in the test commands box, add the robot command to trigger the tests defined in the repository. By default Codeship clones the repository into a folder named clone:
robot clone
Trigger a build and you should see similar results to a local run. That’s it! Automated screenshots generated every time you push to a repository, available for inclusion in your documentation and always up to date.
| Reference: | Automating Screenshots in Documentation from our WCG partner Chris Ward at the Codeship Blog blog. |
