Flutter has been creating waves in the app development space since its launch. The reason is simple, it solves the problem of creating two different codebases for a single app to run on Android and iOS devices. Some experts say that Flutter which was launched by Google is to counter React Native which is used by Facebook. Nevertheless, this is a much-needed relief for enterprises as Flutter will help them save a lot of their time and resources. So let’s first understand what is Flutter.
What is Flutter
Flutter is an opensource mobile UI framework that can create Android and iOS apps from a single codebase. The Flutter framework includes the Flutter engine, Dart platform, the Foundation library, and design-specific widgets. Flutter apps are written in Dart programming language and runs on dart virtual machine.
How to Create a Flutter App
Before we start the process of app development it is important to know that there are two types of widgets, stateless and stateful. A stateless widget describes part of the UI by building a structure of other widgets that describe the UI more definitive. Stateful widgets are the widgets that can change their state multiple times and can be redrawn on to the screen any number of times while the app is in action.
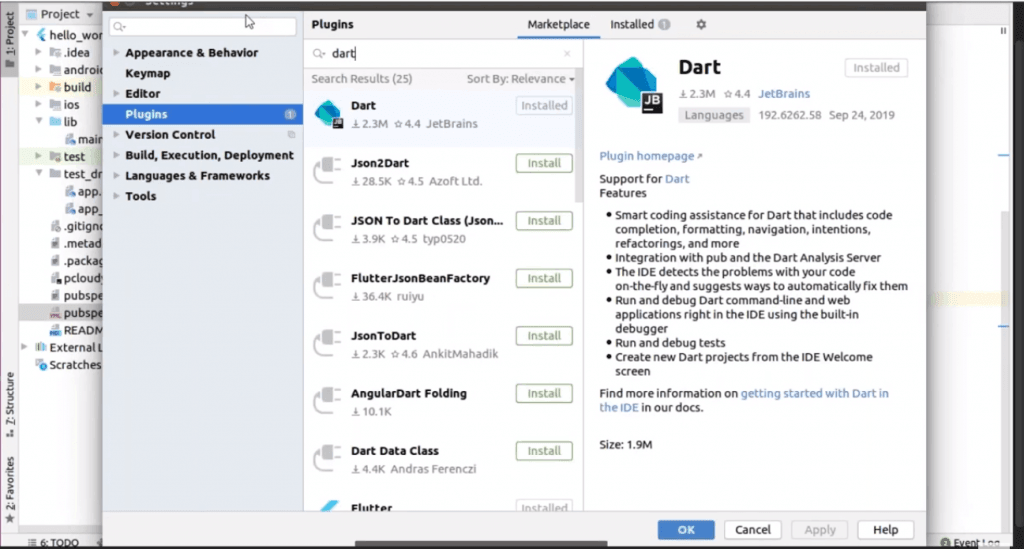
To create a Flutter app you need to install Flutter SDK and other tools required to support the framework. We will create the app in Intelli J IDE and for that, you need to install two plugins. The first one is Dart and the second plugin is Flutter. You can install the plugins by clicking on File in the menu bar of the IDE and then click on Settings.
Then you need to create a new project and you will get a basic code layout to start with your app development. In the first line, we have the main method where we will enable the flutter driver extension and there is a run app method with MyApp class instance, to run the app.
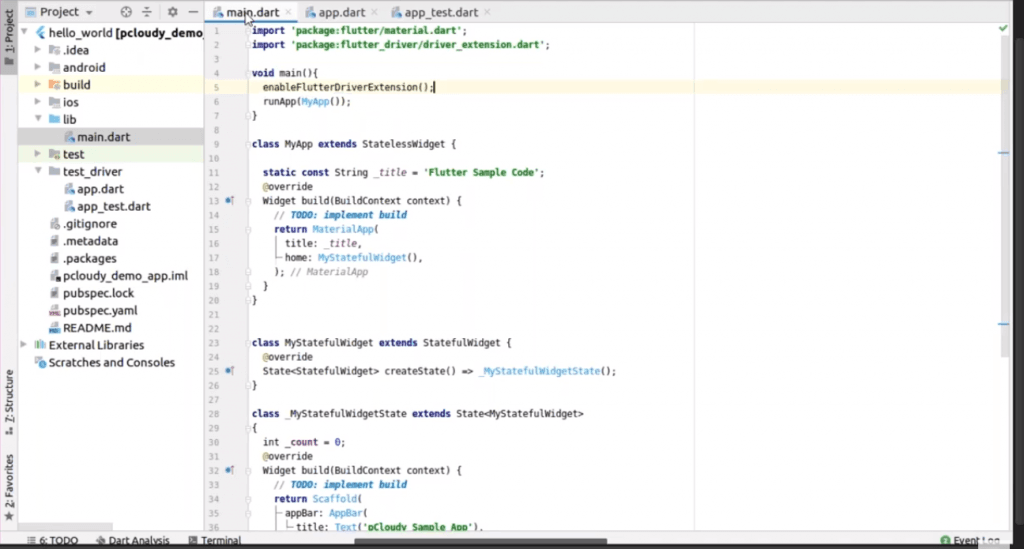
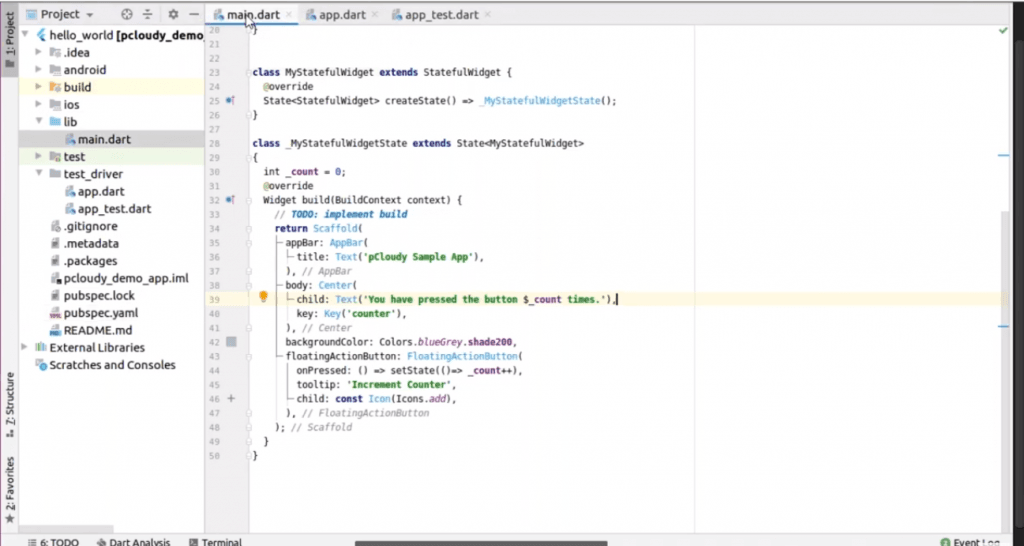
In this sample code, we have used the title as the stateless widget and we have set the title as the key and for the home screen, we are using one more instance which is MyStatefulWidget(). So in this class, we have a small piece of code, where we have set values for elements like appBar, background color, and in the body, we have placed a floating action button for a counter.
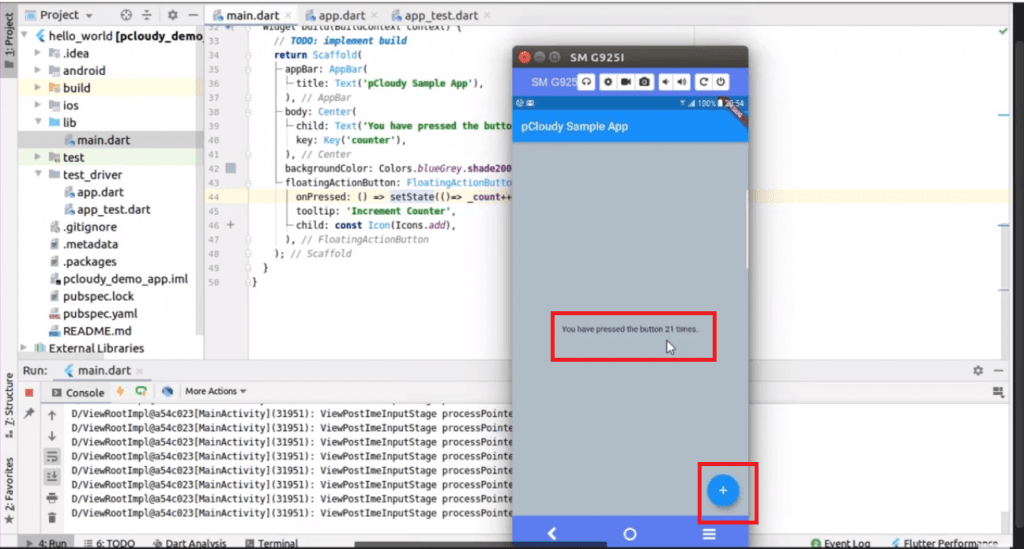
After adding the code you can run the program and you will be able to see the changed state of the counter with every click on the action button.
Appium Flutter Driver
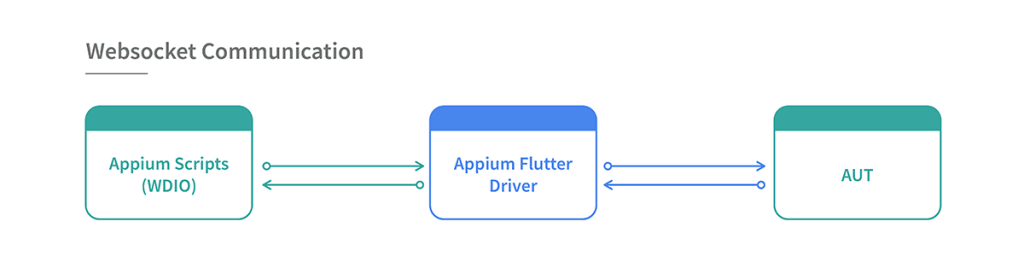
Appium Flutter driver is a test automation tool for flutter apps on multiple platforms. It is a part of the Appium mobile test automation tool. But how does the Appium Flutter driver work? It uses webSocket communication to carry WDIO script to instantiate the flutter driver and the request will be sent to the particular application. Then the AUT will send the response to the script through the Appium Flutter driver.
Appium Flutter driver
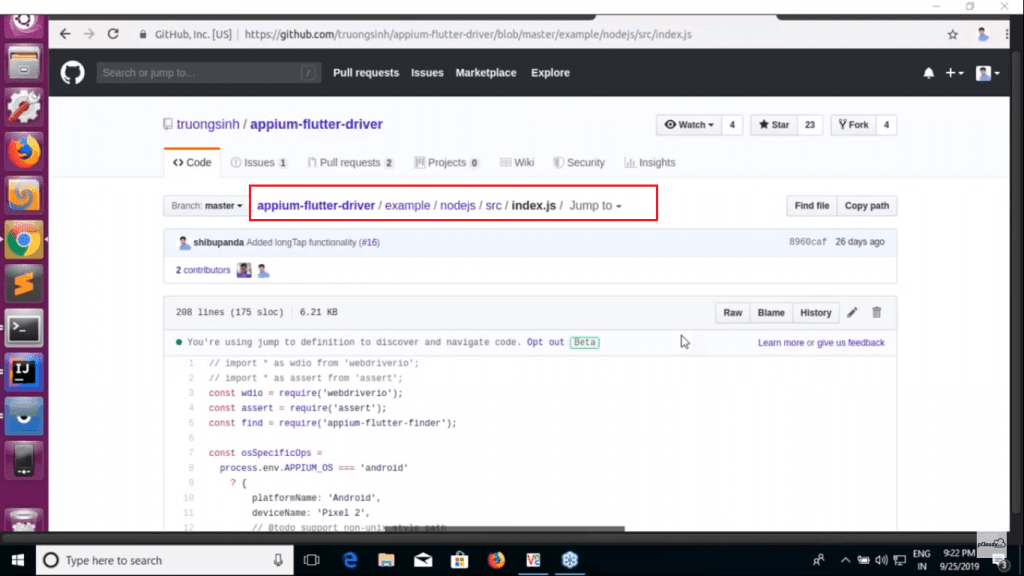
You can also build Appium in your machine through the source code. Once you have cloned the source code, run npm install then npm run built and type a command node to start the Appium server. You can download the package from GitHub. The package contains Appium Flutter Driver and Appium Flutter Finder. You can clone the sample project to get the WDIO code.
In the terminal, you can see that to automate flutter application we have used Flutter as an automation name for both Android and iOS apps. You can see that port is 4723 and in the capabilities, we have mentioned osSpecificOps, automation name: ‘Flutter’. We have mentioned the app path at the top with the device name and platform name and we created an object.
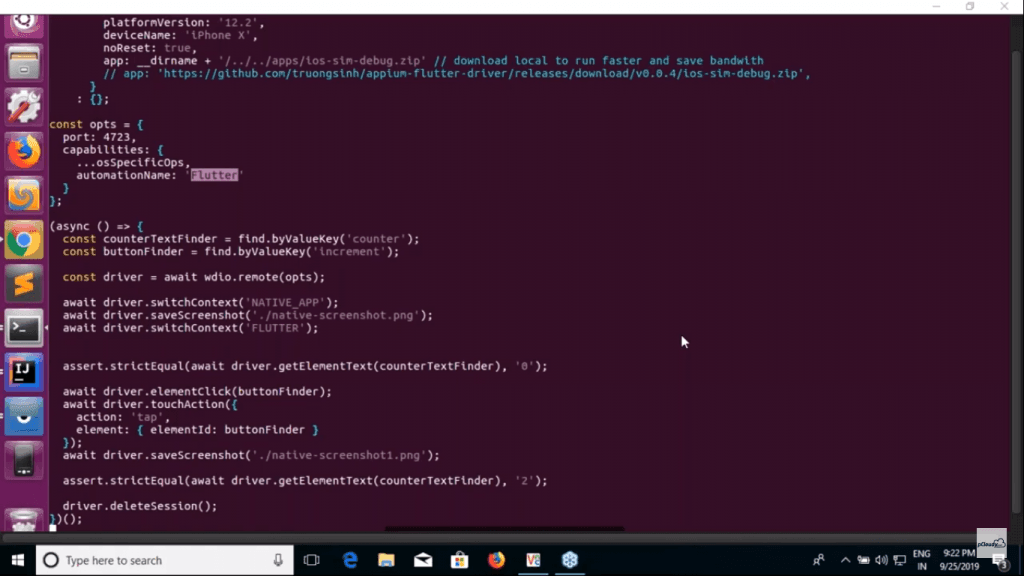
Appium==OS environment is ‘android’ which will pick all the information and specify in the capabilities and it will pass a post request to the server.
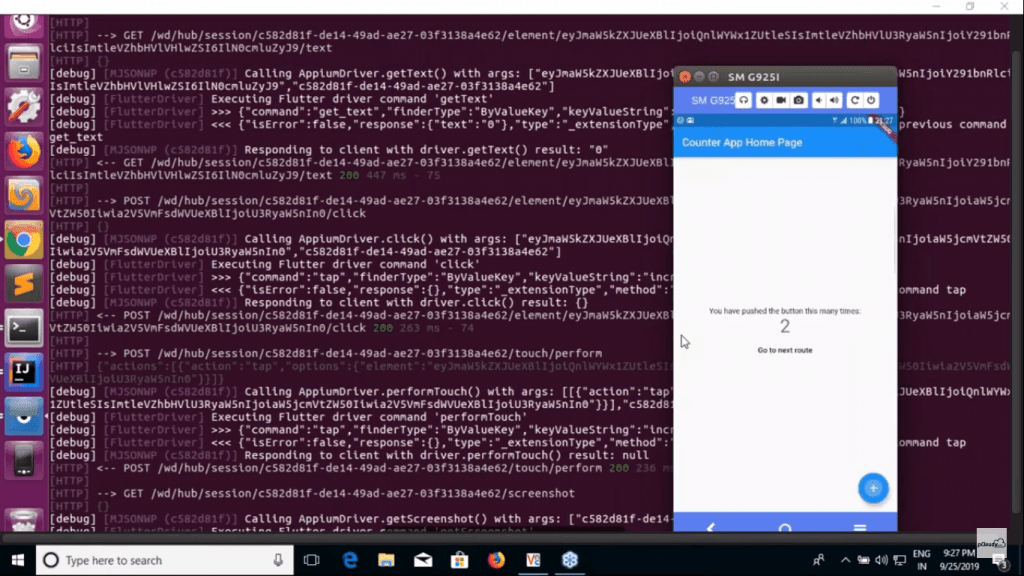
Now here we are trying to find the element using CounterTestFinder and a ButtonFinder to click on the button. In the next line, we have created a driver using a remote method.
Then we have switched the Native App context to Flutter. You can switch this if you are using the Flutter app. Once the app is launched, we are validating that the counter text finder has value as zero by calling Flutter APIs internally. So here we are using two actions, one is clicking and the other is touch.
The button is to be clicked two times and thus we have used strictEqual function. In the last line of code, we are deleting the session.
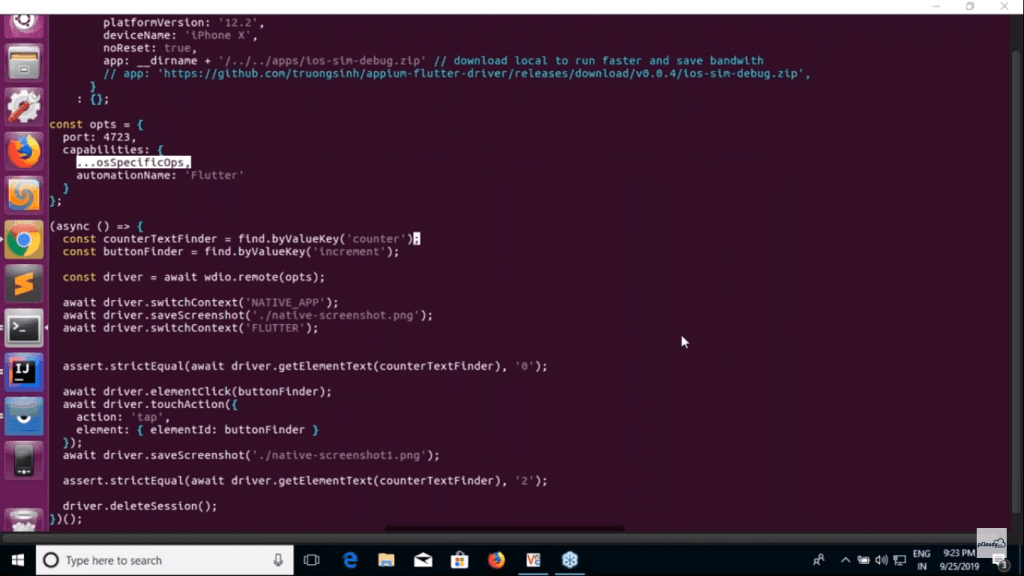
Now to run the test we need to pass the environment variable to connect the device.
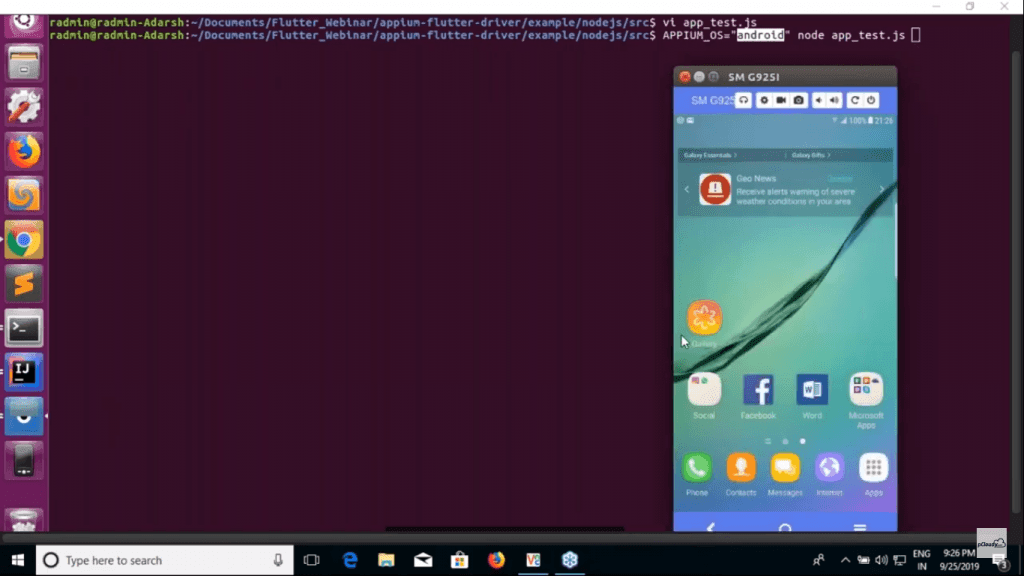
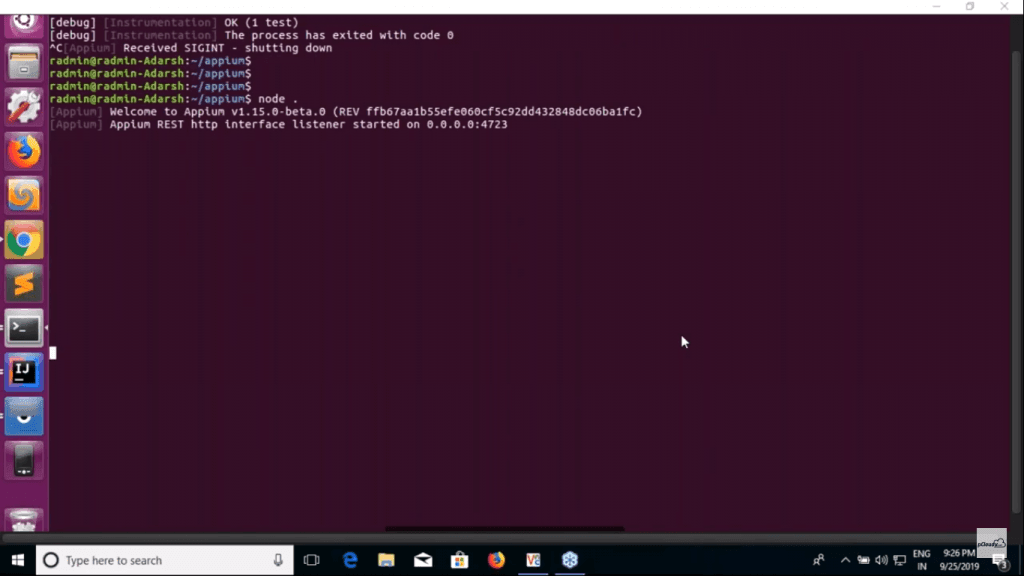
Then we will check if our Appium server is running.
Then once you run the code you will be able to see the actions performed on the device and the counter will change to two.
This is how you can automate your Android and iOS app testing using Appium Flutter driver. Although there are many benefits of using Flutter, there are some limitations as well. The first thing is that you need to learn Dart language to develop and automate the Flutter app.
Suppose you need to run automated tests on multiple devices, then you will have to fire multiple commands in the terminal. Appium flutter driver depends on Flutter Driver APIs and as it’s still not matured enough, some actions cannot be performed.
|
Published on Web Code Geeks with permission by Balamurugan, partner at our WCG program. See the original article here: Flutter App Automation Using Appium Flutter Driver Opinions expressed by Web Code Geeks contributors are their own. |
