HashiCorp is a company that feels like it’s always been around. Quietly plugging away just out of the limelight working on awesome products and every now and then releasing something groundbreaking that you wondered how you worked without it. I attended a couple of meetups recently that covered HashiCorp tools and felt the time was ripe I dug into all they have to offer a CI workflow.
Vagrant
Before my writing career, I was an implementer of and contributor to Drupal. In a world of complex stacks consisting of different web servers, language versions, database servers, and dependencies, I heard the phrase “works on my machine” on a daily basis.
We compromised for years with tools like MAMP/WAMP and build scripts, then along came Vagrant and changed the paradigm forever. Suddenly we could start preconfigured virtual machines during development that directly mimicked production machines and share them among teams.
Other virtualization options have stolen Vagrant’s crown, but it still has a place in people’s hearts and workflows.
Installing
Install Vagrant from binaries, or if you use Mac OS, you can also use Homebrew cask.
Basic usage
To use Vagrant, you first need VirtualBox installed and then download a preexisting image (a “box”) from HashiCorp’s official library or from other third-party links you trust. By default, Vagrant will use VirtualBox to host your virtual machines, but you can use other providers.
The first command initializes a box by copying a Vagrantfile to your local machine that contains configuration information for the virtual machine. The second uses the Vagrantfile in the current directory to start a machine running in the provider you specify.
vagrant init ubuntu/xenial64
vagrant up --provider virtualbox
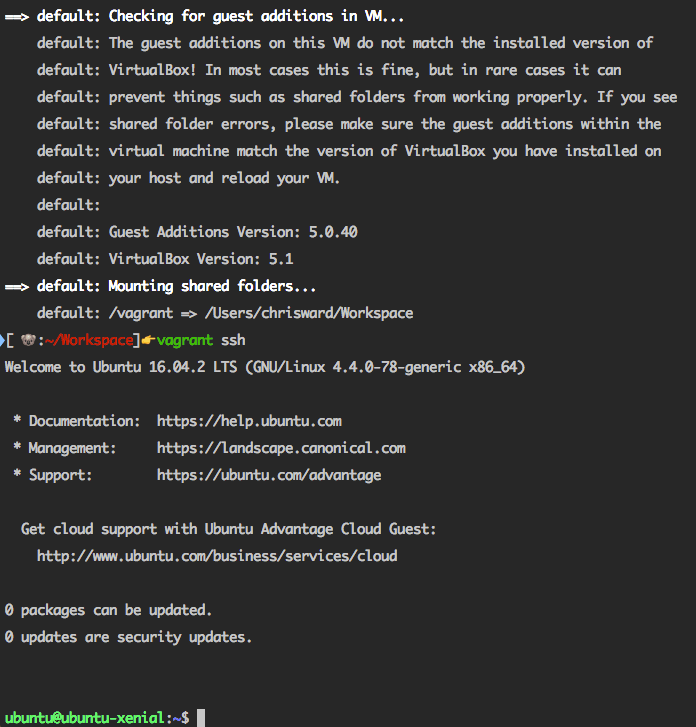
Next, SSH into the box with:
vagrant ssh
More information
Of course there’s a lot more to Vagrant than creating virtual machines and SSHing into them. For example, there are features such as file synchronization between the host and virtual machine, accessing services running on the box from your local machine, and a wide variety of configuration options you can set in the Vagrantfile to set box specifications, and more.
Read the project documentation for more details, or buy the official book if you’re into that sort of thing.
Packer
Packer is a part of HashiCorp’s Infrastructure as Code toolset, allowing you to create and automate the creation of machine images.
Installing
Install Packer from binaries, or you can use Homebrew on Mac OS and Chocolatey on Windows.
Basic usage
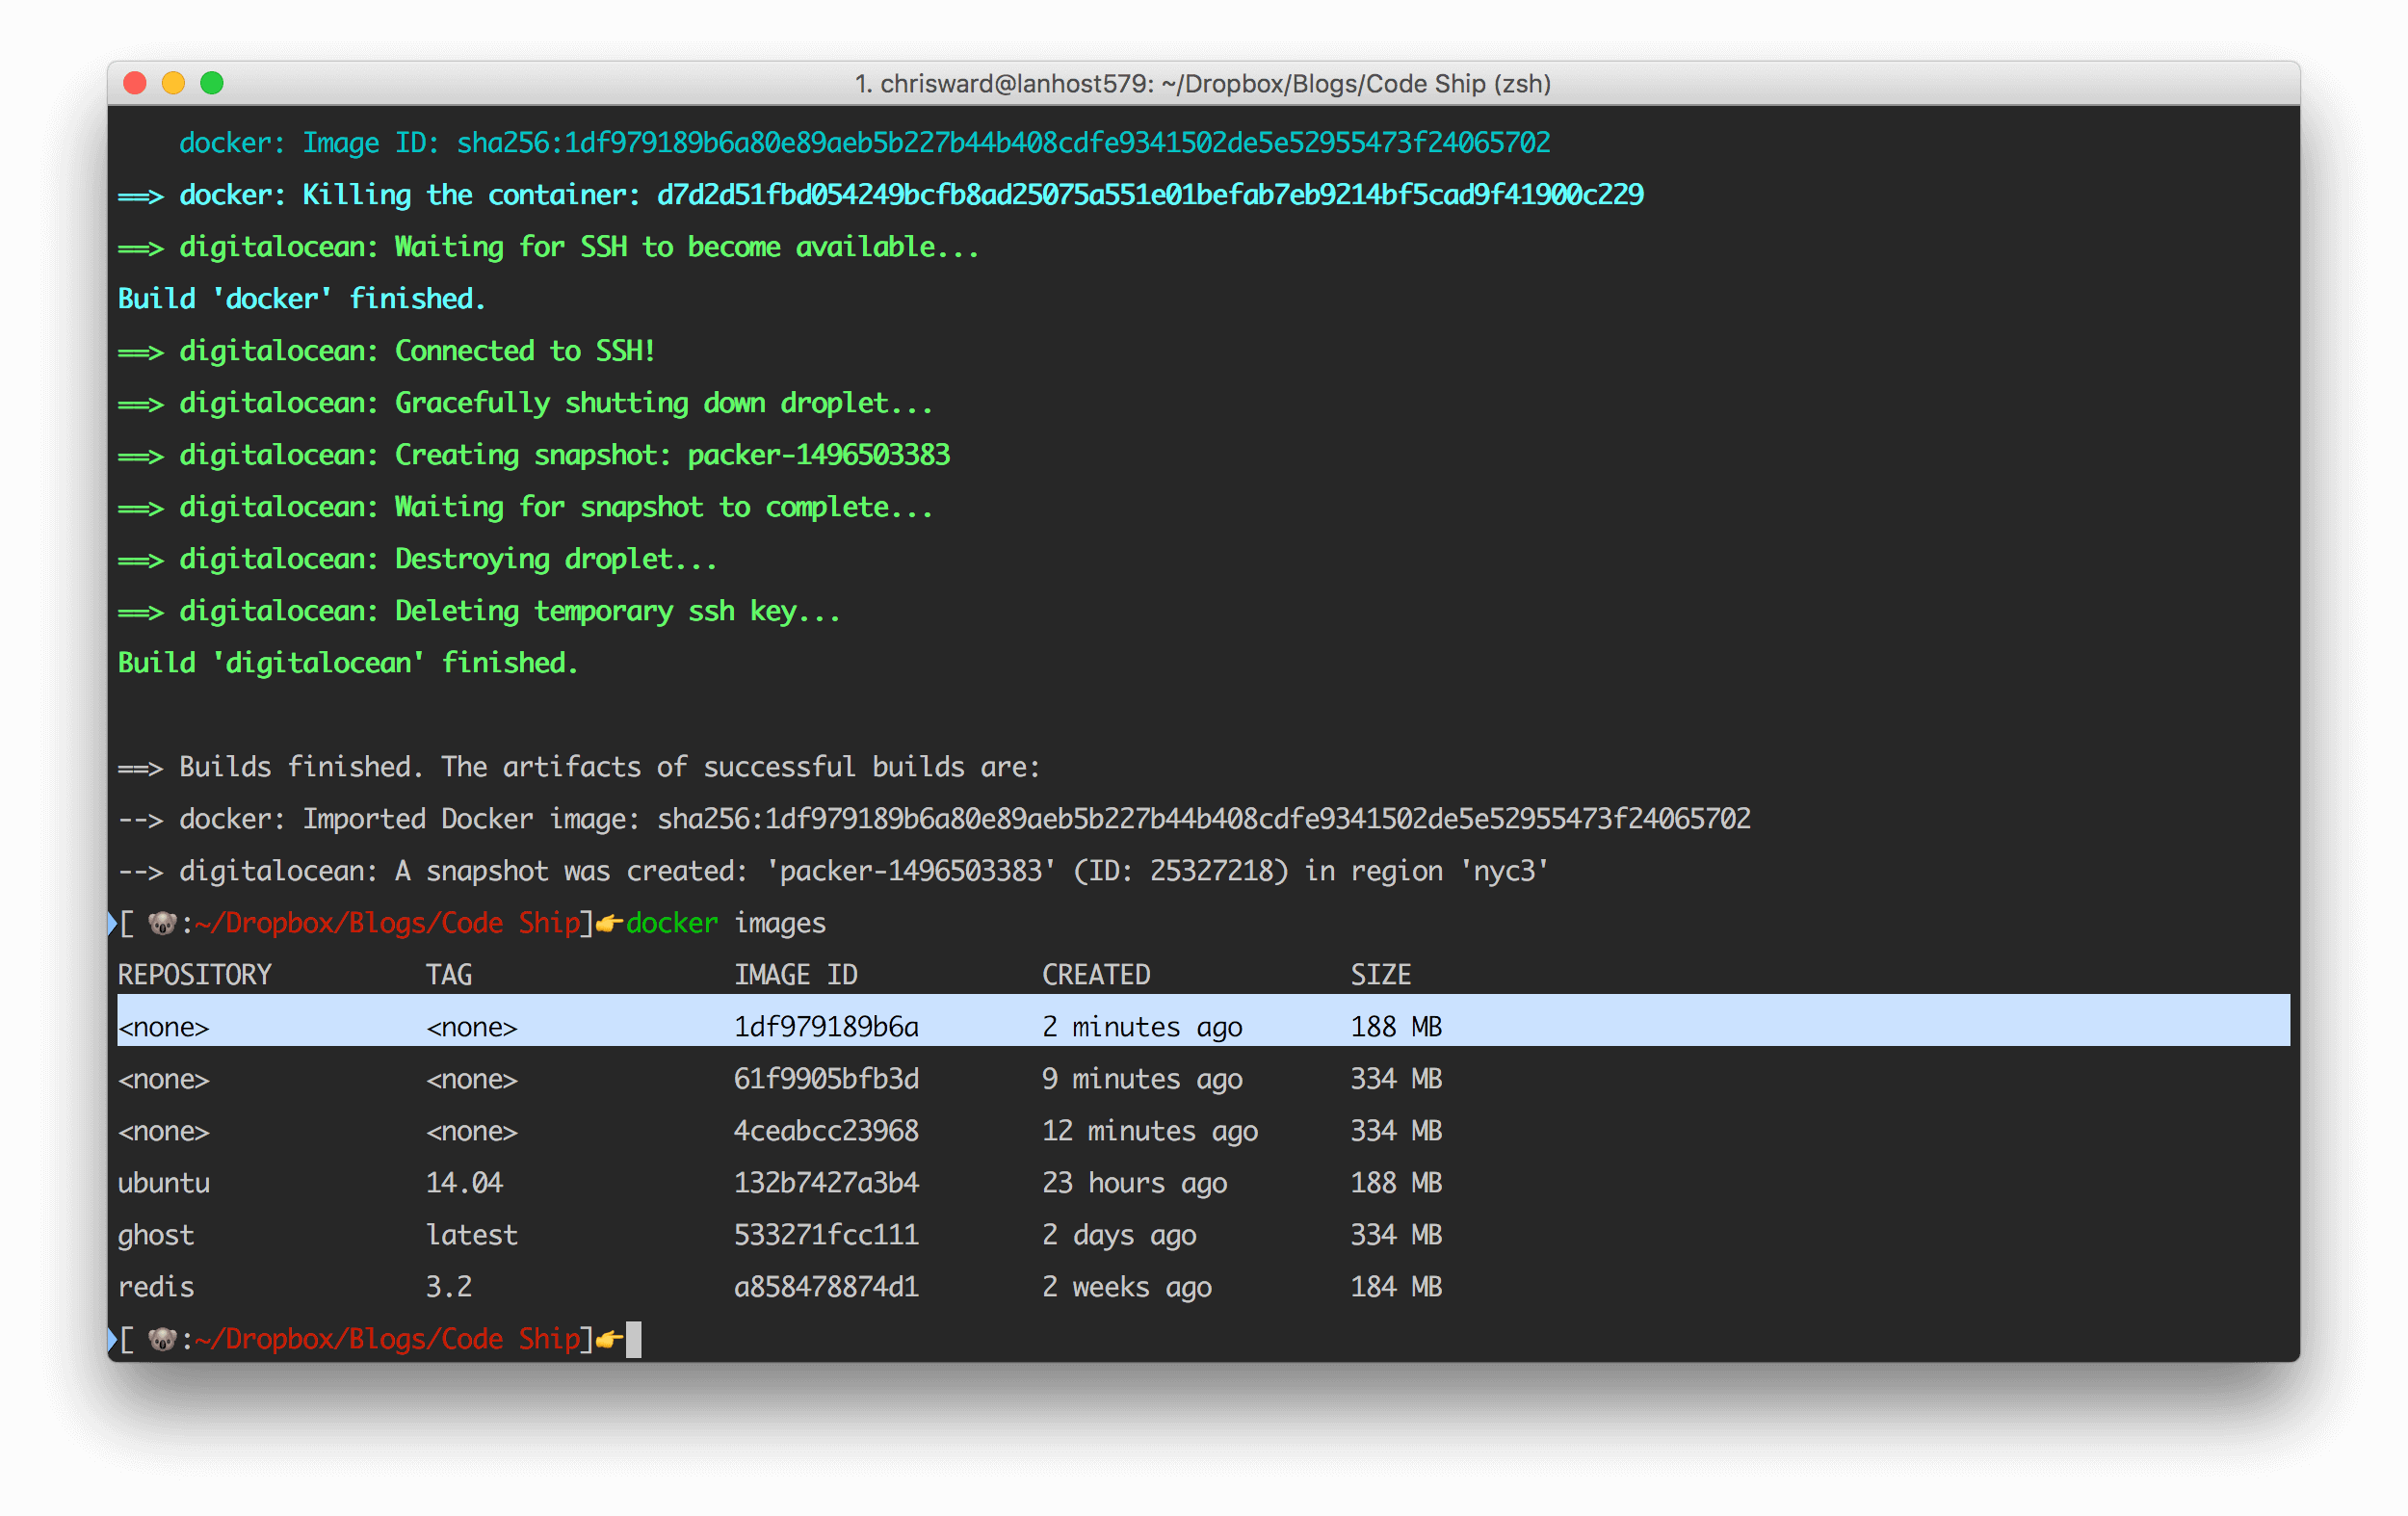
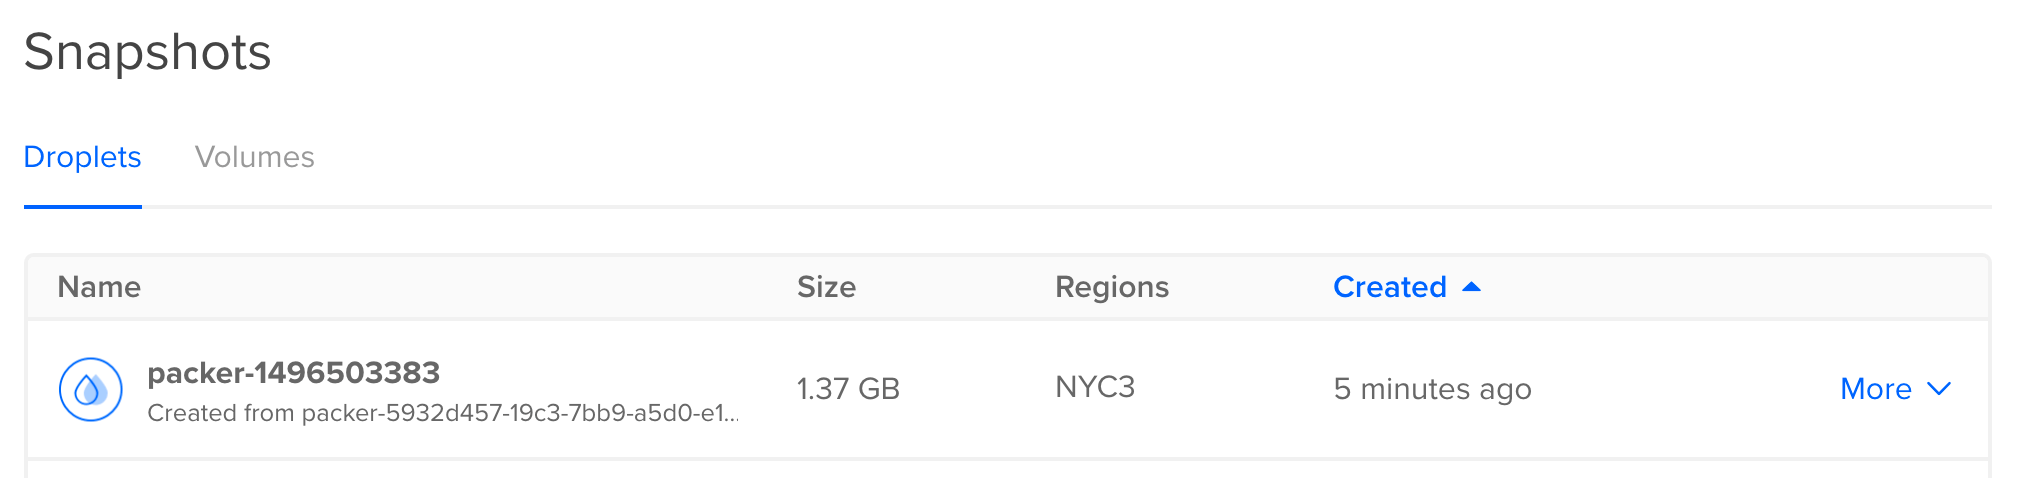
As Packer is designed for portability, a Getting Started guide is challenging. However, for an example, I will create a Docker image/container and Digital Ocean droplet for Ubuntu. Remember that the intention of Packer is to create a file that describes your requirements for any platform, so in theory one file contains the information needed for any platform.
{
  "builders": [{
    "type": "docker",
    "image": "ubuntu:14.04",
    "commit": true
  },
  {
    "type": "digitalocean",
    "api_token": "<TOKEN>",
    "image": "ubuntu-14-04-x64",
    "region": "nyc3",
    "size": "512mb",
    "ssh_username": "root"
  }
]
}
Run packer validate with the JSON file as a parameter to check if the file is valid, and then build with packer build:
packer validate ubuntu.json
packer build ubuntu.json
More information
Read more here about the builders available in Packer. If you want to know more about the format of template files, then read here. Read here if you want to know how to integrate Packer with other components of your DevOps tool chain.
Terraform
As application infrastructure becomes more complex, the number of tools and options to manage it has also increased, and around this, the concept of “infrastructure as code.” This principle allows those involved with DevOps to represent the desired configuration for an application stack in a series of text files and create entire infrastructure from those files.
Installing
Install Terraform from binaries, or you can use Homebrew on Mac OS.
Basic usage
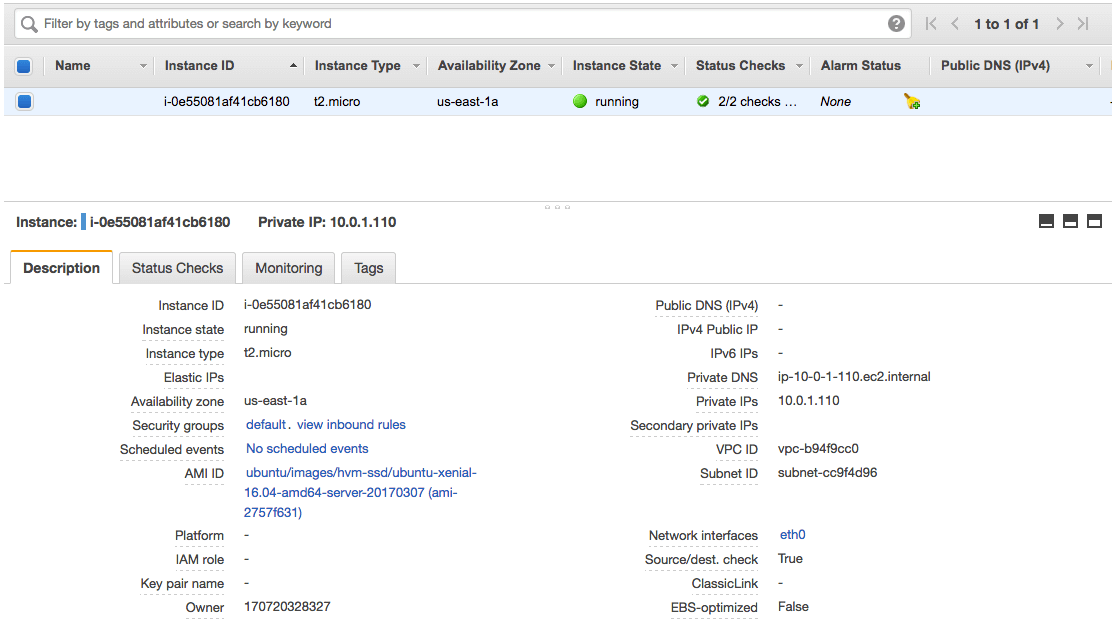
Create a new .tf file with the following that creates a provider and resource on Amazon Web Services:
provider "aws" {
  access_key = "AKIAJSXZHNQKLBRRI2LQ"
  secret_key = "696T3Ww/GMXBcBpYwSHp/6SfnAe0mEYOx3oHPflx"
  region     = "us-east-1"
}

resource "aws_instance" "example" {
  ami           = "ami-2757f631"
  instance_type = "t2.micro"
}
To test what Terraform will create, run terraform plan and then terraform apply if you’re happy with what you see. Authentication and setup steps for cloud hosts can vary wildly, but all being well you should now see the infrastructure you specified.
If you change or add to the properties of your infrastructure, then rerunning terraform plan and terraform apply will cause Terraform to destroy a current instance and create another to match the new requirements.
At the moment, you have a machine running an image but no software or applications on the image. If you combine Terraform with Packer, then you have your own images defined that handle this step for you. Otherwise, you use ‘provisioners‘ to perform local or remote commands, copy resources, and more. For example, to issue a simple (albeit useless) command, change the .tf file to:
...
resource "aws_instance" "example" {
  ami           = "ami-b374d5a5"
  instance_type = "t2.micro"

  provisioner "local-exec" {
    command = "echo 'Hello World' > greetings.txt"
  }
}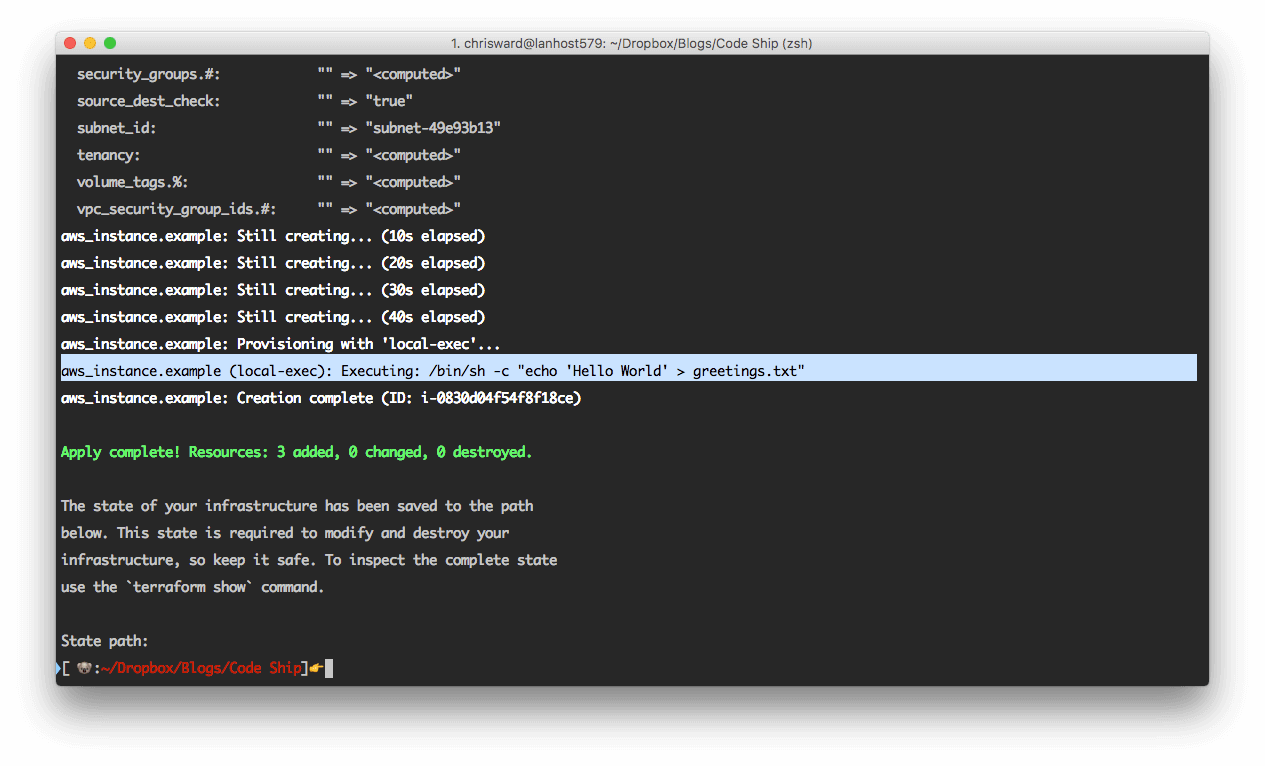
But provisioning, as the name suggests, applies only when you create an instance. To add provisioning steps, first use terraform destroy and then terraform apply.
More information
Terraform is one of Hashicorp’s most complex and potential-laden tools, so it requires careful planning and reading around what you need for your setup.
You probably want to use variables instead of hard-coding all the values you need. Terraform handles input and output variables, modularity, remote backends, and much, much more.
!Sign up for a free Codeship Account
Vault
In a similar vein to Docker Secrets, Vault helps you keep sensitive information like keys, passwords, and tokens out of your production code and repositories, and instead accessible through an API.
Installing
Install Vault from binaries, or you can use Homebrew on Mac OS.
Basic usage
Vault operates as a server/client model, with one server and multiple clients connecting to that server via CLI tools or an API. First start the Vault server. For testing purposes, start it in ‘dev’ mode.
vault server -dev
The output of this command will tell you to export VAULT_ADDR and note the values of Unseal Key and Root Token. Make sure you do in a new terminal and keep that new terminal open.
Write your first secret with the following:
vault write secret/bestblog value=codeship
And read back with:
vault read secret/bestblog
Whilst Vault has a CLI tool to store and access secrets, in reality, you will use its HTTP API, or client libraries from within your application, for example, to reproduce the same commands as above with HTTP calls:
curl \
  -H "X-Vault-Token: <TOKEN>" \
  -H "Content-Type: application/json" \
  -X POST \
  -d '{"value":"codeship"}' \
  http://127.0.0.1:8200/v1/secret/bestblog
curl \ -H "X-Vault-Token: <TOKEN>" \ -X GET \ http://127.0.0.1:8200/v1/secret/bestblog
Or using the Ruby library:
Vault.with_retries(Vault::HTTPConnectionError) do
  Vault.logical.write("secret/bestblog")
end
Vault.with_retries(Vault::HTTPConnectionError) do
Vault.logical.read("secret/bestblog")
endMore information
Vault offers more features such as adding Secrets backends (local and hosted), dynamic secrets (non-human generated), rotating (changing) secrets, and more.
Consul
Consul helps you tie together a lot of the services present in a microservice and container-based infrastructure by providing a service they can all communicate through to discover each other.
For example, many distributed systems rely on the ability to find other instances throughout the cluster. With many cloud hosting providers (especially if you have a mixed cloud infrastructure), this can be a challenge. Consul will help you provide a medium for this setup to work. You can also use Consul as a backend for other HashiCorp tools.
Installing
Install Consul from binaries, or you can use Homebrew on Mac OS.
Basic usage
Consul runs in either server or client mode. To prevent data loss, you are strongly encouraged to have more than one server running in a production environment. All other instances will run as clients, reporting to serve instances.
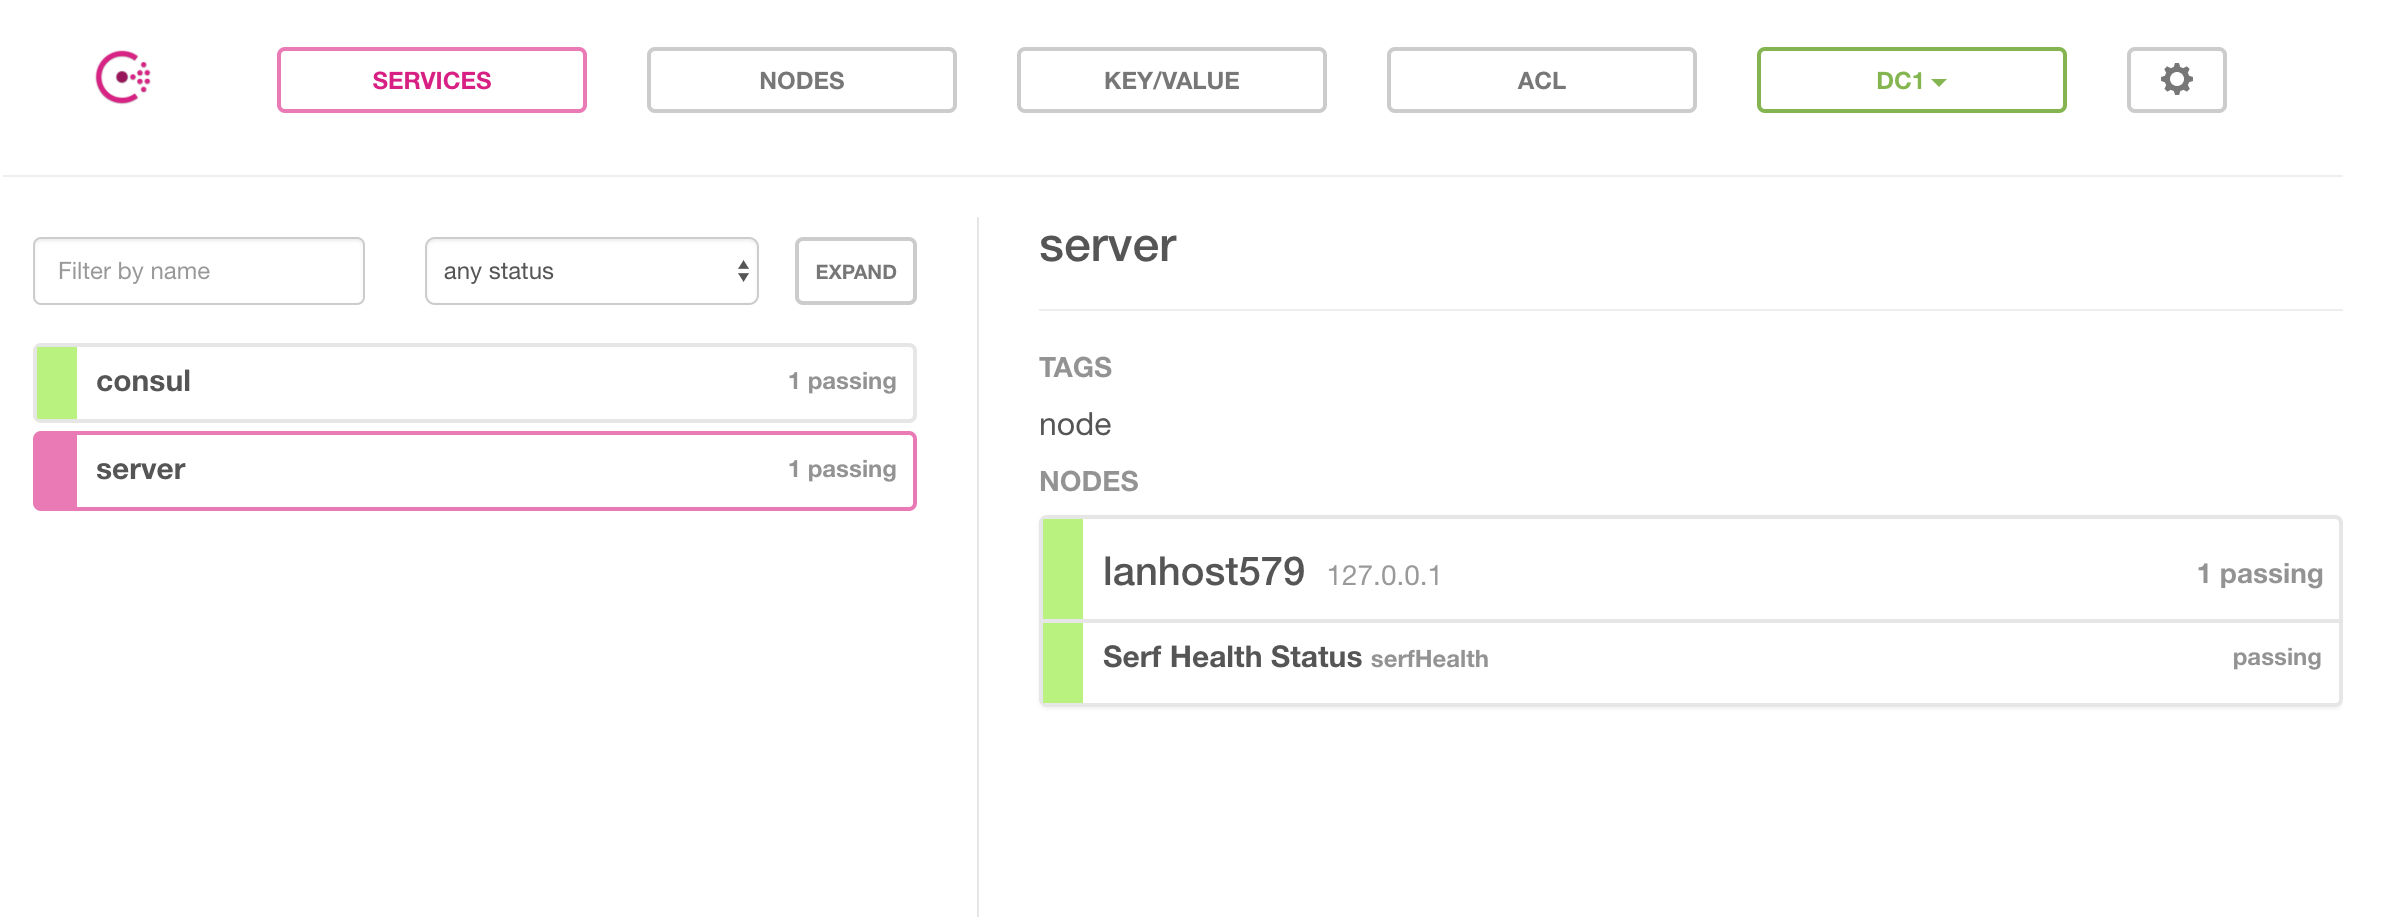
A Consul cluster registers and allows you to manage services. You then query these services with the DNS or HTTP API to ascertain their status. You create services by creating a service definition file (in JSON) or by using the HTTP API.
A service file looks like the following (the service name will be the file name, for example, server.json):
{
  "service":
  {
    "name": "server",
    "tags": ["node"],
    "port": 3000
  }
}
The easiest way to experiment and understand Consul is to run it in development mode. The mode won’t persist state, but will allow you to create a cluster on your local machine.
Start the server, setting the configuration directory. As you change the contents of this folder, the consul cluster will reflect changes automatically:
onsul agent -dev -config-dir=/etc/consul.d

Then to query a service, use the following endpoint with the name as a parameter:
curl http://localhost:8500/v1/catalog/service/server
Or with the DNS API:
dig @127.0.0.1 -p 8600 server.service.consul
Both of which will tell you details of the nodes running the service and basic details of it.
More information
If you want to try emulating a cluster for experimenting with Consul, try the Vagrant image for a cluster.
Consul has a basic but helpful web UI that you can start with the -ui parameter.
Consul is designed to allow you to create nodes. They will automatically define which role they will take on as the state of the cluster changes. If you want to manually define a node role or configure other parameters, dive into the agent options.
Want to know even more about configuring Consul? Then read through the guides section of the Consul documentation to learn about topics such as ACL, DNS, and cross data center federation.
Nomad
The final piece of the HashiCorp puzzle is Nomad. It helps you schedule virtual machines (containers, VMs, and application runtimes) across multiple cloud providers and operating systems. A scheduler lets you work in application-level abstract, defining what sort of infrastructure your application needs and letting the scheduler handle deployment, upgrades, and machine failures.
Installing
Nomad runs as an agent on each machine that is part of the cluster, and through it, you schedule the machines you want to run. Nomad is cross-platform but has the best driver support on Linux hosts. Install Nomad from binaries, or you can use Homebrew on Mac OS.
Basic usage
As with other tools in this article, there is a -dev mode that is ideal for starting a local test instance:
nomad agent -dev
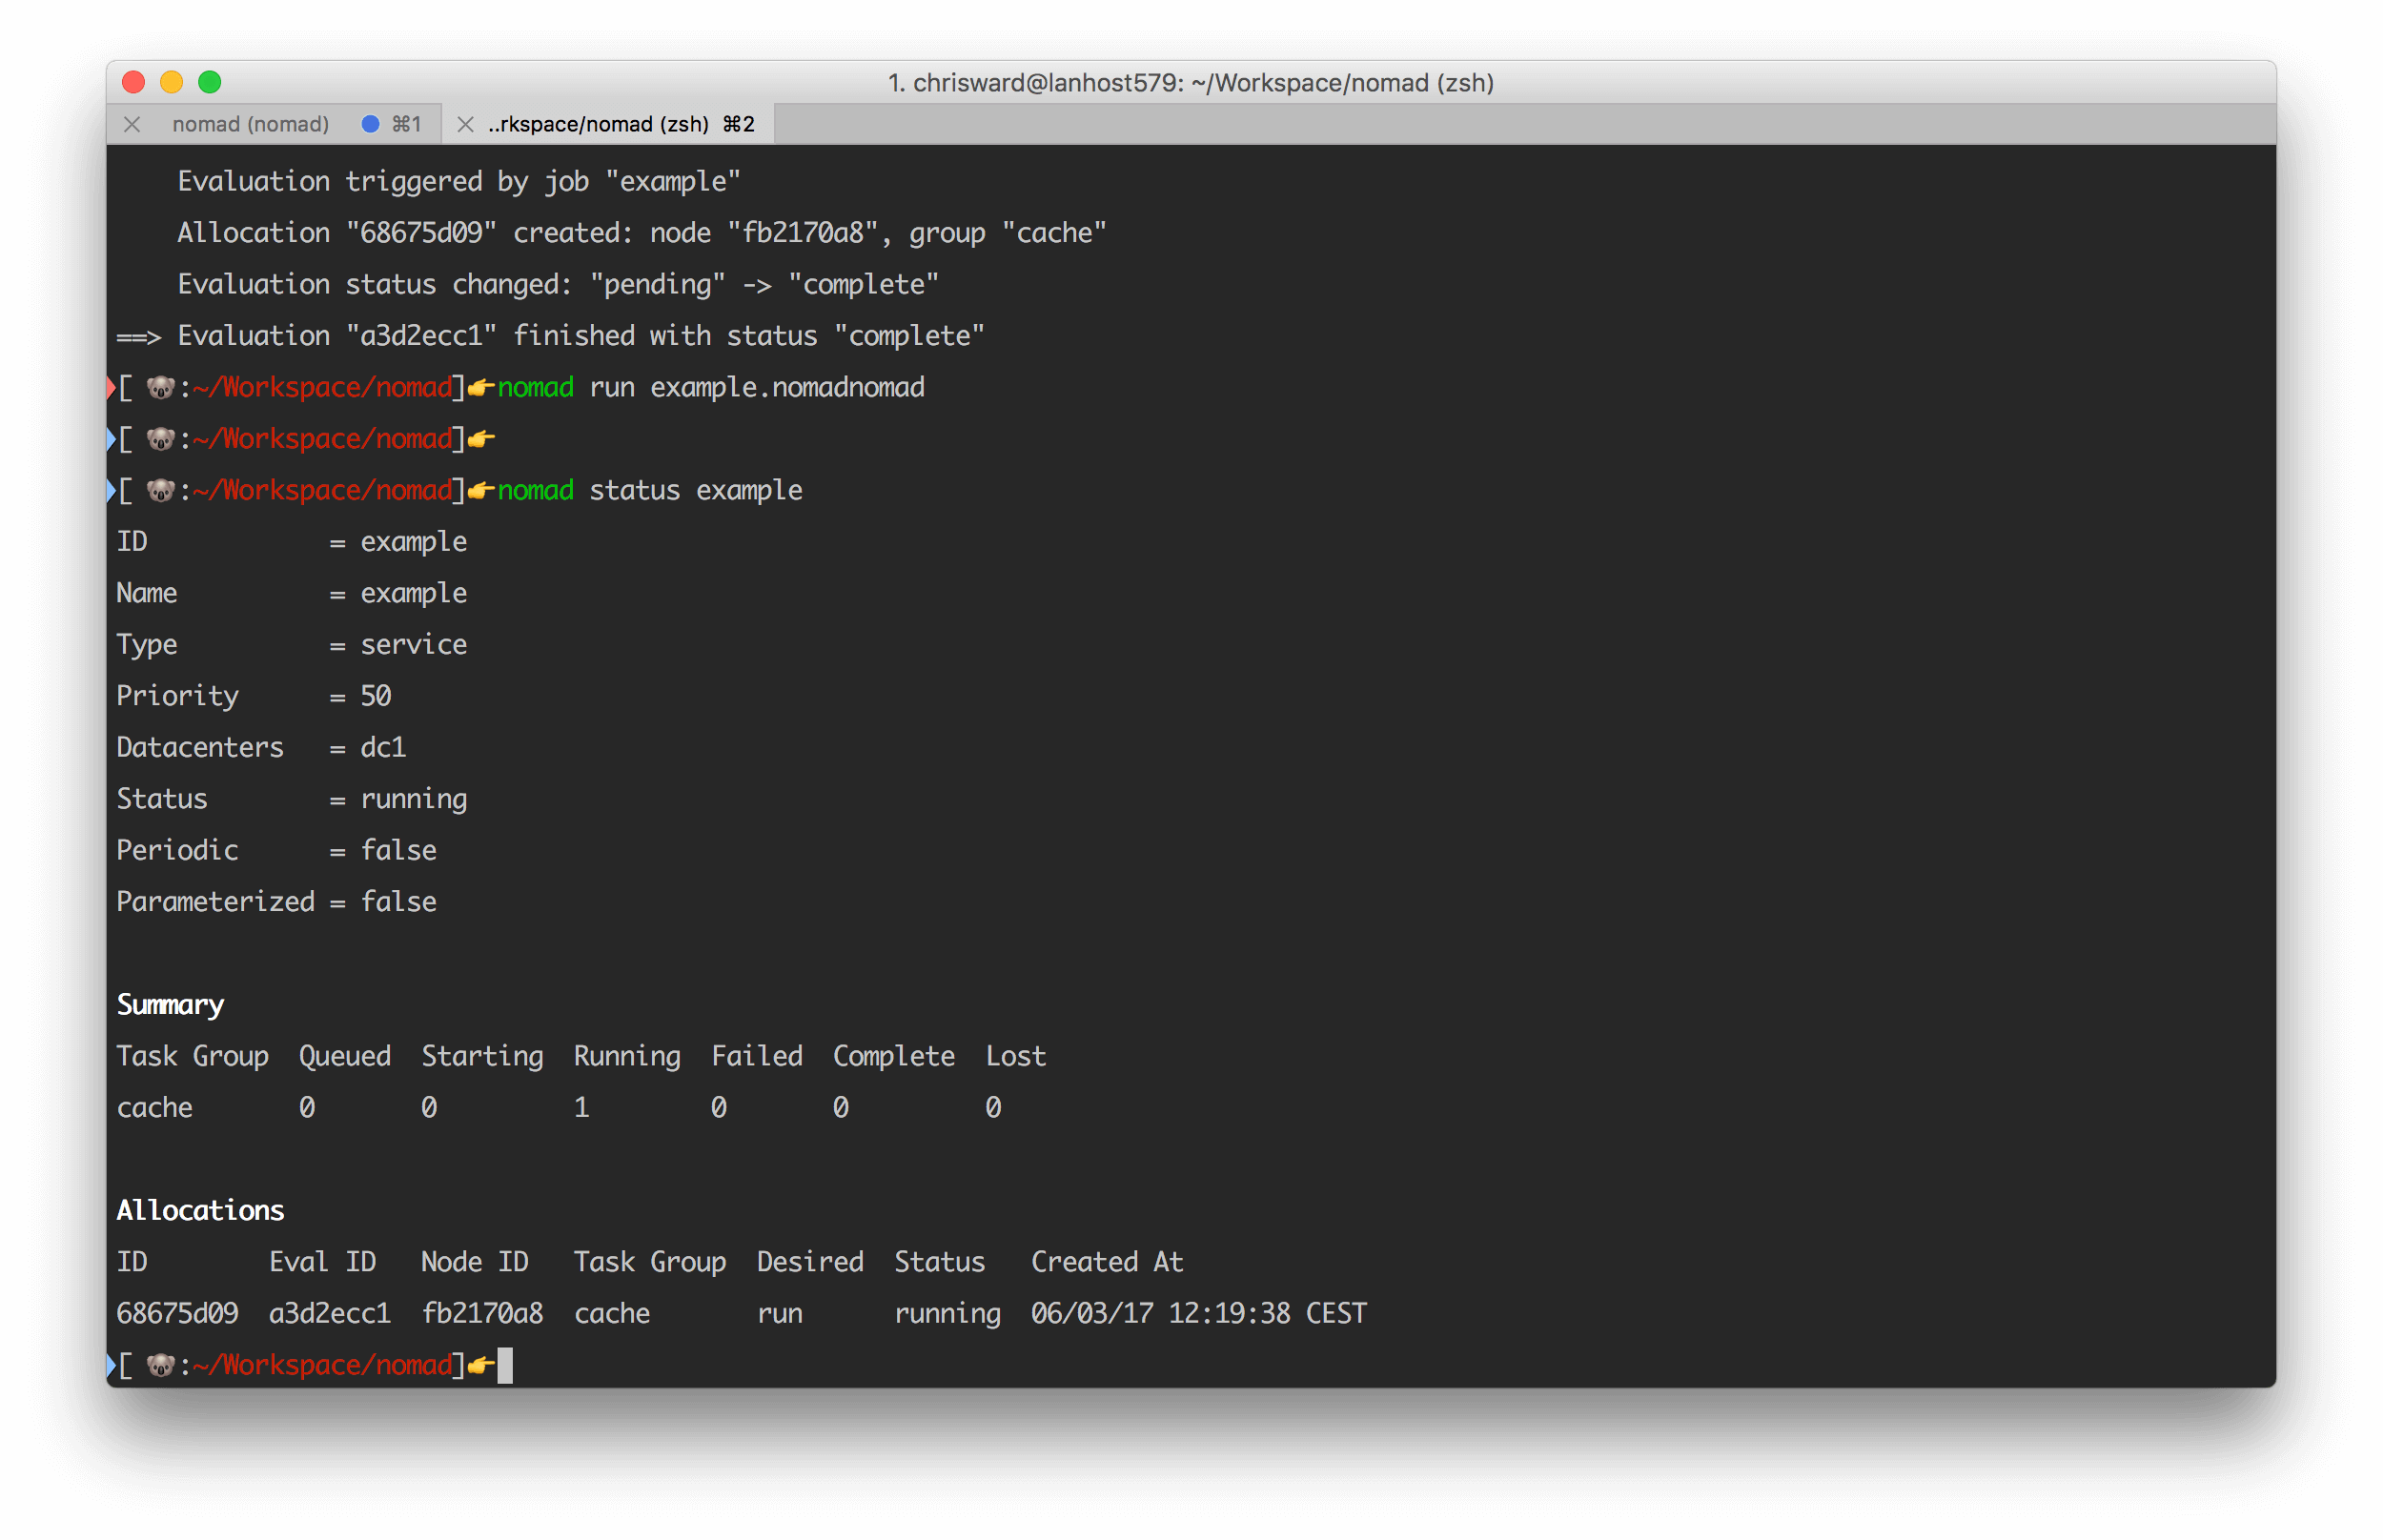
Next create an empty ‘job’ file in hcl format with:
noamd init
The file defines a lot of default configuration in a format common to many other Hashicorp tools. Read through the file to get an idea of what’s possible, but in summary, it creates a Redis service running in a Docker container in the default ‘global’ region and defines machine specifications. Start the job with:
nomad run example.nomad
And inspect with:
nomad status example
As your requirements change, edit the configuration file and run the nomad plan command to see what the effect of the change will be before running the change for real.
More information
Find our more about the useful drivers that Nomad supports for a variety of container frameworks and virtual machines. Curious to know what other commands are available? Then read more here.
Finally, read this document to learn more about the configuration options available for jobs.
Tying It All Together
Individual HashiCorp tools are usable in isolation from each other, but several of them chain together exceptionally well to provide a platform and provider agnostic DevOps toolchain. The company rarely pushes you into paying for anything. With a handful of enterprise level offerings for Nomad, Vault, Terraform, and Consul, I guess that makes them enough income to sustain the development of the other tools.
| Reference: | HashiCorp Tools Useful for Continuous Integration from our WCG partner Chris Ward at the Codeship Blog blog. |
