I found a plethora of articles on how to build a Sitecore project and get to its infamous welcome page. I could create data templates and content and even workflows, but I found myself confused on how everything fit together. Placeholders, renderings, layouts, sublayouts, Oh My!
In an effort to learn Sitecore MVC, I decided to build a small website using Launch Sitecore as my guide. Launch Sitecore is a sample website where you can find and learn the fundamentals of building a site and best practices.
This article assumes basic knowledge of the Sitecore interface and focuses on creating the building blocks within the Sitecore content tree.
Step 1 – Start with a Vanilla Sitecore instance
This walkthrough starts with a vanilla (out-of-the-box) Sitecore website installed and running with an MVC project.
There are several blog posts already devoted to this first hurdle, so I won’t go through that here. I found the following steps the easiest and most reliable.
- Run the Sitecore web application installer to get Sitecore loaded.
- Run Sitecore Instance Manager (SIM) to create the Visual Studio MVC Project
- Do yourself a favor and move the bin folder to a location outside of website folder and reset the references in the project.
We are starting from this familiar sample page:

Step 2 – Decide what you want to build
Don’t underestimate this step. Even for a sample, proof-of-concept, website, take the time to decide what data you have and the basics of how you want things to look. I decided to build a Pet Adoption website. I will build the following pages:
- Home page
- There will be two possible renderings
- A large jumbotron image
- Browse Adoptable Pets Page
- There will be a left hand side bar
- A simple Menu
To save time, I will be using existing layouts and code from Launch Sitecore. I’m less concerned about learning syntax, than I am about learning how presentation items hook together.
Step 3 – Dig in! Data Templates
We can’t have a website without something to display!
Data Template Terms
- Data Template: The data structure and framework around which content is created. (In sql terms, think table definition.)
- Fields: The individual components of a Data Template where data is entered into the system.
- Field Types: Determines the manner in which data is entered or selected. These include single-line text, multi-line text, rich text, numbers, checkbox, checkbox list, and many others.
- Inheritance: Data Templates can inherit from other base templates to allow templates to share field definitions.
- Standard Values: Standard Values are the defaults for an item template. These allow you to set things such as layout, workflow, and security as defaults.
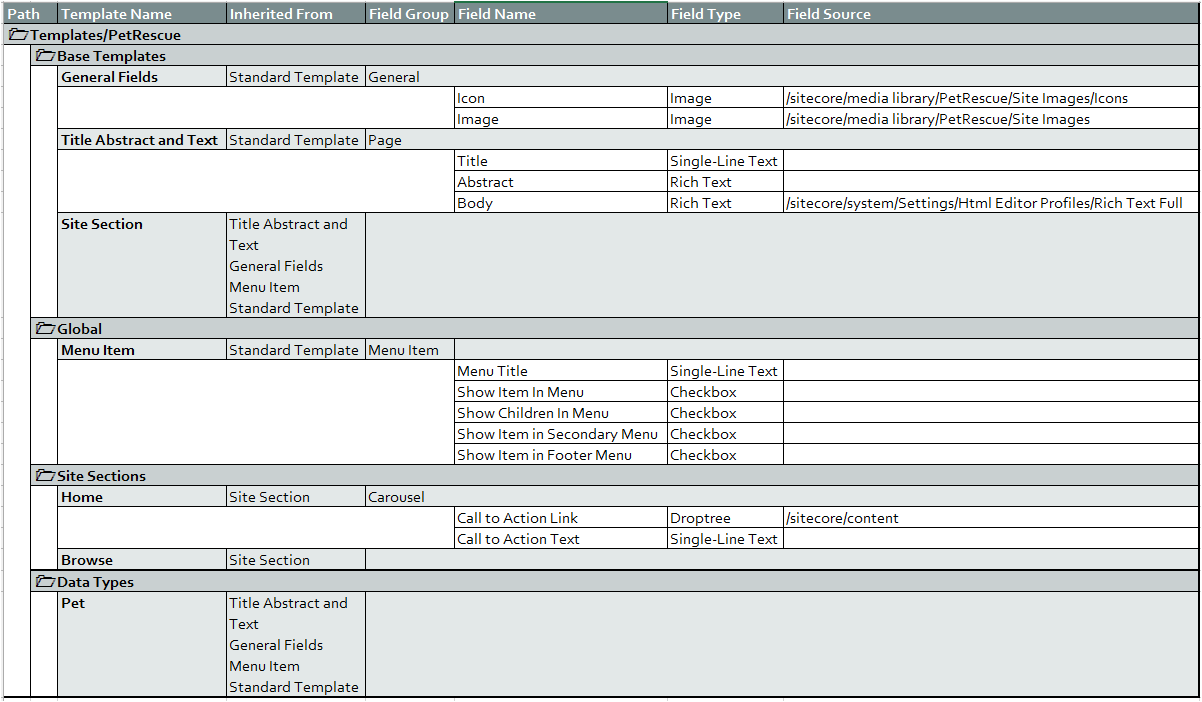
Launch Sitecore starts with some foundation templates that most of the other templates will inherit from. We’ll do the same.
I created the following data templates under the existing Templates folder:
Step 4 – Determine the Layout
Presentation Terms
- Device: A method within Sitecore for categorizing HTTP requests to the site (e.g. a web, print or mobile view) and displaying the correct layout and components for that device.
- Layout: Defines the overall appearance of a page (written as a .cshtml file)
(MVC) Rendering: View and Controller Renderings in MVC solutions (also written as a .cshtml file) - Placeholder: An area of the page to support the user adding controls to the given location. This allows controls to be bound dynamically.
- Placeholder Settings: Once placeholders have been defined, placeholder settings will provide pre-defined insert options for components.
- Static Binding: Placement of a component by “hard-coding”. Placing content in defined area without using a placeholder. This is normally used for navigation, footers, copyright, etc.
- Dynamic Binding: Placement of a component using placeholders. We can define which controls are allowed per placeholder to allow flexibility, while still maintaining control of the overall look and feel.
When loading a URL, Sitecore will determine the item associated with that URL, look at the presentation details (layouts and components placed into placeholders) to present the correct content with the presentation applied.
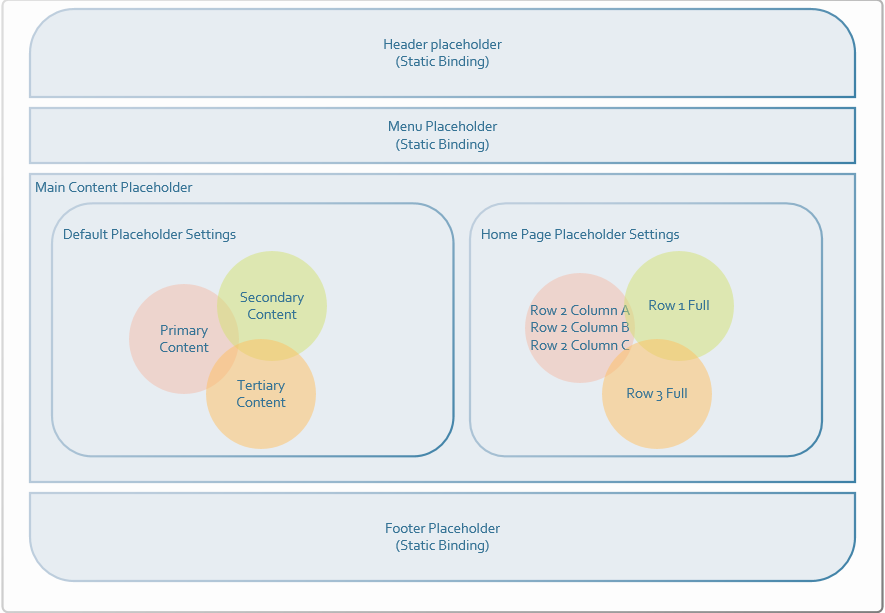
For our little website, we will build one Main Layout. The placeholders in the main layout are:
- Header
- Menu
- Main Content
- Footer
We will provide the ability to override the Main Content placeholder with a Home Main Content Placeholder Setting. This allows for the same code to be used while allowing a different visual for the home page. The circles in this diagram represent renderings that will be placed in the placeholder. There can be several options on where they will be placed for a given rendering. This will be determined by the HTML.
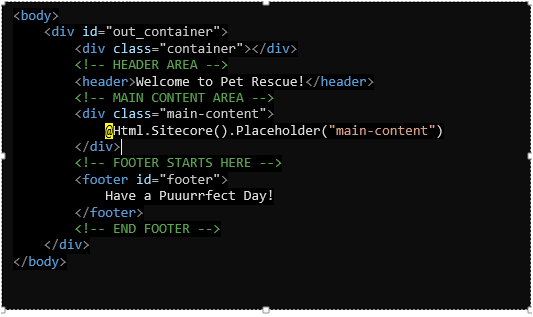
I found it helpful to see the actual code at this point. This is from Main.chstml, our main layout.
Step 5 – Define the Placeholders
Create the placeholder for the main content area as seen below under Placeholder Settings/Pet Rescue. The only field to fill in at this time is the Placeholder Key, which I’ve made the same as the content item’s name. Later we will add what controllers are allowed in each placeholder.
These will make more sense in the next step.
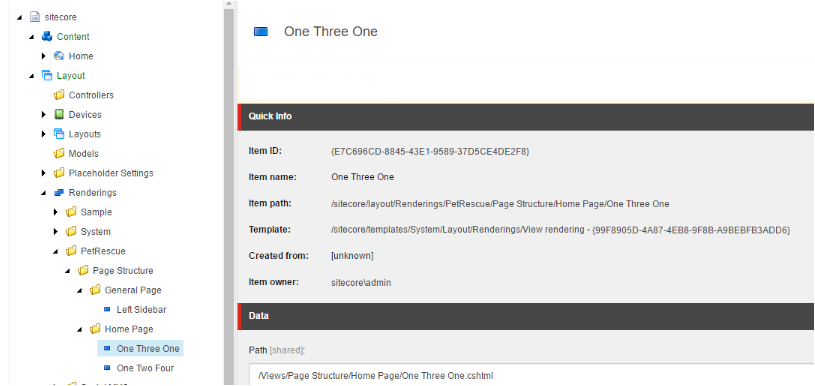
Step 6 – Define the Renderings
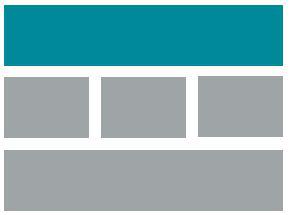
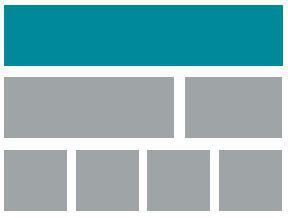
First, for the home page, we will create a rendering called One Three One. It will place our placeholders to allow one full row at the top, 3 columns in the second row and 1 full row at the bottom. An optional view will also be created called One Two Four.
For the general pages, we have three placeholders. We will create one that has a side bar on the left, creatively called “Left Sidebar”.

Add these as view renderings as seen below. Fill in the Path and Thumbnail fields for all these items.
The thumbnail images will show up in the Experience Editor and visually help our editors to know what layout they are choosing.

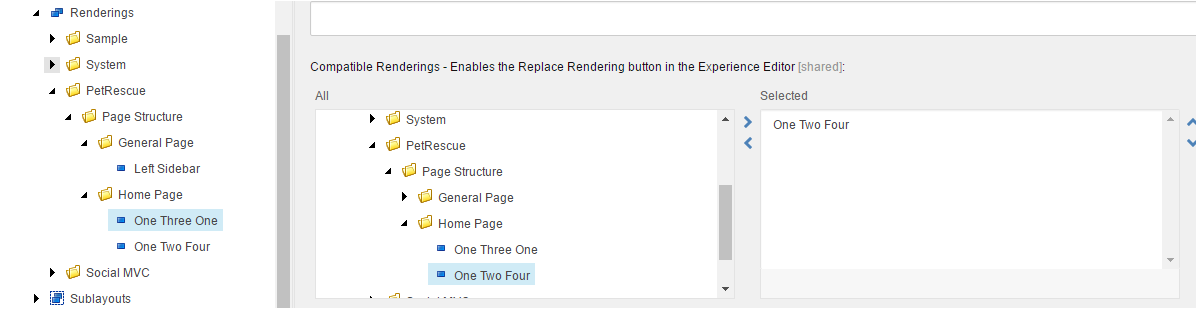
For the Home Page renderings, also fill in the Compatible Renderings field. This will show up in the Experience Editor showing our authors what layout choices are available to them for the area they are editing.
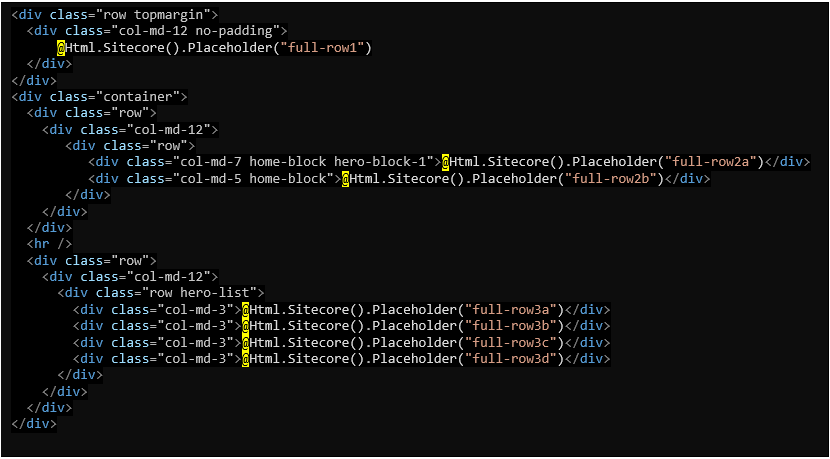
Here’s the code for our page structure place holders:
One Three One.chstml

One Two Four.chstml
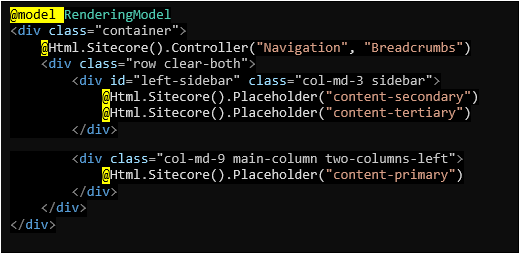
Left Sidebar.chstml
While we are at it, let’s throw in a few other renderings that we will be using throughout the site. An article comparing View Renderings vs Controller Renderings by John West is listed in the Resources section of this article.
- Main Navigation as a View Rendering
- Path: /Views/Navigation/MainNavigation.cshtml
- Model: /sitecore/layout/Models/MenuItemList
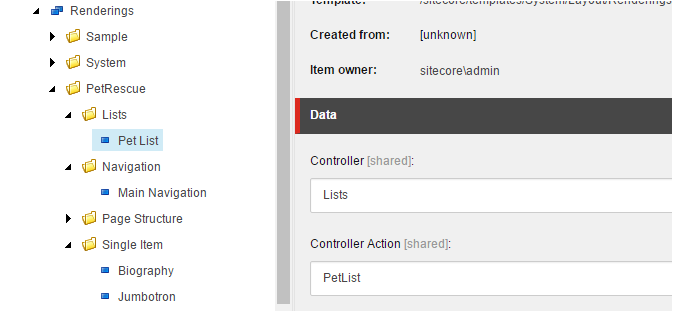
- Pet List as a Controller Rendering
- Controller: Lists
- Controller Action: PetList
- Jumbotron as a Controller Rendering
- Controller: Single Item
- Controller Action: Jumbotron
- Biography as a View Rendering
- Path: /Views/SingleItem/Biography.cshtml
- Text Widget as Controller Rendering
- Controller: Single Item
- Controller Action: Text Widget
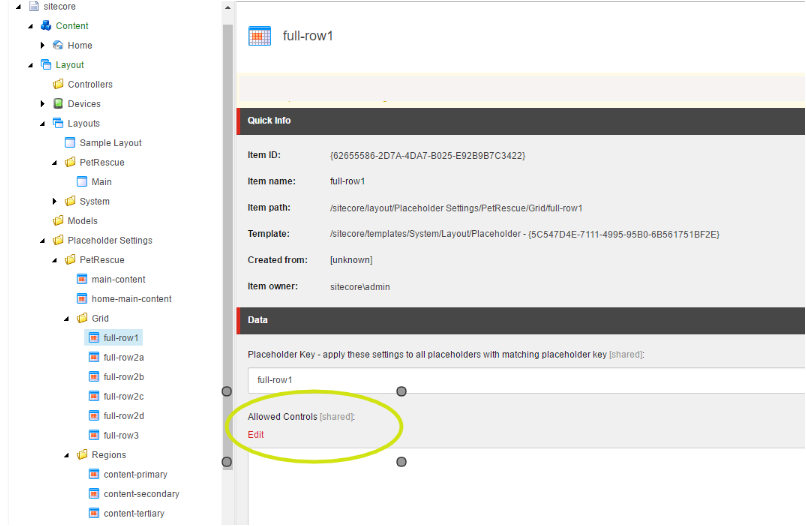
Step 7 – Add Renderings to Placeholders
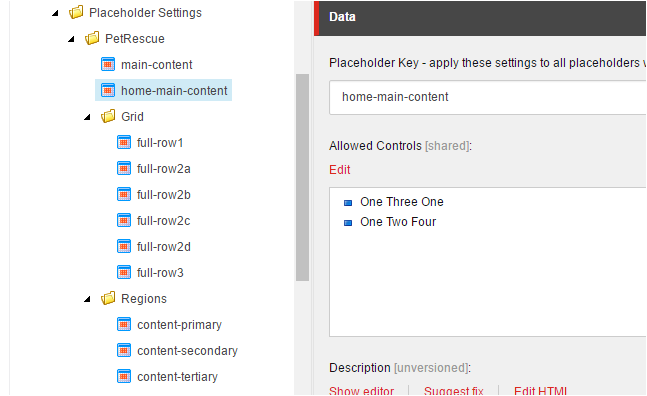
Now, we need to tell our placeholders what renderings they are allowed to use. Go back to the placeholders and add the appropriate renderings to the Allowed Controls field.
Placeholder | Allowed Controls |
| main-content | Left Sidebar |
| home-main-content | One Three One One Two Four |
| full-row1 | Jumbotron |
| full-row2a | Text Widget |
| full-row2b | Text Widget |
| full-row2c | Text Widget |
| full-row2d | Text Widget |
| full-row3 | Jumbotron Text Widget |
| content-primary | Pet List Text Widget |
| content-secondary | Pet List Text Widget |
| content-tertiary | Pet List Text Widget |
Step 8 – Define the Main Layout
We have all the components (renderings) and placeholders defined. We will now create the main layout.
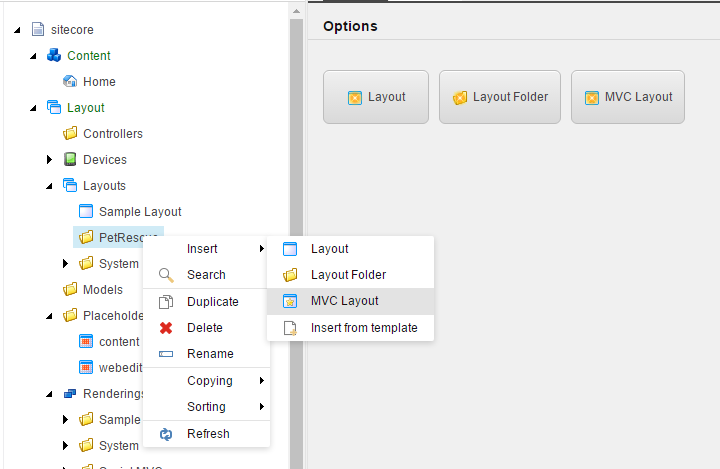
Insert an MVC Layout. Sitecore will ask you for the name of your layout, and where to put it in the tree.
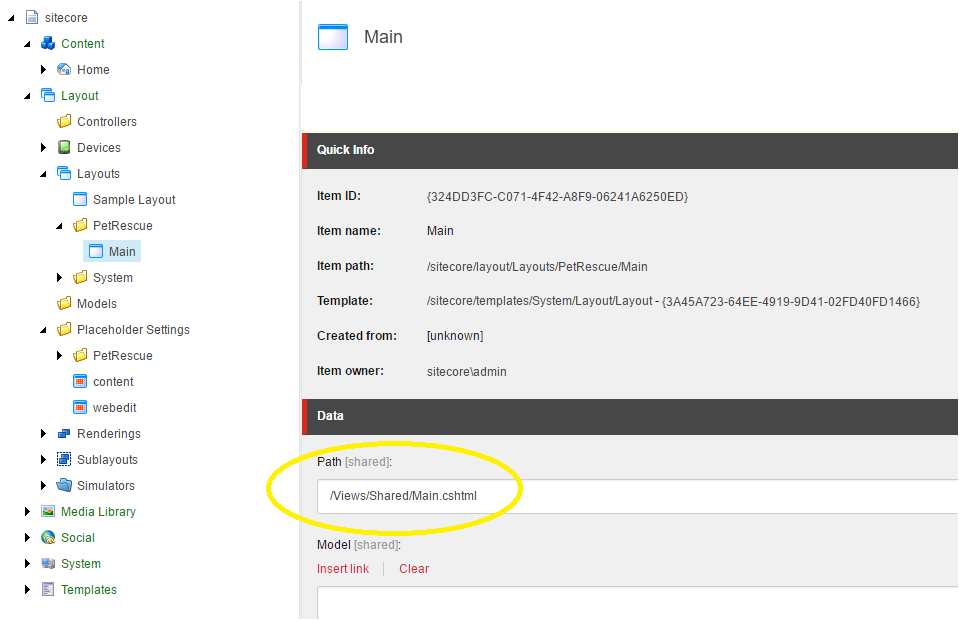
Then it will ask where you want to put the file.
Step 9 – Bind the Layout to the Content
First we’ll work on the home page. We want the layout associated to our Home data template – so that any content that uses the Home template will already have the layout defined.
Create a Standard Values item for the Home data template. Click on the template and make sure the Builder tab is active. Select Standard Values from the Ribbon tool bar.
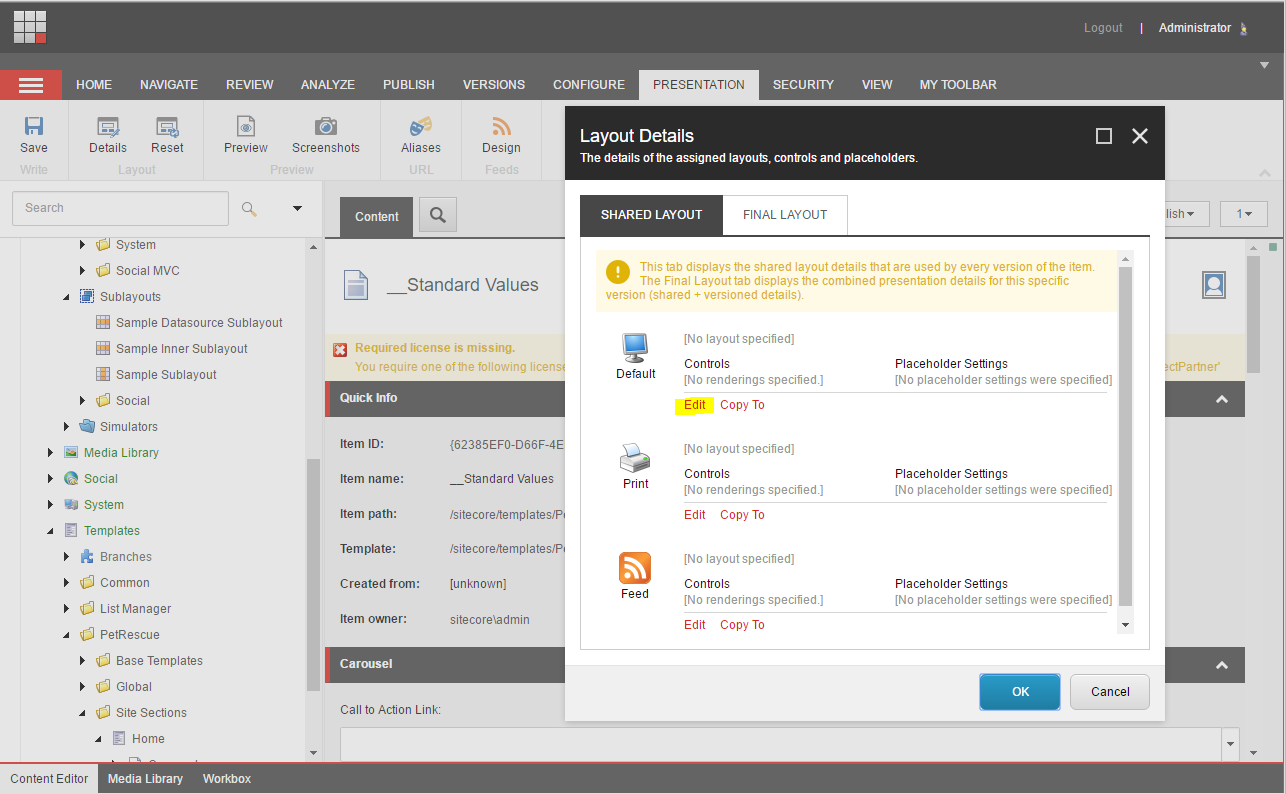
Select the Presentation Tab and select Details from the Ribbon tool bar.
This will bring up a popup that defines controls available for each defined device.. We are only concerned about the Default Device at this time, so click Edit on that row.
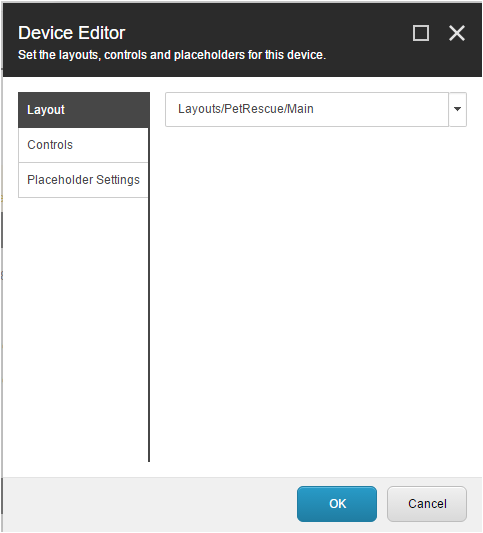
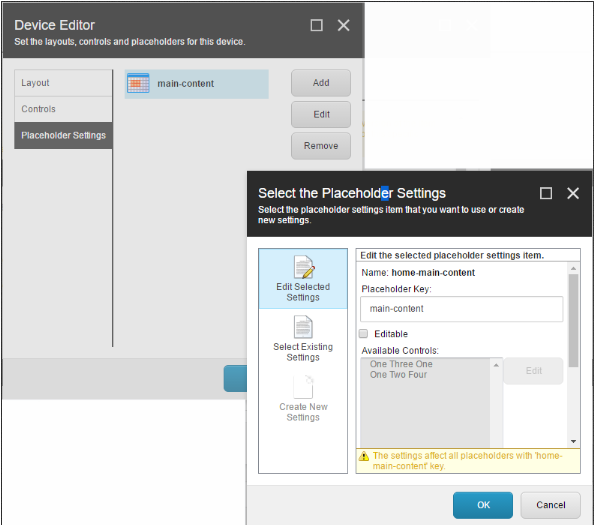
Select the Main Layout that we created earlier. We need to specify the placeholder settings to our home-main-content to allow the different format on the home page – while still using the area identified as ‘main-content’.
For now, we want to use the One Three One rendering. The beauty of Sitecore is that we can change this on the fly at any time. We want to use the Jumbotron in the first full row. I’m going to be lazy and just put Text Widgets in all of the other placeholders.
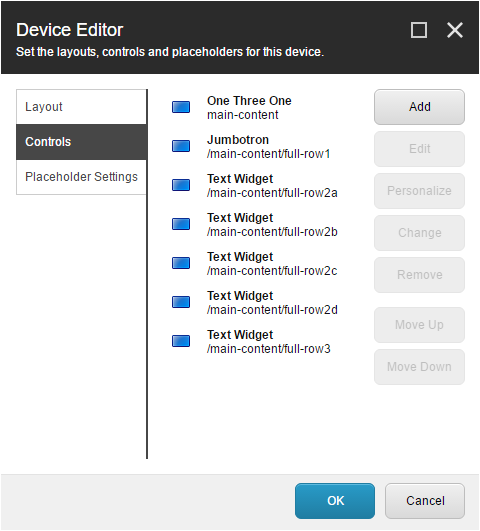
Finally, set the placeholder settings to override the page structure on our Home page.
After everything is set, the Layout Details will look like this:
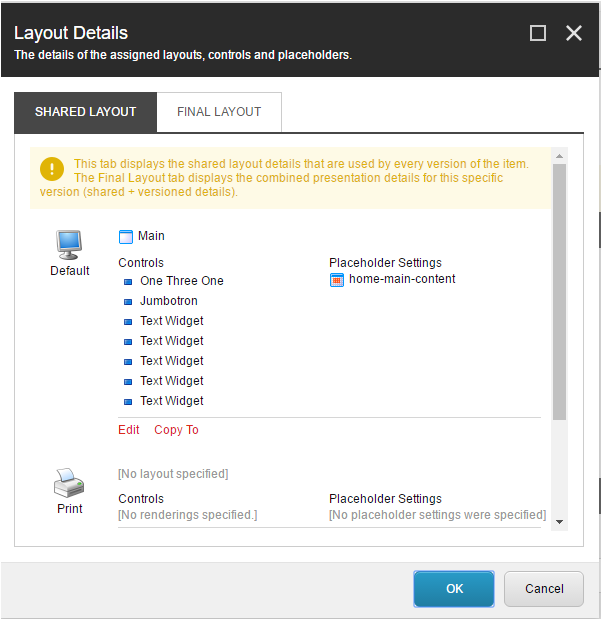
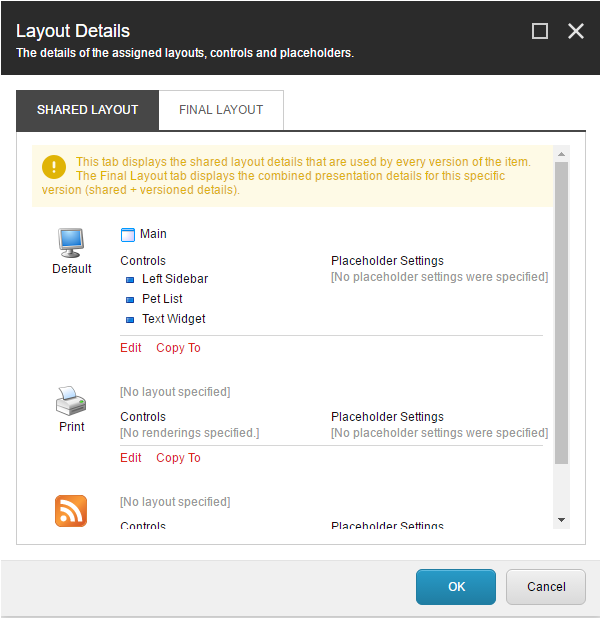
Do the same for the General Page. We don’t have to specify a placeholder setting here, as all the pages will have the same controls available in the same placeholders.
Conclusion
The presentation puzzle is complete. Our next step is to add code, then content, and we have a site!
Thank you for reading, I hope that you found it helpful. Please leave any comments or questions below.
Resources
- Launch Sitecore
- View Renderings VS. Controller Renderings in the Sitecore ASP.NET CMS
- Sitecore Instance Manager (SIM)
| Reference: | Learning Sitecore: My Project Builds, Now What? from our WCG partner Keyhole Software at the Keyhole Software blog. |
