In Part II of this series, we defined and applied our shared infrastructure. Today we’ll continue where we left off and define an actual Docker service to run on that infrastructure.
Service Resources Declaration
To keep this tutorial as simple as possible, for my service I am just going to run a web interface for the RDS database instance. This will demonstrate the use of a load balancer, Docker service, and database all while automatically configuring the connections between them.
In my example, I use Cloudflare for DNS and CDN services to demonstrate the multi-provider capability of Terraform. However, if you don’t use Cloudflare, you can leave those pieces out. I have an example of using Route53 for the DNS portion.
At the same level as the shared folder, create a folder named service.
In the service folder, we need to create many of the same files as we did for shared earlier:
- backend.tf
- main.tf
- outputs.tf
- providers.tf
- vars.tf
backend.tf should contain:
// service/backend.tf
terraform {
 backend "s3" {
   bucket         = "myorg-terraform-environmentname"
   key            = "service/terraform.tfstate"
   region         = "us-east-1"
   encrypt        = true
   dynamodb_table = "terraform-lock"
 }
}
providers.tf should contain:
// service/providers.tf
provider "aws" {
  region     = "${var.aws_region}"
  access_key = "${var.aws_access_key_id}"
  secret_key = "${var.aws_secret_access_key}"
}
provider "cloudflare" {
 email = "${var.cloudflare_email}"
 token = "${var.cloudflare_token}"
}
vars.tf should contain:
// service/vars.tf
variable "aws_region" {}
variable "aws_access_key_id" {}
variable "aws_secret_access_key" {}
variable "cloudflare_email" {}
variable "cloudflare_token" {}
variable "cloudflare_domain" {}
With the addition of Cloudflare to this environment, you’ll also need to export your Cloudflare credentials as environment variables for Terraform to pick up on:
$ export TF_VAR_cloudflare_email=youremail@domain.com
$ export TF_VAR_cloudflare_token=asdfadsfadsfasdfasdfsafd
$ export TF_VAR_cloudflare_domain=domain.com
Now we need to initialize and plan for this environment to make sure everything is configured correctly.
$ terraform init
Initializing the backend...

Successfully configured the backend "s3"! Terraform will automatically
use this backend unless the backend configuration changes.

Initializing provider plugins...
- Checking for available provider plugins on https://releases.hashicorp.com...
- Downloading plugin for provider "template" (0.1.1)...
- Downloading plugin for provider "terraform" (1.0.0)...
- Downloading plugin for provider "aws" (0.1.4)...

The following providers do not have any version constraints in configuration,
so the latest version was installed.

To prevent automatic upgrades to new major versions that may contain breaking
changes, it is recommended to add version = "..." constraints to the
corresponding provider blocks in configuration, with the constraint strings
suggested below.

* provider.aws: version = "~> 0.1"
* provider.template: version = "~> 0.1"
* provider.terraform: version = "~> 1.0"

Terraform has been successfully initialized!

You may now begin working with Terraform. Try running "terraform plan" to see
any changes that are required for your infrastructure. All Terraform commands
should now work.

If you ever set or change modules or backend configuration for Terraform,
rerun this command to reinitialize your working directory. If you forget, other
commands will detect it and remind you to do so if necessary.

$ terraform plan
Refreshing Terraform state in-memory prior to plan...
The refreshed state will be used to calculate this plan, but will not be
persisted to local or remote state storage.

data.terraform_remote_state.shared: Refreshing state...

------------------------------------------------------------------------

No changes. Infrastructure is up-to-date.

This means that Terraform did not detect any differences between your
configuration and real physical resources that exist. As a result, no
actions need to be performed.
Releasing state lock. This may take a few moments...
Now update outputs.tf to contain the following so we can display some information after we run terraform apply in a bit:
output "url" {
 value = "https://pma.${var.cloudflare_domain}"
}
output "dbusername" {
 value = "${aws_db_instance.db_instance.username}"
}
output "dbpassword" {
 value = "${aws_db_instance.db_instance.password}"
}
Our service environment depends on our shared environment, so we need to tell the service environment how to get access to the remote state for shared.
Create a new file named remote-shared.tf with the following contents:
// service/remote-shared.tf
data "terraform_remote_state" "shared" {
 backend = "s3"

 config {
   bucket = "myorg-terraform-environmentname"
   key    = "shared/terraform.tfstate"
   region = "us-east-1"
 }
}
This will create a data resource of type terraform_remote_state named shared. This provides read-only access to any outputs from the shared Terraform environment by using variable interpolation with the format: “${data.terraform_remote_state.shared.output_name}”.
Let’s start building out the resources needed for our service in the main.tf file. First off, we’ll create the database:
// service/main.tf
resource "aws_db_instance" "db_instance" {
 engine                  = "mariadb"
 allocated_storage       = "8"
 instance_class          = "db.t2.micro"
 name                    = "mydatabase"
 identifier              = "mydatabase"
 username                = "dbuser"
 password                = "dbpass1234"
 db_subnet_group_name    = "${data.terraform_remote_state.shared.db_subnet_group_name}"
 vpc_security_group_ids  = ["${data.terraform_remote_state.shared.vpc_default_sg_id}"]
 skip_final_snapshot     = true // <- not recommended for production
}
You’ll see in our database resource we reference outputs from the shared environment to get access to the db_subnet_group_name and vpc_security_group_id.
Next up, we’ll create the Application Load Balancer. For this step, we need an SSL certificate. I recommend using Amazon’s Certificate Manager (ACM) service for free and easy certs.
You cannot use Terraform to create ACM certs because there is a separate approval process, but once one is issued, you can reference it in Terraform. If you don’t already have an ACM certificate, it is easy to get one. Just go to the Certificate Manager service in the AWS console, request a new certificate for the hostname you want, and AWS will send emails to contacts from a WHOIS report for approval. Open the email and click the approve link, and it’ll be immediately available for use.
To look up the certificate, we’ll use a data resource that we can later reference in the ALB listener configuration.
// service/main.tf
data "aws_acm_certificate" "sslcert" {
 domain = "*.mydomain.com"
}
We need to create a new security group to allow public access to port 443 of the load balancer.
// service/main.tf
resource "aws_security_group" "public_https" {
 name        = "public-https"
 description = "Allow HTTPS traffic from public"
 vpc_id      = "${data.terraform_remote_state.shared.vpc_id}"
}

resource "aws_security_group_rule" "public_https" {
 type              = "ingress"
 from_port         = 443
 to_port           = 443
 protocol          = "tcp"
 security_group_id = "${aws_security_group.public_https.id}"
 cidr_blocks       = ["0.0.0.0/0"]
}
Now we can create the ALB, a target group, and a listener rule for HTTPS to route to the default target group.
// service/main.tf
/*
 * Create application load balancer
 */
resource "aws_alb" "alb" {
 name            = "alb-myapp"
 internal        = false
 security_groups = ["${data.terraform_remote_state.shared.vpc_default_sg_id}", "${aws_security_group.public_https.id}"]
 subnets         = ["${data.terraform_remote_state.shared.public_subnet_ids}"]
}

/*
 * Create target group for ALB
 */
resource "aws_alb_target_group" "default" {
 name     = "tg-myapp"
 port     = "80"
 protocol = "HTTP"
 vpc_id   = "${data.terraform_remote_state.shared.vpc_id}"

 stickiness {
   type = "lb_cookie"
 }
}

/*
 * Create listeners to connect ALB to target group
 */
resource "aws_alb_listener" "https" {
 load_balancer_arn = "${aws_alb.alb.arn}"
 port              = "443"
 protocol          = "HTTPS"
 ssl_policy        = "ELBSecurityPolicy-2016-08"
 certificate_arn   = "${data.aws_acm_certificate.sslcert.arn}"

 default_action {
   target_group_arn = "${aws_alb_target_group.default.arn}"
   type             = "forward"
 }
}
With a load balancer in place, we can create an ECS task definition and service definition to run the web interface to the database. For the task definition, we need to use a template file to dynamically provide values and render the JSON needed. So create a new file named service/task-definition.json with the following contents. If you’re familiar with ECS already, you’ll notice the JSON below is not a full task definition. Instead, it is only the containerDefinitions portion of the overall definition.
[
 {
   "volumesFrom": [],
   "memory": 128,
   "extraHosts": null,
   "dnsServers": null,
   "disableNetworking": null,
   "dnsSearchDomains": null,
   "portMappings": [
     {
       "hostPort": 0,
       "containerPort": 80,
       "protocol": "tcp"
     }
   ],
   "hostname": null,
   "essential": true,
   "entryPoint": [],
   "mountPoints": [],
   "name": "web",
   "ulimits": null,
   "dockerSecurityOptions": null,
   "environment": [
     {
       "name": "PMA_HOST",
       "value": "${mysql_host}"
     },
     {
       "name": "PMA_ABSOLUTE_URI",
       "value": "${hostname}"
     }
   ],
   "links": [],
   "workingDirectory": null,
   "readonlyRootFilesystem": null,
   "image": "phpmyadmin/phpmyadmin:latest",
   "command": [],
   "user": null,
   "dockerLabels": null,
   "logConfiguration": null,
   "cpu": 128,
   "privileged": null,
   "memoryReservation": null
 }
]
When using the template_file data resource, you pass variables into it. Within the template file, you can reference them with format ${variable_name}. Note that in a template you do not use the var prefix like you do in other resource definitions.
Now define the configuration for the task definition and service in the main.tf file:
// service/main.tf
/*
 * Render task definition from template
 */
data "template_file" "task_def" {
 template = "${file("${path.module}/task-definition.json")}"

 vars {
   mysql_host = "${aws_db_instance.db_instance.address}"
   hostname   = "https://${aws_alb.alb.dns_name}/"
 }
}

/*
 * Create task definition
 */
resource "aws_ecs_task_definition" "td" {
 family                = "myapp"
 container_definitions = "${data.template_file.task_def.rendered}"
 network_mode          = "bridge"
}

/*
 * Create ECS Service
 */
resource "aws_ecs_service" "service" {
 name                               = "myapp"
 cluster                            = "${data.terraform_remote_state.shared.ecs_cluster_name}"
 desired_count                      = "${length(data.terraform_remote_state.shared.aws_zones)}"
 iam_role                           = "${data.terraform_remote_state.shared.ecsServiceRole_arn}"
 deployment_maximum_percent         = "200"
 deployment_minimum_healthy_percent = "50"

 placement_strategy {
   type  = "spread"
   field = "instanceId"
 }

 load_balancer {
   target_group_arn = "${aws_alb_target_group.default.arn}"
   container_name   = "web"
   container_port   = "80"
 }

 task_definition = "${aws_ecs_task_definition.td.family}:${aws_ecs_task_definition.td.revision}"
}
With the service defined and ready, the final step is to create a DNS record on Cloudflare to point to the load balancer so we can demonstrate the ability to interact with multiple service providers in the same configuration. If you do not use Cloudflare, you can replace this part with the DNS configuration of your choice, such as Amazon’s Route 53.
Add the following to main.tf.
// service/main.tf
/*
 * Create Cloudflare DNS record
 */
resource "cloudflare_record" "pmadns" {
 domain  = "${var.cloudflare_domain}"
 name    = "pma"
 value   = "${aws_alb.alb.dns_name}"
 type    = "CNAME"
 proxied = true
}
If using Route53, remove the three cloudflare_* variable definitions in vars.tf and replace them with the following. Use the Zone ID for your Route53 zone for the value of aws_zone_id. Use the fully qualified domain name of your system for exthostname.
/*
 * AWS Zone ID in Route 53
 * Get the Zone ID for the already existing zone from the AWS Console
 */
variable "aws_zone_id" {
  default = "replaceme"
}

/*
 * Fully qualified host name to be added to Route 53 zone
 */
variable "exthostname" {
  default = "replaceme.example.com"
}
If using Route53, remove the definition for url in outputs.tf and replace it with the following.
/*
 * Fully Qualified Domain Name
 */
output "fqdn" {
  value = "${aws_route53_record.pmadns.fqdn}"
}
With the service environment set up, running terraform plan shows adding 10 new resources for me:
$ terraform plan
Refreshing Terraform state in-memory prior to plan…
....
Plan: 9 to add, 0 to change, 0 to destroy.
Make it so.
$ terraform apply
data.terraform_remote_state.shared: Refreshing state…
....
Apply complete! Resources: 10 added, 0 changed, 0 destroyed.

The state of your infrastructure has been saved to the path
below. This state is required to modify and destroy your
infrastructure, so keep it safe. To inspect the complete state
use the `terraform show` command.

State path:

Outputs:

dbpassword = dbpass1234
dbusername = dbuser
url = https://pma.domain.com
It took about five minutes to complete for me. Creating ALBs and DBs can be a bit slow so be patient. When finished, refreshing the EC2 Container Service clusters view in the console shows our tasks are running:

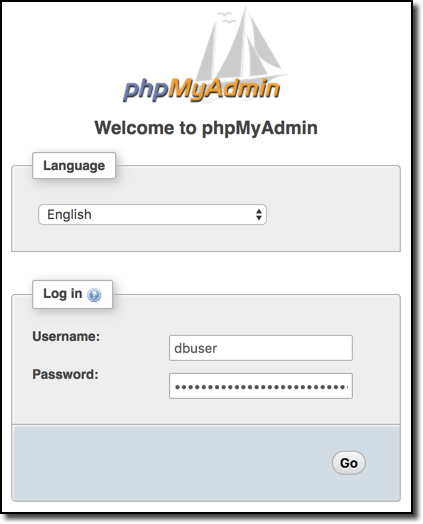
The output shows the URL to the application. Navigating there, I see the login screen and log in using the username and password from the output:
That’s it. We now have a new VPC provisioned, EC2 instances spread across multiple availability zones, an ECS cluster for orchestrating Docker services, a web application running multiple instances load balanced by a dynamic load balancer and interacting with a newly provisioned database.
Conclusion
So with a little bit of work up front to define all the configurations, it only takes two commands to bring it all online. And then two commands again to destroy it all. It’s pretty awesome just how powerful Terraform is and how comforting it is to have a reproducible, version controlled, collaborative approach to managing infrastructure.
In the examples above, I hard-coded values for many fields for simplicity where normally I would use variables. Also after figuring out all the configurations needed to get an application online, I’d work on refactoring the configurations into reusable modules. This approach is actually quite similar to any other software development where you build what you need, then refactor and simplify as much as possible.
After getting my first application online with Terraform, I refactored it down to several modules and hosted them in their own Git repo for reuse in all my applications.
What next?
If you want to try this out yourself, the examples in this article are available on GitHub. Just clone the repo and follow the steps described in the README.
Head over to Terraform and read the official docs. Browse the list of Providers available to see how many you use and could benefit from using via Terraform.
You may also be interested in reading Terraform: Up & Running for a deeper and more comprehensive understanding of Terraform. It is a bit dated, but most of the concepts are still applicable.
As mentioned earlier, Terraform is a free and open-source tool, however HashiCorp, the company behind Terraform (any many other great products), has an Enterprise version of the product. Terraform Enterprise connects with your version control system to automate execution of terraform plan and even terraform apply runs. It also provides more secure variable management and an enhanced team experience through its web interface and Terraform state management.
| Published on Web Code Geeks with permission by Phillip Shipley, partner at our WCG program. See the original article here: Service Resources for Your Terraformed Docker Environment Opinions expressed by Web Code Geeks contributors are their own. |
