Introduction
Animation is the visualization of change, having reference points for the start and end states for comparison. Before HTML 5, it was limited to usage of Adobe Flash, CSS and JavaScript mostly. In this tutorial we will introduce the HTML canvas element and the requestAnimationFrame function in JavaScript to help us create simple animations.

The HTML canvas element (introduced in HTML5) is a container for canvas graphics and defined as a resolution-dependent bitmap canvas which can be used for rendering graphs, game graphics, or other visual images on the fly. It is a rectangular area inside a HTML page with no content or border of its own.
JavaScript can be used to draw anything you want on the canvas. It has several methods for drawing paths, boxes, circles, text, and graphic images.You can have more than one canvas element on the same page. Each canvas will show up in the DOM, and each canvas maintains its own state. If you give each canvas an id attribute, you can access them just like any other element.
<canvas id ="a" width="300" height="225"></canvas>
Now you can easily find that canvas element in the DOM with JavaScript, create a context, and then utilize the Canvas API in HTML 5 to draw visualizations
The requestAnimationFrame function requests the browser to call the animation loop at the time of redrawing the screen. Previously, developing animation with Javascript was a bit clunky as compared to ones created with CSS as you had to work with setInterval and setTimeOut to power your animation loop. There were problems in repainting the screen. With this new function, those problems are all gone and we are able to produce polished animation using the HTML 5 and javascript alone.
The canvas element is supported in the following browser versions or above.
- Google Chrome 4.0
- IE 9.0
- Firefox 2.0
- Safari 3.1
- Opera 9.0
The requestAnimationFrame is supported by the following browsers versions or above.
- Google Chrome 10.0
- IE 10
- Firefox 4.0
- Safari 6.0
- Opera 15.0
Canvas element and context
We need to understand the difference between Canvas element and Canvas context. While the element is a node in DOM, the context is the object with properties and methods that you can use to represent graphics inside canvas element. The context can be 2d or webgl (3d). You need to use the getContext method to return a reference to a Context object
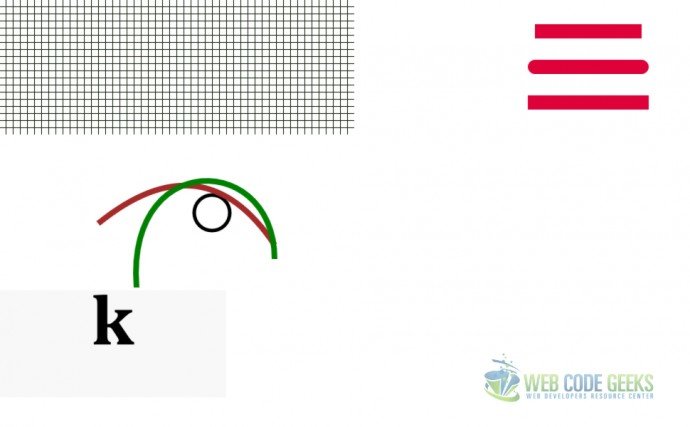
In the following sections we will use various Canvas properties and methods. Here is a screenshot of what we will be developing today.
Draw a Graph
We will draw a graph paper use the combination of horizontal and vertical lines. First define a HTML canvas element with a id as shown below
<canvas id="GraphCanvas" width="550" height="190"></canvas>
Now in your javascript, grab a handle to reference the canvas, and get a reference to the context object, before we draw the lines.
var canvas = document.getElementById('GraphCanvas');
var context = canvas.getContext('2d');
Inside a loop draw the lines as shown below. The moveTo() and lineTo() method moves and draws line to the specific start-point and endpoint respectively.
Draw the horizontal line
for (var x = 0.5; x < 500; x += 10) {
          context.moveTo(x, 0);
          context.lineTo(x, 375);
        }
Draw the vertical line.
for (var y = 0.5; y < 375; y += 10) {
          context.moveTo(0, y);
          context.lineTo(500, y);
        }
The reason we set the x and y set at 0.5 is because we want to draw a line that is only one pixel wide; therefore we need to shift the coordinates by 0.5 perpendicular to the line’s direction.
Now we need to actually draw it on the canvas using the stroke() method. The strokestyle property allows us to specify the color code.
context.strokeStyle = "#0B1907";
context.stroke();
Draw a Line
To draw a line, you use the following compulsory methods in sequence:
- Use the
beginPathmethod to declare that we are about to draw a new path - Use the
moveTo(x, y)moves the drawing cursor to the specified starting point. lineTo(x, y)draws a line from the starting position to a new position.- In order to make the line visible, we apply a stroke to the line using
strokefunction
By default the stroke color is defaulted to black. You can use the the strokeStyle property of the canvas context to set a different color of an HTML5 Canvas line
     context.beginPath();
     context.moveTo(200, canvas.height / 2 - 50);
     context.lineTo(canvas.width - 200, canvas.height / 2 - 50);
     context.lineWidth = 20;
     context.strokeStyle = '#DF013A';
     context.lineCap = 'butt';
     context.stroke();
The lineCap property defines the three possible cap style butt, round or square. In order to define the width of an Canvas line, we can use the lineWidth property of the canvas context. Both these properties must be set before calling the stroke() method.
context.lineWidth = 15;
Draw Arc
The arc() method creates an arc/curve (used to create circles, or parts of circles). It is defined by a center point, a radius, a starting angle, an ending angle, and the drawing direction (either clockwise or anticlockwise). Arcs can be styled with the lineWidth, strokeStyle, and lineCap properties. The arc method as defined below accepts the following parameters.
x and y coordinates of the center of the circle, r the raidus of the circle, sAngle is the start angle expressed in radians , eAngle is the end angle and last one is weather it would clockwise or counterclockwise.
context.arc(x,y,r,sAngle,eAngle,clockwise);
The 0 for the starting angle is at the 3 o’clock position of the arc’s circle. Arcs can be styled with the lineWidth, strokeStyle, and lineCap properties as highlighted below.
var canvas = document.getElementById('myCanvas');
var context = canvas.getContext('2d');
var x = canvas.width / 2;
var y = canvas.height / 2;
var radius = 75;
var sAngle = 1.1 * Math.PI;
var eAngle = 1.9 * Math.PI;
var counterClockwise = false;
context.beginPath();
context.arc(x, y, radius, sAngle, eAngle, counterClockwise);
context.lineWidth = 15;
context.strokeStyle = 'black';
context.stroke();
Draw some more stuff
Similar to the arc, we can draw 2 types of curves namely quadratic and Bezier curve. If a path does not exist, use the beginPath() and moveTo() methods to define a context point. Both the curves can be styled with the lineWidth, strokeStyle, and lineCap properties.
To draw a quadratic curve, define a control point that dictates the curvature of your quadratic curve by creating two imaginary tangential lines which are connected to the context point and the ending point. The distance of control point from the context point and end point determines the how broad your curve is. Longer the distance , sharper is your curve. Play around with the co-ordinates as shown below to form a better idea on the curve. Here is the syntax
context.quadraticCurveTo(Cp1X,Cp1Y,EpX,EpY);
where Cp1X and Cp1Y indicates the x and y co-ordinates of Control point while EpX and EpY are the x and y co-ordinates of the end point.
context.beginPath();
context.moveTo(140, 120);//define the context point
context.quadraticCurveTo(288, 0, 388, 150);
context.lineWidth = 8;
context.strokeStyle = 'brown';
context.stroke();
To create a Bezier curve with HTML5 Canvas, we use the bezierCurveTo() method.Unlike quadratic curves, Bezier curves are defined with two control points instead of one, allowing us to create more complex curvatures than quadraticCurve . You begin by using the moveTo() to create the context point
context.moveTo(200, 250);//create context point
Now you can call the bezierCurveTo(Cp1X,Cp1Y, Cp2X,Cp2yY,EpX, EpY). Cp1X,Cp1Y, Cp2X and Cp2Y represent the x and y co-ordinates of the 2 control points. EpX and EpY are the x and y co-ordinates of the endpoints. Conceptually, the first part of the curve is tangential to the imaginary line that is defined by the context point and the first control point. The imaginary line that is defined by the second control point and the ending point defines the tangential curve of the second part.
context.beginPath();
context.moveTo(200, 250);//create context point
context.bezierCurveTo(150, 15, 388, 10, 388, 170);
context.lineWidth = 8;
context.strokeStyle = 'green';
context.stroke();
Drawing a shape like rectangle on a canvas is quite easy as well. Call the context.rect() method which accepts x and y position co-ordinates along with the width and height.
context.beginPath();
context.rect(180, 50, 200, 100);
context.fillStyle = 'green';
context.fill();
context.lineWidth = 7;
context.strokeStyle = 'black';
context.stroke();
Introducing requestAnimationFrame
Since the advent of requestAnimationFrame (sometimes referred as rAF method), developing animations using JavaScript has never been easier. This rAF method allows the browser to handle some of the complicated animation tasks for you, such as managing the frame rate. The inherent problem of using setTimeout and setInterval was the browser painting the frames quicker than the screen can display then (most computer screens have a refresh rate of 60 frames per second or FPS) resulting unnecessary computation.
Due to the fact that setTimeout and setInterval based animation will continue to run even if the page is not visible to user, which means that it’s not battery friendly animation especially for mobile devices . Using rAF gives the browser the ability to optimize your animations to make them smoother and more resource efficient by eliminating the possibility of unnecessary draws and combining multiple animations into a single re-flow and repaint cycle.
Let’s build our first animation with rAF. We start off by defining a div element inside html for container.
<div id="AnimationContainer">

<h1 id="symbol">*</h1>

</div>
As rAF is fairly new, we need to check the vendor specific variant of the function in your javaScript. There are four vendor prefixes that you have to deal with:
- moz for Mozilla Firefox
- webkit for Google Chrome, Apple Safari and other webkit-based browsers
- o for Opera
- ms for Microsoft Internet Explorer
var requestAnimationFrame= window.requestAnimationFrame||
window.webkitRequestAnimationFrame||
window.mozRequestAnimationFrame||
window.oRequestAnimationFrame||
window.msRequestAnimationFrame;
As long as the variable evaluates to true to any one of the expressions, we will call requestAnimationFrame with the callback function that is responsible to redraw the screen. In our example we first evaluate the div element for display.
var symbols = document.querySelector("#symbol");
Then we assign a variable the characters we want to display an animate. Note how we used the Math DOM object for random selection and assignment to the div
var l = displayCHARS[Math.floor(Math.random()*displayCHARS.length)];
symbols.textContent = l;
requestAnimationFrame(animate);
Typically the frame rate is 60 frames per second(FPS). You can consider using setTimeout to delay when the next requestAnimationFrame call gets made.
setTimeout(function(){
        requestAnimationFrame(animate);
    },1000/10);
If you need to stop your animation loop,you can consider using cancelAnimationFrame.Just like rAF, obtain a vendor specific handle
for the function to start with.
var cancelRAF = window.cancelAnimationFrame||
        window.webkitCancelAnimationFrame||
        window.mozCancelAnimationFrame||
        window.msCancelAnimationFrame ;
Store the request specific rAF id to be passed to your cancelRAF function.
var requestID;     //store the requestAnimationFrame requestID value
requestID = requestAnimationFrame(animate);
cancelRAF(requestID);
Finally let’s use the requestAnimationFrame on a canvas element to have a little animation of our own. Here is what we will develop today.

We will use clearRect function of the context to clear the specified pixels within a given rectangle.Then use the fillStyle to color the background and fillRect() to draws a “filled” rectangle.
            mainContext.clearRect(0, 0, canvasWidth, canvasHeight);
            // color in the background
            mainContext.fillStyle = "grey";
            mainContext.fillRect(0, 0, canvasWidth, canvasHeight);
Now draw the circle and color it.
mainContext.beginPath();
var radius = 25 + 150 * Math.abs(Math.cos(angle));
mainContext.arc(225, 225, radius, 0, Math.PI * 2, false);
mainContext.closePath();
// color in the circle
mainContext.fillStyle = "red";
mainContext.fill();
Download the source code
You can download the full source code of this example here: HTMLCanvas
