In this example, we’ll be introducing and talking about contenteditable attribute of HTML5. The contenteditable attribute specifies whether the content of an element is editable or not.
For some time now, we’ve been using various technologies to edit and store text within a web browser. Now with the contenteditable attribute, things have got a whole lot easier.
In this article, we’ll be looking at what this attribute is for, how it works, and how we can take things further.

1. Initial Setup and Application
Go ahead and create a new html document and add the basic sytnax in it like so:
<!DOCTYPE html>
<html>
<head>
	<title>HTML5 Contenteditable Attribute Example</title>
</head>
<body>

<!-- STYLE SECTION -->

<style type="text/css">

</style>

<!-- HTML SECTION -->

</body>
</html>
1.1 Browser Support
Content editable is fully compatible with current browsers:
• Firefox 3.5+
• Firefox for Android 19+
• Chrome 4.0+
• Internet Explorer 5.5+ *
• Safari 3.1+
• Opera 9+
• iOS Safari 5.0+
• Android Browser 3.0+
• Opera Mobile 12.1+
• Chrome for Android 25+
1.2 Syntax & Attribute Values
The syntax for applying the attribute in HTML is: <element contenteditable="true|false">
The two values this attribute can take are:
– true which specifies that the element is editable.
– false which specifies that the element is not editable.
Note that the default value of contenteditable is inherit and contenteditable="" or contenteditable="true" mean the same thing when being applied, they both mean true.
1.3 Basic Application
To apply the attribute in a basic form just add a new paragraph in HTML and assign it contenteditable="true" like so:
<!-- HTML SECTION  -->
<p contenteditable="true">This text element is editable.</p>
And we’d have a single line of text which can be changed to whatever text you like: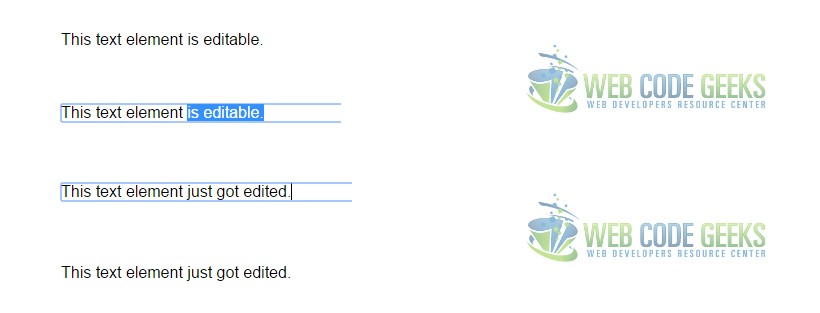
By default, your paragraph (without this attribute) will not be editable, so there is no need to apply the false value.
2. Futher into Contenteditable
2.1 Application to a Parent Element
Applying contenteditable attribute into parent elements, that is, elements with several elements inside them, and setting the value to true, will give all of the children element editability. Check the example below:
<div contenteditable="true" class="parent">
    <h2>I am the first child.</h2>
    <div>I am the second child</div>
    <p>I am the third child.</p>
</div>
All of the element inside the parent div will be fully editable.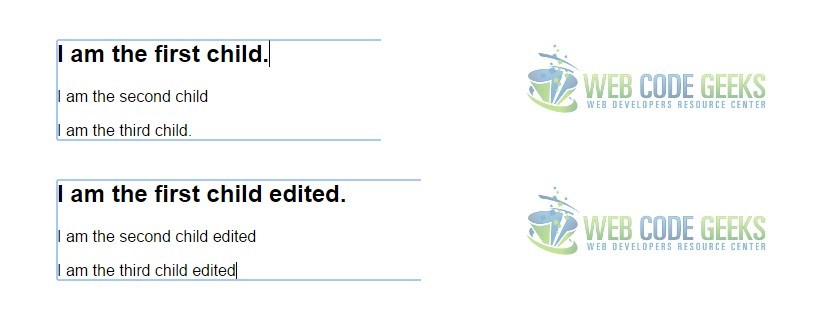
This happens for all child element whenever the attribute is applied to their respective parent elements except when a child element explicitly has the contenteditable="false" applied. Let’s give an example:
<div contenteditable="true" class="parent">
    <h2 contenteditable="false">I am the first child and I cannot be changed.</h2>
    <div>I am the second child</div>
    <p>I am the third child.</p>
</div>
That is it. Now the first element will not be editable, while the others will.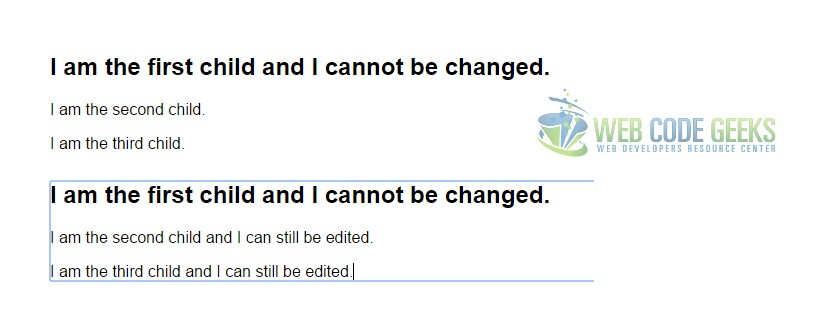
2.2 Saving the Changes
Saving changes depends on where we will store the data; commonly, it will be saved in a database. But since we do not have database access, in this tutorial, we are going to show you how to save the changes in localStorage. To do so, we will also use a bit of jQuery to make the code simpler.
First, add a text element and then a button element in HTML. The button is going to save the changes.
<article id="content" contenteditable="true">
    <p>Sweet roll tiramisu chocolate bar sugar plum caramels tootsie roll caramels. Chocolate cake wypas cotton candy icing. Applicake sesame snaps liquorice pastry croissant caramels fruitcake gingerbread biscuit. Donut toffee candy canes.</p>
</article>

<button id="save">Save Changes</button>

<script type="text/javascript" src="js/jquery-1.11.3.min.js"></script>
Don’t forget to include the jQuery library on your HTML. Next, lets save the edited content using jQuery.
<script>
    var theContent = $('#content');// set the content

    $('#save').on('click', function(){
   // stores the new content in localStorage when the button is clicked
        var editedContent   = theContent.html();
        localStorage.newContent = editedContent;
    });
</script>
This code will create a new key in localStorage containing the last change made in the content. We can use the Firebug or Developer Tools to clarify whether the data has been successfully stored or not, but make sure you hit the button. For Firefox users, go to the DOM panel and search for localStorage. In Chrome as well as Safari, we can see it under the ‘Resources’ tab.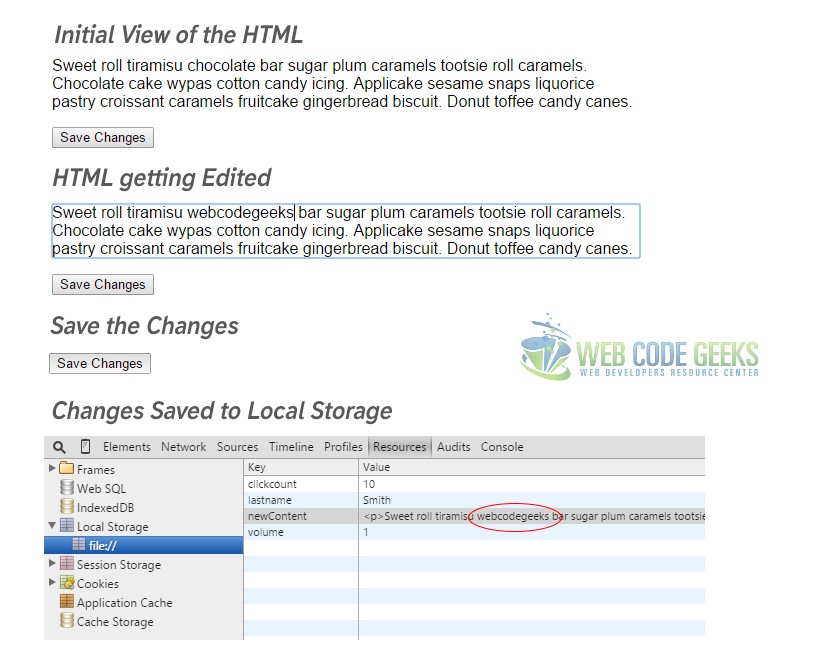
No only can we save changes to the local storage, but we can also retrieve these changes when the page is reloaded:
<script>
    // save changes to localStorage
    var theContent = $('#content');
    $('#save').on('click', function(){
        var editedContent   = theContent.html();
        localStorage.newContent = editedContent;
    });
    // retrieve the saved text
    if(localStorage.getItem('newContent')) {
   // applies the newContent when it is exist ini localStorage
        theContent.html(localStorage.getItem('newContent'));
    }
</script>
Simple as that, we’d now have the paragraph updated even when the page gets reloaded.
3. Conclusion
Tp conclude, the attribute finally makes official something that’s been implemented by browser makers for years. Although this is one of the lesser-known new attributes, I bet you’ll find yourself using it more often than you would think. Imagine being able to simply click a block of content and start making changes instantly: making quick corrections to an article in-place, allowing users to edit their comments, or even building spreadsheets within company applications that aren’t hooked up to any sort of back-end user interface. It is up to you to come up with even more uses.
4. Download
You can download the full source code of this example here: HTML5 Contenteditable Attribute
