In this post we will take a look at the kbd Html tag. This tag allows us to stylize keyboard input in a way that highlights the semantics of the enclosed text. What I meant there was that the text would stand out from surrounding text and would indicate as an input provided by the user using an input device like keyboard. We can use this tag in a programming blog or for online programming content as well as other scenarios.
1. Tools & Technologies
I have used the following tools to build the demonstration project. You can switch to other editors or IDE that you are comfortable with. As far as the technologies are concerned I have used Nodejs to spin up a little web server.

2. Project Layout
The layout of our sample application will look like below once we are done with all the changes:

index.js: This file contains JavaScript code to spin a basic web server. It does not have too many bells and whistles but suffices the purpose here for our example. We set it up to listen for requests on port 8090 and serve the requested server side resource as response.
index.html: This is, where the action is, the landing page of our example. It contains the markup to demonstrate the usage of the Keyboard Input Tag.
3. Purpose and Usage of Keyboard Input Element
The purpose of the Keyboard Input tag is to represent text in one of the following scenarios:
- Present text that the user needs to key in the system
- Present output generated by the system in response to user action
- Cases where we need to show selections that the user needs to make like menu selections
Let us look at each usage in detail. Firstly we will add an HTML5 web page and called index.html. This file looks like below initially.
index.html
<!DOCTYPE html>
<html lang="en">
    <head>
        <meta charset="utf-8">
        <meta http-equiv="X-UA-Compatible" content="IE=edge">
        <meta name="viewport" content="width=device-width, initial-scale=1">
<!-- The above 3 meta tags *must* come first in the head; any other head content must come *after* these tags -->
        <title>WCG -- HTML5 Keyboard Input Element Example</title>

<!-- HTML5 shim and Respond.js for IE8 support of HTML5 elements and media queries -->
<!-- WARNING: Respond.js doesn't work if you view the page via file:// -->
<!--[if lt IE 9]>
<script src="https://oss.maxcdn.com/html5shiv/3.7.3/html5shiv.min.js"></script>
<script src="https://oss.maxcdn.com/respond/1.4.2/respond.min.js"></script>
<![endif]-->
    </head>
    <body>
        <h1>WCG -- HTML5 Keyboard Input Element Example </h1>
    </body>
</html>
Now let us add the below markup to our index.html page.
...
<p>
 We can save a file using the keyboard shortcut <kbd><kbd class="key">Ctrl</kbd>+<kbd class="key">S</kbd></kbd>
</p>
...
Further we can style the content of the nested <kbd></kbd> tags to further highlight a specific input among larger content. So let us add the following style to our nested tags by adding a style tag with our css and decorating the nested tags with the css rule we just created:
...
<style>
    .key {
        border-radius: 3px;
        border: 1px solid lightgray;
        padding: 2px;
    }
</style>
...
and
<kbd><kbd class="key">Ctrl</kbd>+<kbd class="key">S</kbd></kbd>
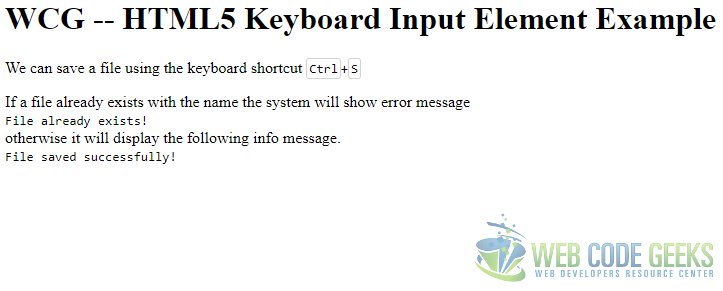
After making the above changes the output looks like below:

To present system output to a terminal in HTML5 markup we can make use of the kbd tag as follows:
...
<p>
If a file already exists with the name the system will show error message<br />
<kbd>File already exists!</kbd><br/>
otherwise it will display the following info message.<br />
<kbd>File saved successfully!</kbd>
</p>
...
The output of the above changes looks like below:
To inform the user of options provided to accomplish a task we can use the kbd tag as follows:
...
<p>
We can also save files using the menu command <kbd><samp>File</samp> => <samp>Save</samp></kbd>
</p>
...
As you can see we have used the kbd tag in combination with the samp tag to achieve the desired result. The changes above yields the following output:

4. Run the code
To run the code for this example, the following two commands need to be run in order.
> npm install
followed by
> node index.js
Once done, navigate to the URL http://localhost:8090 using a browser to navigate to our landing page:

5. Download the Source Code
That wraps up our look at the HTML5 Keyboard Input Tag. You can download the source code from:
You can download the full source code of this example here : WCG — HTML5 Keyboard Input Element Example
