The focus of this example will be the textarea tag of HTML5.
This tag defines a multiline text input control. The textarea can hold an unlimited number of characters and its size can be defined whether by rows and columns in html or more precisely by width and height in css.
Some of the attributes we will see are new to HTML5 (i.e autofocus, required, placeholder etc) which enhance this tag’s usability.
The textarea element is supported by most popular browsers like Chrome, IE, Firefox, Safari and Opera.

1. Basic Setup and Application
First, go ahead and create e new html file with basix syntax inside:
<!DOCTYPE html>
<html>
<head>
	<title>HTML5 Textarea Example</title>
</head>
<body>
<!-- STYLE  SECTION -->
<style type="text/css">
</style>
<!-- HTML SECTION  -->
</body>
</html>
</pre>
To define a textarea, just start a new textarea tag and enter text inside like so:
<!-- HTML SECTION  -->
<textarea>This is the most basic textarea.</textarea>
You have created the following textarea:

2. Variations of Textarea Attributes
Well, textarea has also attributes that can be assigned inside the tag, like any other html element:
1. autofocus – tells the textarea to be in focus when the page loads
<!-- HTML SECTION  -->
<textarea autofocus='autofocus'>This is the most basic textarea.</textarea>

2. cols – specifies the visible width of a text area
<!-- HTML SECTION  -->
<textarea cols='50'>This is the most basic textarea.</textarea>

3. disabled – specifies a text area that should be disabled
<!-- HTML SECTION  -->
<textarea disabled="disabled">This is the most basic textarea.</textarea>

4. maxlength – specifies the maximum number of characters allowed in the textarea
<!-- HTML SECTION  -->
<textarea maxlength="250">This is the most basic textarea.</textarea>
No need for a view, it’s the same textarea just with a 250 input characters condition.
5. placeholder – specifies a short sentencte or keyword as a hint on what the input should be filled with
<!-- HTML SECTION  -->
<textarea placeholder="Write something here..."></textarea>

6. required – specifies a required field, the fill of the textarea is a must
<!-- HTML SECTION  -->
<textarea required="required">This is the most basic textarea.</textarea>
No need for a view here, it is the same as the default view.
7. rows – specifies the visible number of lines in a textarea
<!-- HTML SECTION  -->
<textarea rows="8">This is the most basic textarea.</textarea>
3. Styling the Textarea
Styling a textarea will be an easy part and most times necessary on your website.
3.1 Size
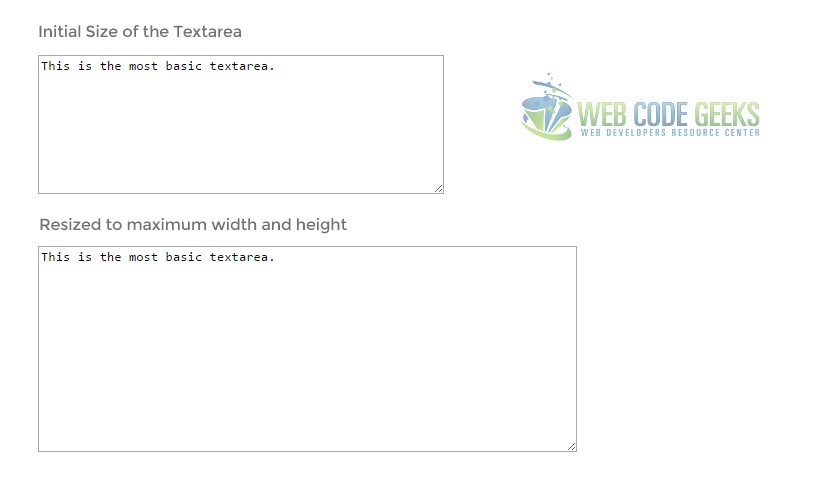
In CSS, we can easily specify an initial and maximum width and height for the textarea.
<!-- STYLE  SECTION -->
  <style type="text/css">

  textarea {
  	width: 30em;    /* the inital width of the textarea */
  	height: 10em;    /* the inital height of the textarea */

  	max-width: 40em;    /* the maximum width of the textarea */
  	max-height: 15em;    /* the maximum height of the textarea */
 }
 </style>
Look at both cases:
3.2 Font & Padding
You can have custom fonts inside the textarea. Look at the css below:
<!-- STYLE  SECTION -->
  <style type="text/css">

  textarea {
  	padding: 1em;   /* space on all directions */

  	font-family: "Montserrat", "sans-serif";
  	font-size: 1em;
 }
 </style>
Notice, now the text is inside a placeholder.
3.2 Border
Custom borders can be applied to textarea elements like below:
<!-- STYLE  SECTION -->
  <style type="text/css">

  textarea {
  	border: 0.1em solid #ccc;
  	border-radius: 0.5em;
 }
 </style>

3.3 Background
Custom borders can be applied to textarea elements like below:
<!-- STYLE  SECTION -->
  <style type="text/css">

  textarea {
  	background-color: #ffffe6;
 }
 </style>

4. Conclusion
To conclude, we can say that it is pretty easy and comfortable to create and style a textarea element in HTML5 and CSS3.
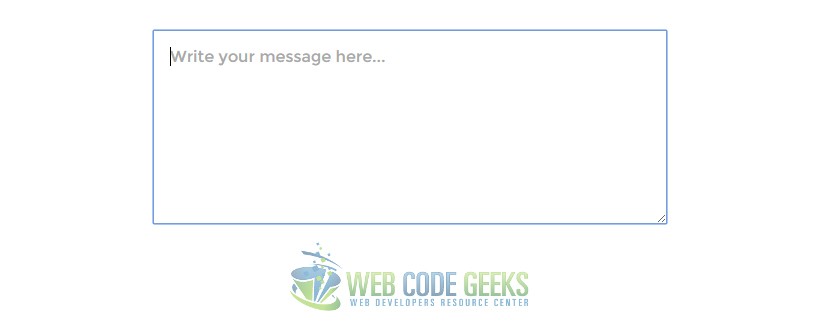
Do always remember to give the textarea a name when considering information that has to be submitted like so:
<!-- HTML SECTION  -->
<form action="/post">
	<textarea name="message" placeholder="Write your message here..."></textarea>
	<input type="submit"> <!-- this represents the submit button -->
</form>
The code above is an example of how you can have a textarea inside a form and submit it.
Also, take advantage of the html attributes to achieve as much as you can without having to style it all in css.
However, styling works just good for elements of html directly as well as when referred to classes.
5. Download
You can download the full source code of this example here: HTML5 Textarea
