There are new tools and technologies appearing in the internet everyday, all with their special characteristics and their similarities and differences with the rest of all what have already been established.
While a big number of them flop just as quickly as they were made visible (with good reason too!), Angular.js will be around for quite some time in the future, even though it has only been little time since it got famous.
Developers use it in their projects, people write and explain about it. Within a year the internet went from having just one decent tutorial/documentation to hundreds of them, including books, code samples, everything you need. Why did it reach these levels of success though?
Table Of Contents
1. What is AngularJS?
1.1 The Good Part
AngularJS is a data-binding framework that is specifically built for SPAs. That means you can easily build an application without using any other libraries since it already has everything you will ever need, built-in. It also maintains synchronization for the model and view, so it implements MVC (you should get to know them! No excuses!). However, Angular has a special way of putting MVC architecture to work: instead of writing the modules and then writing the code that connects them, with Angular you just have to write the modules, the rest is done for you automatically. Cool, right?
The good thing about SPAs is that they make it look as if you are using an app with all it’s components just like usual, while the page remains the same all throughout, with only the views being changed along with the URL – AngularJS handles routing as well as views. It’s as if you’ve just opened a desktop application and having everything you need already there.
Another good thing about AngularJS apps is that unlike other SPAs, the browser history is actually kept. For example, if you want to click on the back button to get back to the previous view, AngularJS will actually take you back to the previous view. Most SPAs don’t work this way.
1.2 The Bad Part
AngularJS is however, not appropriate for all kinds of things. If you are aiming to create an application that does simple calculations – a calculator, a puzzle game, animations, dynamic forms etc. – then AngularJS is the framework you are looking for, as it’s built precisely for rapid prototyping of generic applications.
If you want to build management tools or large scale apps, you might want to rethink using it, or at the very least use other frameworks with it.
1.3 The Important Part
Code for AngularJS applications is always organized into models, views, controllers, and sometimes also services.
- Models – JavaScript objects that represent the data your application can access or the application’s current state.
- Views – play two important roles. First, they are responsible for presenting the data from your models to the user in a visual and useful format. Second, they intercept generic user interactions–including clicks and option list selections–and translate them into application-specific actions. Views in AngularJS are defined declaratively using HTML and CSS.
- Controllers – define the actual behavior of your application and play a key role in connecting the right models to the right views.
- Services – are specialized objects that perform work on behalf of other objects. Services have many uses, from fetching remote data to providing an implementation of a useful algorithm.
Even though there are a seemingly endless number of different components of AngularJS, the basics of Angular can be broken down into 4 major components:
- Directives
- Controllers
- Scopes
- Services
Once we have a basic understanding of these basic concepts, learning Angular will be easy as pie. So let’s get to it!
2. Setting up a basic Angular app
What we’ll do here is create an angular App that has only an input field for your name, and then we’ll display a greeting sing that name. First of all, let’s create an HTML file named index.html and a Javascript file named app.js.
2.1 The HTML part
In the index.html you just need to put the default structure plus about two more lines, making your code looks like this:
index.html
<!DOCTYPE html>
<html>
<head>
    <script src="http://cdnjs.cloudflare.com/ajax/libs/angular.js/1.2.1/angular.min.js"></script>
    <meta charset="utf-8">
    <title>Basic Angular App</title>
    <script src="app.js"></script>
</head>
<body ng-app="myApp">
<br/><br/>
<div>
    Enter your name:
    <input type="text" ng-model="name"></input>
</div>
<div>Hello {{name}}</div>
</body>
</html>
In the <head> section we’ve simply linked to the online-hosted AngularJS library and scripted the custom Javascript file named app.js that we created.
The important part of this piece of code is the <body> section. There is the Angular app that we have defined, by putting ng-app="myApp" inside the <body> tag. That means that we have named our app myApp. After doing that, we have placed an input field that has two attributes appended to it: type and ng-model, the former taking the value text while the latter name. We bind the value of the input to the variable name using the attribute ng-model. To show the value of name in the view, we put {{name}} in the HTML, so basically we bind the value of the name to the view. Angular treats the double {} brackets as a template and keeps the value updated as the input tag changes.
2.2 The Javascript Part
We mentioned creating a Javascript file named app.js and scripting it in the main file, but didn’t say what it’s contents were. Well, they should look like this:
app.js
var app = angular.module('myApp', []);
Yes, it’s only that much! That line of code means that we create an Angular module named myApp, just as we agreed before. With that, we’re done. For a one line app, we’re set to go!
While in action, it would look like this:
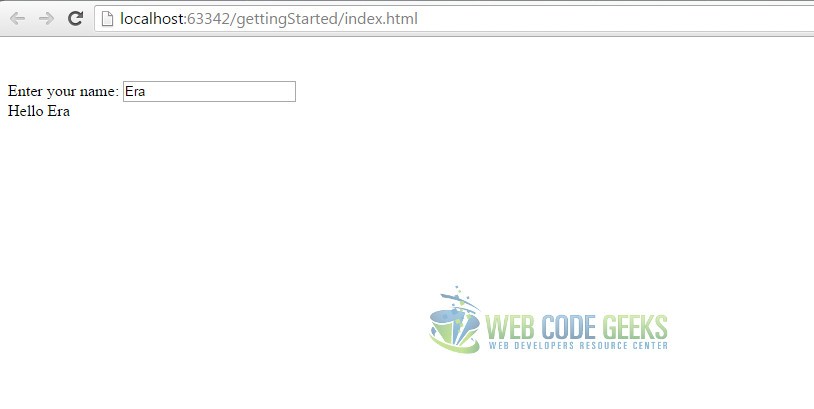
3. Understanding Directives
3.1 What are Directives?
We fleetingly mentioned that directives are one of the main building blocks of AngularJS. It’s more serious than that! Everything in Angular is based on directives, Angular is packed chock full of built-in directives from the start for that reason. But what are they exactly?
To put it simply, directives are JavaScript functions that manipulate and add behaviors to HTML DOM elements. Each directive undergoes something similar to a life cycle as AngularJS compiles and links the DOM. The directive lifecycle begins and ends within the AngularJS bootstrapping process, before the page is rendered. When AngularJS loads this simple example, it will traverse the DOM elements looking for any directives that are associated with each DOM element. Once it’s found all of them (if there are multiple directives), it will then start running the directive and associating it with the DOM element. This all happens behind the scenes.
3.2 Built-in Directives
Unwittingly you have already used some directives that are given to you with Angular, without you needing to create them yourself (yes! you can also create custom directives!). If you go back to the example above, you’ll notice the usage of ng-app and ng-model. The first one initializes an AngularJS application, while the latter binds the value of HTML controls such as input, select or textarea, to application data.
Of course, there is a multitude of other built-in directives, such as ng-init, ng-repeat, ng-view etc. However, I’d recommend you take each of those apart as you go, as you’ll get a deeper understanding of Angular in general.
3.3 Custom Directives
In addition to all the pre-packaged directives that come with the decision to use Angular in your applications, you can also make things interesting and simple by creating your own, according to your app’s needs and however you think they might make programming easier, and that they do!
You can very easily create you own directives by using a simple function made especially for this: directive(). But let’s see it in action first, and explain stuff later. To create a directive named, say, ng-era, the code would go precisely like below:
directives.js
app.directive('ngEra', function() {
  return {
    restrict: 'A',
    template: '
‘ } });
As you see, we have applied the directive() function on our Angular app. The first argument it takes, is the name of the directive, in camel case. Camel case means that it would be written as ngEra and Angular considers it an equivalent to ng-era, while also making the translation of the case used itself. It’s only done like this for code clarity purposes, but it’s important.
The second parameter of the function would be a function that defines the way the directive is to be used. The A you see as a value for restrict, means that we have restricted our directive to be invoked only as an attribute. There are four ways to invoke a directive, as an element, as an attribute, as a class, or as a comment, respectively E, A, C, and M for short. By default, Angular uses EA as a value for restrict, which means that the directive is used both as an element and as an attribute. You could fire your directive like below:
invoke.html
'A' - <span ng-era></span>
'E' - <ng-era></ng-era>
'C' - <span class="ng-era"></span>
'M' - <!-- directive: ng-era -->
It’s quite easy, and useful to boot!
4. Understanding Controllers
While directives are typically used on a single DOM element, Angular uses the concept of controllers to organize functionality across a group of DOM elements, and does not limit itself to only one of them. A controller is a bit of code that defines functionality for a part of the page, where you want the app to behave differently than it would typically. It is defined using the ng-controller directive.
Basically, a controller is a JavaScript object containing attributes/properties and functions. Each controller accepts $scope as a parameter which refers to the module that controller is to control. Let’s take a look at how we would define a controller:
controllers.js
app.controller('mainCtrl', function($scope) {
  // We have access to this new
  // $scope object where we can place
  // data and functions to interact with it
});
That would mean that we have created a controller named mainCtrl and defined a scope where it would have the right to make changes etc. We would use it like below:
controllers.html
<div ng-controller='mainCtrl'>
  <!--
    In here, we have access to the
    $scope object defined by mainCtrl
   -->
</div>
We’re mostly clear on controllers, except for one little thing: $scope.
5. Understanding Scopes
What about $scope? What is it and where did it come from? AngularJS uses scopes to communicate between components – particularly between our Javascript and our HTML. Scopes are by definition the glue between our code and what the browser renders.
$scope is a special object that is passed into the controller function by the AngularJS framework itself. Its role is to serve as a bridge between your controller and your view and is therefore one of the most important types of objects you’ll use in AngularJS. Any properties you add to $scope will be directly accessible to the view, so naturally it’s the perfect place to store references to your model objects.
Let’s pick up the first example we used to explain Angular, the one where the app greets the user. The code for the HTML part, would now look like below:
index.html
<!DOCTYPE html>
<html>
<head>
    <script src="http://cdnjs.cloudflare.com/ajax/libs/angular.js/1.2.1/angular.min.js"></script>
    <meta charset="utf-8">
    <title>Basic Angular App</title>
    <script src="app.js"></script>
    <script src="directives.js"></script>
</head>
<body ng-app='myApp'>

<input type="text" ng-model="message" placeholder="Enter a message" />
<h3>{{ message }} {{ user.email }}</h3>

</body>
</html>
It’s not much different from the previous one, right? Only this time, we’ve used two expressions after the input field. What they do will be defined by the their $scopes, as in the code below:
app.js
angular.module('myApp', [])
.run(function($rootScope) {
  $rootScope.user = {
    email: 'balliue@gmail.com'
  };
  $rootScope.message = "Welcome back";
});
As you can see, what we’ve done here is assign a variable user on $rootScope and Angular made this variable accessible to our view automatically. An important thing to note is that this binding goes both ways. Our view can change the value of a variable. For instance, we can type a message in an input box and it will automatically be updated from the default Welcome back! that we have set it to display! While the default view would be this one:
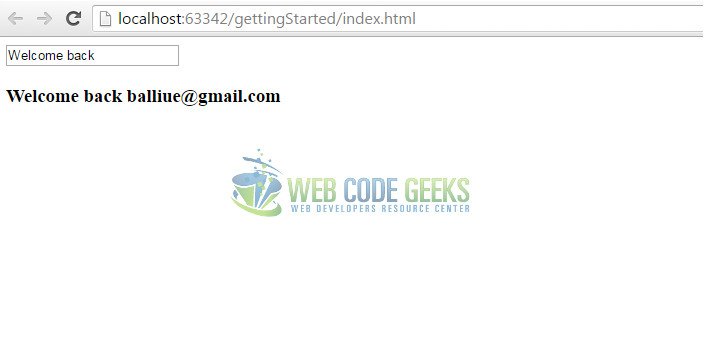
In action, we’d be presented with this view:

It’s important to understand that Angular may have a large number of scopes, however, the most basic level of it, the top one, is $rootscope. Since it’s the most important one, it’s also not recommended to make changes directly into it.
6. Understanding Services
Services are, at their core, just functions and are responsible to do specific tasks only. This makes them an individual entity which is maintainable and testable. Controllers and filters can call them based on requirements. Services are normally injected using dependency injection mechanism of AngularJS.
AngularJS provides many inbuilt services for example, $http, $route, $window, $location etc. Each service is responsible for a specific task for example, $http is used to make ajax call to get the server data. $route is used to define the routing information and so on and so forth. Inbuilt services are always prefixed with $ symbol. However, as seems to be the case with everything Angular, you can also build your own services, and you can do so using two methods: as a factory or as a service.
Both are pretty similar, and not only on their end result. Let’s try them out!
To create a service as a factory we first define a factory and then assign a method to it. The code would go like below:
app.js
app.factory('MathService', function() {
   var factory = {};

   factory.multiply = function(a, b) {
      return a * b
   }

   return factory;
});
As you can see, the first parameter or the factory() constructor is the name that we want our service to have, and the second is the function that defines a factory and makes it multiply a number by another one. By using the service method, we could get this result using the code below:
app.js
app.service('CalcService', function(MathService){
   this.square = function(a) {
      return MathService.multiply(a,a);
   }
});
In this case we’ve used a built-in service to multiply a number by itself, and you’ll notice it’s the one we created above (just for giggles, it could be whatever).
7. Download the source code
This was an example explaining the basic concepts of AngularJS.
You can download the full source code of this example here: gettingStarted

Hi Era,
Thanks for the interesting article. I enjoyed reading it.
Regards,
Raj