In this post we will look at the Bootstrap Carousel Component also known as Image Slider. This component is also available as an independent plugin as well. All that is required is adding the carousel.js file. But if the bootstrap.js or the minified version of it is included, there is no need for this file to be added. The bootstrap js file already contains all the plugins.
We will learn both ways of using the carousel component, viz., via data attributes and via JavaScript. Although nesting of carousels is not supported we can have more than one of these on a page. With both approaches there is really no restrictions on the feature set that we can leverage with this component. As far as browser compatibility is concerned there are some issues with IE9 and below. This is because it uses CSS3 transitions for animating and that is not supported in IE9 & 8.
So, let us get started with the tasks on hand.

1. Tools & Technologies
We use the following tools & technologies to implement this example:
2. Project Structure
To start off we need to organize our project structure as below.
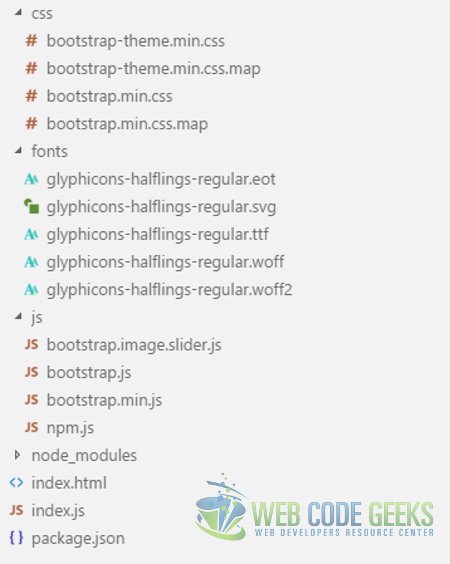
css
The css files from Bootstrap package reside in this folder. All the css stylesheets created by us would reside here as well.
fonts
All the font files that came with Bootstrap are located in this folder.
js
The Bootstrap JavaScript files are placed here along with the file we will create, namely, bootstrap.image.slider.js
index.html
The file is based on the template at Bootstrap Getting Started section. It holds the HTML markup and is our landing page. All the other files are referenced in this one and they come together in the browser and make things happen.
index.js
Our barebones web server is built using Node.js and Express module resides in this file.
3. Carousel via Data Attributes
3.1 About data attributes
Data attributes are a part of the HTML5 and they can be used to associate data with elements. Prefixing data-* to attribute name we maintain semantics instead of using non standard attributes. To read such data associated with elements all we need to do is read the property name of off the dataset property of the DOM element. For example, consider the below markup:
<li id="litem" data-target="#carousel-first-one" class="active"></li>
Now as you can see that the above markup has a list item with data- attributes. To access this value programmatically I can write on JavaScript as below:
var litem = document.getElementById("litem");
litem.dataset.target; //#carousel-first-one
3.2 Carousel Implementation
To use just the data attributes to create an instance of a Carousel we need to follow the following Html structure:
index.html
...
<div id="carousel-first-one" class="carousel" data-ride="carousel">
<!-- Carousel Indicators which allow user to jump to specific slide -->
    <ol class="carousel-indicators">
        <li data-target="#carousel-first-one" data-slide-to="0" class="active"></li>
        <li data-target="#carousel-first-one" data-slide-to="1"></li>
        <li data-target="#carousel-first-one" data-slide-to="2"></li>
    </ol>

<!-- Individual slides of the carousel -->
    <div class="carousel-inner" role="listbox" >
        <div class="item active" style="text-align: center" >
            <img src="/images/puppy.jpeg" alt="Puppy" class="img-responsive" />
            <div class="carousel-caption">
                Bow Wow
            </div>
        </div>
       ...
    </div>

<!-- Controls Previous, Next -->
    <a class="left carousel-control" href="#carousel-first-one" role="button" data-slide="prev">
        <span class="glyphicon glyphicon-chevron-left" aria-hidden="true"></span>
        <span class="sr-only">Previous</span>
    </a>
    <a class="right carousel-control" href="#carousel-first-one" role="button" data-slide="next">
        <span class="glyphicon glyphicon-chevron-right" aria-hidden="true"></span>
        <span class="sr-only">Next</span>
    </a>
</div>
...
The key classes that enable the carousel above are:
carousel: This class is decorated on the div containing the entire markup of the Carousel. The data-ride with value “carousel” causes the carousel to slide on page load. If removed, the carousel will no longer start automatically slide through the various slides.
carousel-indicators: An ordered list is decorated with this class to display the series of dots at the bottom of the carousel. They allow the user to switch to any slide as desired. The dot representing the current slide displayed is styled visibly different from the others. The individual dots or list items are decorated with data-target attribute with the value of # followed by the id of the top most element of carousel. They also have a data-slide-to attribute with a numerical value representing the slide’s order to which the carousel will slide to upon clicking it. The item which is to be initially is decorated with an active class as well.
carousel-inner: This class is used on the div housing the individual slides to be displayed. It contains each slide as a div decorated with the item class.
item: This class is decorated on each div hosting the contents of individual slides of the carousel.
carousel-caption: An optional caption can be provided apart from the image as content of each slide. The caption or content is housed in a div decorated with this CSS class.
left/right carousel-control: The arrows you see on either side of each slide are created by a tags decorated with either the right carousel-control or the left carousel-control CSS classes.
This pretty much is all that is required to display a carousel exclusively via data attributes. The result of the above markup looks as follows:

4. Carousel via JavaScript
Now let us look at the programmatic way of using the carousel plugin. Firstly, we will borrow the entire Html Markup from the previous section sans the data attributes. We will create a new Html page with markup as below:
carousel.html
...
<!-- First carousel exclusively using data atttributes -->
<div id="carousel-first-one" class="carousel" >

<!-- Carousel Indicators which allow user to jump to specific slide -->
    <ol class="carousel-indicators">
        <li id="first" class="active"></li>
        <li id="second"></li>
        <li id="third"></li>
    </ol>

<!-- Individual slides of the carousel -->
    <div class="carousel-inner" role="listbox" >
        <div class="item active" style="text-align: center" >
            <img src="/images/puppy.jpeg" alt="Puppy" class="img-responsive" />
            <div class="carousel-caption">
                Bow Wow
            </div>
        </div>
        <div class="item" style="text-align: center">
            <img src="/images/cat-big.jpg" alt="Cat" class="img-responsive"/>
            <div class="carousel-caption">
                Meow
            </div>
        </div>
        <div class="item" style="text-align: center">
            <img src="/images/Unicorn.jpeg" alt="Unicorn" class="img-responsive"/>
            <div class="carousel-caption">
                Neigh
            </div>
        </div>
    </div>
<!-- Controls -->
    <a id="prev" class="left carousel-control" href="#carousel-first-one" role="button" >
        <span class="glyphicon glyphicon-chevron-left" aria-hidden="true"></span>
        <span class="sr-only">Previous</span>
    </a>
    <a id="next" class="right carousel-control" href="#carousel-first-one" role="button">
        <span class="glyphicon glyphicon-chevron-right" aria-hidden="true"></span>
        <span class="sr-only">Next</span>
    </a>
</div>
...
As you can see we have got rid of the various data-* attributes from the markup and added id attributes. The id attribute helps us as we program these tags which was earlier done by data-* attributes. Now, create a JavaScript file named bootstrap.image.slider.js under the js folder and reference it in our new file carousel.html. In this file we write code to handle the click events of all three carousel-indicators as well as the Left/Previous controls. Our JavaScript file will look like:
bootstrap.image.slider.js
var car = document.getElementsByClassName("carousel")[0];
var first = document.getElementById("first");
var second = document.getElementById("second");
var third = document.getElementById("third");
var prev = document.getElementById("prev");
var next = document.getElementById("next");

//Call to setup carousel initially
$(car).carousel();

first.addEventListener("click", function(){
    switchTo(0);
});
second.addEventListener("click", function(){
    switchTo(1);
});
third.addEventListener("click", function(){
    switchTo(2);
});
prev.addEventListener("click", function(){
    $(car).carousel("prev");
});
next.addEventListener("click", function(){
    $(car).carousel("next");
});
function switchTo(slideNo){
    $(car).carousel(slideNo);
}
Here we attach an event listener to each of the three carousel-indicators, and call the carousel function with the 0 based index of the slide to switch to. We also attach event listeners to both the carousel-controls to implement the previous and next slide behavior of each.
5. Run the Source Code
To run the application and see it in action, we need to run the following two commands, in this order, at the root of the project.
> npm install
> node index.js
Then, we need to navigate to the following URLs in a browser:
http://localhost:8090/
and
http://localhost:8090/carousel.html
6. Download the Source Code
This source code for this example is available for download below:
You can download the full source code of this example here : WCG – Bootstrap Image Slider Example
