Yesterday I wrote a tweet about how I usually create components.
Great workflow for refactoring unwieldy components :-) https://t.co/each4c2cm9
— Kent C. Dodds 🌌 (@kentcdodds) December 9, 2015
A tweet is quite short, so let’s take a closer look at such workflow in more detail. Also, note that I’m using Angular 2 components here, but this holds in many other contexts as well, Angular 1.x, React,…
When you start a new application, most often you get a static document from your UI design team, or you start from some predefined template. That said, you need to have a strategy for decomposing that huge static HTML block into smaller components.
My workflow usually consists in
- Create a component containing that huge static HTML block
- Identify reusable or autonomous parts
- Extract those parts into separate components
- Iterate, goto step 2.
1. The big component
So at step 1 you’ll get something like this.
@Component({
  selector: 'app-main',
  template: `
    <div class="demo-layout mdl-layout mdl-js-layout mdl-layout--fixed-drawer mdl-layout--fixed-header has-drawer is-upgraded" data-upgraded=",MaterialLayout">
      <header class="demo-header mdl-layout__header mdl-color--grey-100 mdl-color-text--grey-600 is-casting-shadow">
        <div class="mdl-layout__drawer-button"> <i class="material-icons">menu</i>
        </div>
        <div class="mdl-layout__header-row">
          <span class="mdl-layout-title">Home</span>
          <div class="mdl-layout-spacer"></div>
          <div class="mdl-textfield mdl-js-textfield mdl-textfield--expandable is-upgraded" data-upgraded=",MaterialTextfield">
            <label class="mdl-button mdl-js-button mdl-button--icon" for="search" data-upgraded=",MaterialButton"> <i class="material-icons">search</i>
            </label>
            <div class="mdl-textfield__expandable-holder">
              <input class="mdl-textfield__input" type="text" id="search">
              <label class="mdl-textfield__label" for="search">Enter your query...</label>
            </div>
          </div>
          <button class="mdl-button mdl-js-button mdl-js-ripple-effect mdl-button--icon" id="hdrbtn" data-upgraded=",MaterialButton,MaterialRipple">
            <i class="material-icons">more_vert</i>
            <span class="mdl-button__ripple-container">
              <span class="mdl-ripple"></span>
            </span>
          </button>
          <div class="mdl-menu__container is-upgraded">
            <div class="mdl-menu__outline mdl-menu--bottom-right"></div>
            <ul class="mdl-menu mdl-js-menu mdl-js-ripple-effect mdl-menu--bottom-right mdl-js-ripple-effect--ignore-events" for="hdrbtn" data-upgraded=",MaterialMenu,MaterialRipple">
              <li class="mdl-menu__item mdl-js-ripple-effect" tabindex="-1" data-upgraded=",MaterialRipple">
                About
                <span class="mdl-menu__item-ripple-container">
                  <span class="mdl-ripple"></span>
                </span>
              </li>
              <li class="mdl-menu__item mdl-js-ripple-effect" tabindex="-1" data-upgraded=",MaterialRipple">
                Contact
                <span class="mdl-menu__item-ripple-container">
                  <span class="mdl-ripple"></span>
                </span>
              </li>
              <li class="mdl-menu__item mdl-js-ripple-effect" tabindex="-1" data-upgraded=",MaterialRipple">
                Legal information
                <span class="mdl-menu__item-ripple-container">
                  <span class="mdl-ripple"></span>
                </span>
              </li>
            </ul>
          </div>
        </div>
      </header>
      <div class="demo-drawer mdl-layout__drawer mdl-color--blue-grey-900 mdl-color-text--blue-grey-50">
        <header class="demo-drawer-header">
          <img src="images/user.jpg" class="demo-avatar">
          <div class="demo-avatar-dropdown">
            <span>hello@example.com</span>
            <div class="mdl-layout-spacer"></div>
            ...
            <div class="mdl-menu__container is-upgraded">
              <div class="mdl-menu__outline mdl-menu--bottom-right"></div>
              ...
            </div>
          </div>
        </header>
        <nav class="demo-navigation mdl-navigation mdl-color--blue-grey-800">
          <a class="mdl-navigation__link" href="">
            <i class="mdl-color-text--blue-grey-400 material-icons" role="presentation">home</i>
            Home
          </a>
          <a class="mdl-navigation__link" href="">
            <i class="mdl-color-text--blue-grey-400 material-icons" role="presentation">inbox</i>
            Inbox
          </a>
        </nav>
      </div>
      <main class="mdl-layout__content mdl-color--grey-100">
        <div class="mdl-grid demo-content">
          <div class="demo-charts mdl-color--white mdl-shadow--2dp mdl-cell mdl-cell--12-col mdl-grid">

            <svg fill="currentColor" width="200px" height="200px" viewBox="0 0 1 1" class="demo-chart mdl-cell mdl-cell--4-col mdl-cell--3-col-desktop">
              ...
            </svg>
            <svg fill="currentColor" width="200px" height="200px" viewBox="0 0 1 1" class="demo-chart mdl-cell mdl-cell--4-col mdl-cell--3-col-desktop">
              ...
            </svg>
          </div>
          ...
        </div>
      </main>
    </div>
  `
})
export class MainCmp {}
Totally not comprehensible, nor maintainable. Also, don’t fall into the trap of simply externalizing this into an HTML page and you’re done, like..
@Component({
  selector: 'app-main',
  templateUrl: './main.html'
})
export class MainCmp {}
Neat, right. Well, no, you’re just hiding the crap ![]() .
.
2. Identify components
For a first high level overview, the best is to look at the static HTML page of our huge app-main component.
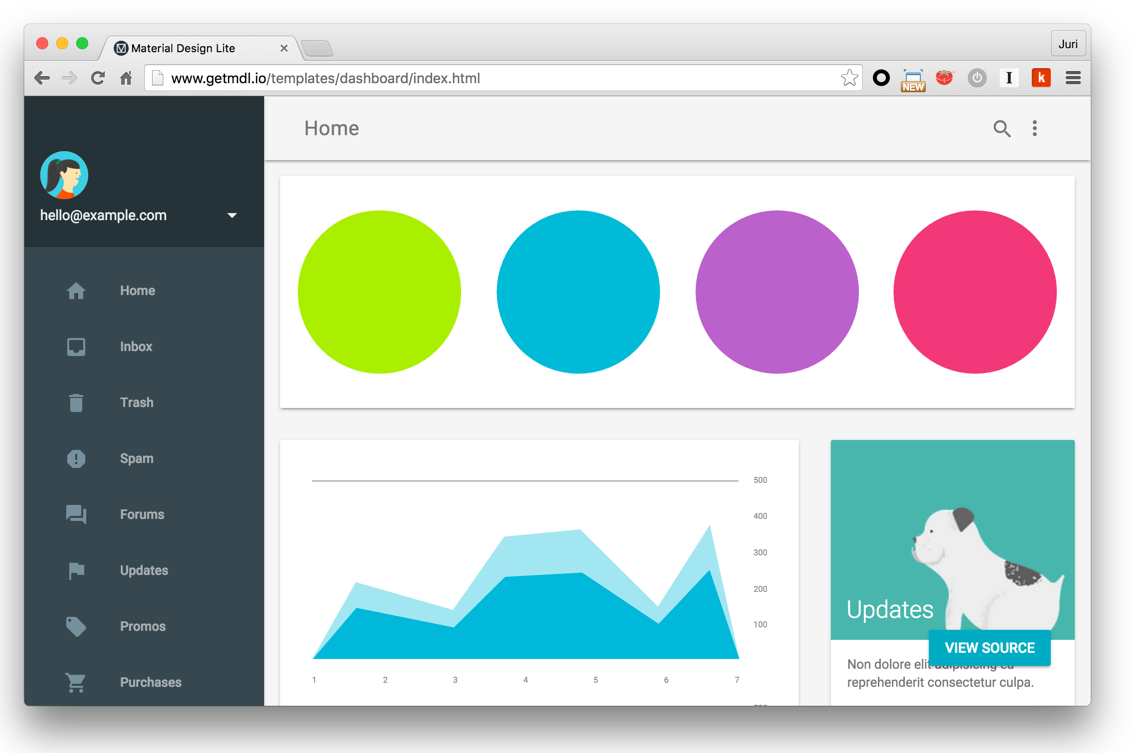
When I look at this I can immediately spot
- a header area
- a main area/dashboard
- a sidebar area
3. Extract new components and re-assemble
Once we’ve identified the components, we can start creating new ones and extract the according HTML parts into them.
// header component file
@Component({
  selector: 'app-header',
  template: `
    <div class="mdl-layout__drawer-button"> <i class="material-icons">menu</i>
    </div>
    <div class="mdl-layout__header-row">
      <span class="mdl-layout-title">Home</span>
      <div class="mdl-layout-spacer"></div>
      <div class="mdl-textfield mdl-js-textfield mdl-textfield--expandable is-upgraded" data-upgraded=",MaterialTextfield">
        <label class="mdl-button mdl-js-button mdl-button--icon" for="search" data-upgraded=",MaterialButton"> <i class="material-icons">search</i>
        </label>
        <div class="mdl-textfield__expandable-holder">
          <input class="mdl-textfield__input" type="text" id="search">
          <label class="mdl-textfield__label" for="search">Enter your query...</label>
        </div>
      </div>
      <button class="mdl-button mdl-js-button mdl-js-ripple-effect mdl-button--icon" id="hdrbtn" data-upgraded=",MaterialButton,MaterialRipple">
        <i class="material-icons">more_vert</i>
        <span class="mdl-button__ripple-container">
          <span class="mdl-ripple"></span>
        </span>
      </button>
      <div class="mdl-menu__container is-upgraded">
        <div class="mdl-menu__outline mdl-menu--bottom-right"></div>
        <ul class="mdl-menu mdl-js-menu mdl-js-ripple-effect mdl-menu--bottom-right mdl-js-ripple-effect--ignore-events" for="hdrbtn" data-upgraded=",MaterialMenu,MaterialRipple">
          <li class="mdl-menu__item mdl-js-ripple-effect" tabindex="-1" data-upgraded=",MaterialRipple">
            About
            <span class="mdl-menu__item-ripple-container">
              <span class="mdl-ripple"></span>
            </span>
          </li>
          <li class="mdl-menu__item mdl-js-ripple-effect" tabindex="-1" data-upgraded=",MaterialRipple">
            Contact
            <span class="mdl-menu__item-ripple-container">
              <span class="mdl-ripple"></span>
            </span>
          </li>
          <li class="mdl-menu__item mdl-js-ripple-effect" tabindex="-1" data-upgraded=",MaterialRipple">
            Legal information
            <span class="mdl-menu__item-ripple-container">
              <span class="mdl-ripple"></span>
            </span>
          </li>
        </ul>
      </div>
    </div>
  `
})
export class HeaderCmp {}
You repeat the same for our sidebar and main area dashboard. Finally we should get something like this.
import { HeaderCmp } from './app-header';
import { SidebarCmp } from './app-sidebar';
import { DashboardCmp } from './app-dashboard';

@Component({
  selector: 'app',
  template: `
    <div class="demo-layout mdl-layout mdl-js-layout mdl-layout--fixed-drawer mdl-layout--fixed-header has-drawer is-upgraded" data-upgraded=",MaterialLayout">
      <app-header class="demo-header mdl-layout__header mdl-color--grey-100 mdl-color-text--grey-600 is-casting-shadow">
      </app-header>

      <app-sidebar class="demo-drawer mdl-layout__drawer mdl-color--blue-grey-900 mdl-color-text--blue-grey-50">
      </app-sidebar>

      <app-main class="mdl-layout__content mdl-color--grey-100">
      </app-main>
    </div>
  `
})
export class MainCmp {}
4. Iterate
Obviously, these components are still way too large. So iterate, basically go back to step 2, take the first component (i.e. our app-header) and extract it into separate ones again, until you get to a point where you have reasonable-sized components.
During such process you may naturally even arrive at components so generic that they’re reusable across multiple applications. So you could even extract them into a separate, dedicated library.
Conclusion
I think you got the main idea. Obviously you’ll do the extract and re-compose in a much quicker way after a while, even in your head “in-memory” ![]() , but the concept is this basically.
, but the concept is this basically.
Back when I was a student at the university, when they explained us the concept of recursion in algorithms, they presented the concept of “divide and conquer”. From now and then I get reminded to that as it is very much the same here. You take a piece, extract it and then assemble it back into the main part.
| Reference: | Componentizing Workflow for Angular 2 from our WCG partner Juri Strumpflohner at the Juri Strumpflohner’s TechBlog blog. |
