In this tutorial we would explore the WebRTC Framework part of the HTML5 specification. RTC stands for Real-Time Communication since it enables peer to peer communication without any plugins or any other installs. WebRTC also removes the need for an intermediary server for two browsers to communicate and exchange data, audio or video among them.
The APIs are still a work in progress and work remains to be done on them. There might be changes to the APIs as development moves on. The World Wide Web consortium(W3C) and the Internet Engineering Task Force are working to standardize WebRTC. Although it will be rewarding to get on board early on to reap benefits as it matures and becomes a standard. Most current browsers have support for WebRTC albeit through prefixes attached to API calls.
In this article, we will build an application to explore the capabilities of WebRTC and learn more about it.
1. What is WebRTC and How it works
WebRTC is a framework that enables peer to peer connections and allows exchange of audio, video and data between the connected peers. WebRTC was thought up to remove the need for a server that acts as the intermediary in any conversation between clients. With WebRTC the role of the server is relegated to just helping two peers to discover each other and setup a direct connection.
Before we start building applications and exploring WebRTC APIs I would like to explain how it works. The players in this scene are the two browser instances wanting to connect. A signalling server that serves the purpose of helping the browsers establish a connection. The WebRTC consists of the following APIs:
- getUserMedia
- RTCPeerConnection
- RTCDataChannel
The getUserMedia API call in JavaScript allows access to the local webcam and audio devices. Once we have access to the audio and video feed we can display the same on our page. We can use RTCPeerConnection APIs to establish a connection with a remote peer and share the local feed to implement a video call. To establish a connection we do need a server but once a connection is established there is no need for a server anymore as we exchange data directly. Although the way things stand right now, we do need STUN, TURN servers to penetrate through firewalls and Netstats.
This is not all we can use the RTCDataChannel API to send and receive arbitrary data to/from a remote peer using a connection established with RTCPeerConnection API. The capabilities of these APIs opens up a world of possibilities and applications that can be created.
2. Tools & Technologies
The tools we are going to use to build our application are:
Node.js is all about JavaScript running on the server. We will use Node.js and Express Module to quickly spin up a web server for our application. Visual Studio Code IDE is one of many IDE available for Node development, you can choose any other preferred one.
3. Project Structure
The screenshot below shows the layout of the project we are building. Below the screenshot is a brief description of each artifact.

js
We place our JavaScript code files here.
index.html
This file is demo page for getUserMedia.
RTCDemo1.html
This file contains the markup for one of our video chat clients.
RTCDemo2.html
This is the other client in our video chat sample.
webrtc.server.js
This is our Socket.io based signalling server.
index.js
This is our basic web server created using express module.
RTCChannelDemo1.html
This page acts as one of the peers in our RTCDataChannel demo.
RTCChannelDemo2.html
This page also acts as one of the peers in our RTCDataChannel demo.
4. Capturing Audio & Video
Let us begin by trying to write code to access the local webcam feed from a webpage. Edit the index.html file to add the following HTML Markup:
<video autoplay></video>
<button type="button" id="btnShowCamera" >Show Webcam</button>
Here we have added a video element to display the stream from webcam. Notice the attribute autoplay. This is critical as otherwise you would only see a static capture from the webcam, if at all. Let us add an event handler for the button element placed on the page. Add the following JavaScript to the webrtc.demo.js file. Do not forget to refer to it in the index.html page as well using a script tag.
webrtc.demo.js
function GetUserMedia(){
    navigator.getUserMedia = navigator.getUserMedia || navigator.webkitGetUserMedia
                    || navigator.mozGetUserMedia || navigator.msGetUserMedia;
    return navigator.getUserMedia;
}

function showWebcam(){
    var userMedia = GetUserMedia();
    if(userMedia){
        navigator.getUserMedia({video: true, audio: true}, function(stream){

            document.getElementsByTagName("video")[0].src = window.URL.createObjectURL(stream);

        }, function(error){
            console.log("There was an error in GetUserMedia!!!");
        });
    }
}
document.getElementById("btnShowCamera").addEventListener("click", function(event){
    showWebcam();
});
The GetUserMedia function in the code above tries to shield our code from the cross browser differences in implementations. Like I noted before, WebRTC is still in progress but as things get standardized you can expect the vendor prefixed versions to go away. When we call the getUserMedia function we pass a constraint object indicating the streams we want to request, viz., Audio, Video. The next argument is a callback to handle the returned stream object with the third argument acting as an error handler.
Run the code now using the commands below and navigate to http://localhost:8090/. Click on the Show Webcam button and reply yes or grant permission to allow access to webcam in the prompt that comes up. You should be able to see the video feed from the webcam on the page.
5. Setting up Peer to Peer Connection
To begin with connecting two separate clients, we start with creating a small signalling server of our own using socket.io Module. This will allow us to act as an intermediary to introduce the two clients we will create shortly. The code to handle the forwarding of signals on the server looks like below:
index.js
const express = require("express");
const app = express();
const hostname = "127.0.0.1";
const port = 8090;

var http = require('http').Server(app);
var io = require("socket.io")(http);
app.use(express.static('.'));

io.on('connection', function(client){
    console.log("Connection established!");
    client.on("candidate", function(msg){
        console.log("candidate message recieved!");
        client.broadcast.emit("candidate", msg);
    });
    client.on("sdp", function(msg){
        console.log("sdp message broadcasted!");
        client.broadcast.emit("sdp", msg);
    });
    client.on("desc", function(desc){
        console.log("description received!");
        client.broadcast.emit("desc", desc);
    });
    client.on("answer", function(answer){
        console.log("answer broadcasted");
        client.broadcast.emit("answer", answer);
    });
});

http.listen(port, hostname);
All we are doing is attaching the socket module to our web server so that it could listen to incoming connection requests and take action. Once a connection is established we can pass messages to any of the connected peers. The peers can also communicate through the same semantics with the server.
We are leveraging this to facilitate the initial handshake between the two peers we will create. Once the peers are connected they no longer need to use this signalling server and can talk directly to each other exchanging data.
Let us create two peers which will connect and exchange video feed with each other. Each peer resides in a separate Html file and has the below markup.
<!DOCTYPE html>
<html lang="eng">
<head>
<title>WCG -- WebRTC Tutorial For Beginners</title>
</head>
<body>
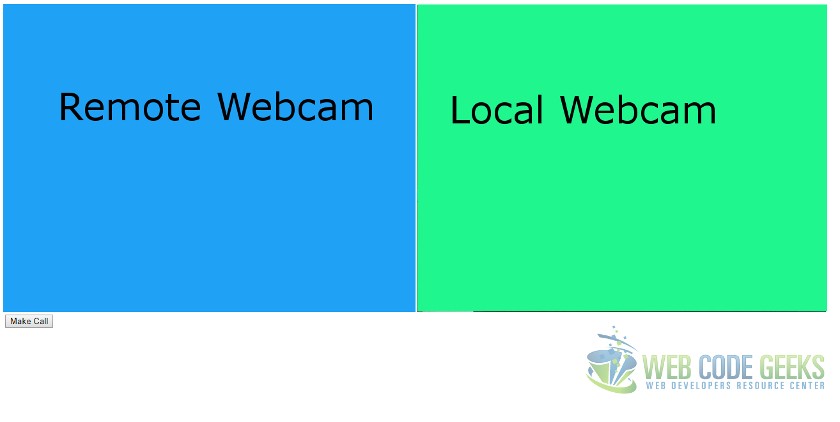
<video id="remoteview" autoplay></video>
<video id="selfview" autoplay></video>
<button type="button" id="makeCall">Make Call</button>
<script src="/socket.io/socket.io.js"></script>
<script>
var socket = io();
</script>
<script src="/js/webrtc.server.js"></script>
</body>
</html>
The above markup creates a couple of video elements with ids remoteview & selfview. There is also a button that says “Make Call” and initiates the video call. We also call in the client library of Socket.io which enables us to signal via the server to the other peer to establish a connection. We instantiate the socket and connect to the signalling server in the next script block. Finally we call our own webrtc.server.js JS file which has the following JavaScript code.
webrtc.server.js
//To iron over browser implementation inconsistencies like prefixed naming conventions
GetUserMedia();
GetRTCPeerConnection();
GetRTCSessionDescription();
GetRTCIceCandidate();

//Initializing a peer connection
var caller = new window.RTCPeerConnection();

//Listen for ICE Candidates and send them to remote peers
caller.onicecandidate = function(evt){
    if(!evt.candidate) return;
    console.log("onicecandidate called");
    onIceCandidate(caller, evt);
};

//onaddstream handler to receive remote feed and show in remoteview video element
caller.onaddstream = function(evt){
    console.log("onaddstream called");
    if(window.URL){
        document.getElementById("remoteview").src = window.URL.createObjectURL(evt.stream);
    } else {
        document.getElementById("remoteview").src = evt.stream;
    }
};
//Get local audio/video feed and show it in selfview video element
navigator.getUserMedia({video: true, audio: true}, function(stream){
    if(window.URL){
        document.getElementById("selfview").src = window.URL.createObjectURL(stream);
    } else {
        document.getElementById("selfview").src = stream;
    }
    caller.addStream(stream);

}, function(evt){
    console.log("Error occurred!");
});
function GetRTCIceCandidate(){
    window.RTCIceCandidate = window.RTCIceCandidate || window.webkitRTCIceCandidate
                || window.mozRTCIceCandidate || window.msRTCIceCandidate;

    return window.RTCIceCandidate;
}
function GetUserMedia(){
    navigator.getUserMedia = navigator.getUserMedia || navigator.webkitGetUserMedia
                    || navigator.mozGetUserMedia || navigator.msGetUserMedia;
    return navigator.getUserMedia;
}
function GetRTCPeerConnection(){
    window.RTCPeerConnection = window.RTCPeerConnection || window.webkitRTCPeerConnection
                        || window.mozRTCPeerConnection || window.msRTCPeerConnection;
    return window.RTCPeerConnection;
}
function GetRTCSessionDescription(){
    window.RTCSessionDescription = window.RTCSessionDescription || window.webkitRTCSessionDescription
                    ||  window.mozRTCSessionDescription || window.msRTCSessionDescription;
    return window.RTCSessionDescription;
}

//Create and send offer to remote peer on button click
document.getElementById("makeCall").addEventListener("click", function(){
    caller.createOffer().then(function(desc){
        caller.setLocalDescription(new RTCSessionDescription(desc));
        socket.emit("sdp", JSON.stringify({"sdp": desc}));
    });
});

//Send the ICE Candidate to the remote peer
function onIceCandidate(peer, evt){
    if(evt.candidate){
        socket.emit("candidate", JSON.stringify({"candidate": evt.candidate}));
    }
}

//Communications with the remote peer through signaling server
socket.on("connect", function(client){
    //Connection established with the signaling server
    console.log("connected!");

    //Listening for the candidate message from a peer sent from onicecandidate handler
    socket.on("candidate", function(msg){
        console.log("candidate received");
        caller.addIceCandidate(new RTCIceCandidate(JSON.parse(msg).candidate));

    });

    //Listening for Session Description Protocol message with session details from remote peer
    socket.on("sdp", function(msg){
        console.log("sdp received");
        var sessionDesc = new RTCSessionDescription(JSON.parse(msg).sdp);
        caller.setRemoteDescription(sessionDesc);
        caller.createAnswer().then(function(sdp){
            caller.setLocalDescription(new RTCSessionDescription(sdp));
            socket.emit("answer", JSON.stringify({"sdp": sdp}));
        });
    });

    //Listening for answer to offer sent to remote peer
    socket.on("answer", function(answer){
        console.log("answer received");
        caller.setRemoteDescription(new RTCSessionDescription(JSON.parse(answer).sdp));
    });
});
The functions with names starting with Get* are needed to protect our code due to cross browser compatibility issues. Like I said before that WebRTC is still being standardized and browser vendors have prefixed their implementations with prefixes. Apart from this we instantiate an RTCPeerConnection on load and register a handler for ice candidates and stream. ICE Candidates are the peers available in the network. Streams are added to the RTCPeerConnection object for sharing with remote peers. The flow of the whole operation is as follows:
- Register with the signalling server.
- Create a
RTCPeerConnectionand registeronicecandidateandonaddstreamevent handlers. - Get the local video and audio streams with
getUserMediaAPI call and add to theRTCPeerConnectionobject. - Either create and offer and send it out to the other peer to begin a call or create an answer on the receipt of an offer from another peer.
- Should start to see the live video/audio feed both local and remote on both ends.
6. Exchanging Data
Now that we have seen the RTCPeerConnection and getUserMedia APIs in action let us look at RTCDataChannel API. Although is less glamorous than the other two in terms of output, it can lay its own claim to fame by providing arbitrary data exchange channel among peers. This gives us a lot of abilities to write multi player online games with a RTCDataChannel providing superior performance since the players are connected directly to each other.
To demonstrate the API, let us write an example of its use to send and receive text messages back and forth between two peers. We create two Html pages to host each peer, namely RTCChannelDemo1.html and RTCChannelDemo2.html. The markup of both these pages should be as follows:
RTCChannelDemo1.html, RTCChannelDemo2.html
<!DOCTYPE html>
<html lang="en">
<head>
    <title>WCG -- WebRTC Tutorial for Beginners</title>
</head>
<body>
    <textarea id="remoteUser" rows="10" disabled ></textarea>
    <textarea id="self" rows="10"></textarea>
    <button id="makeCall" type="button" >Connect</button>
    <script src="/socket.io/socket.io.js"></script>
    <script>
        var socket = io();
    </script>
    <script src="/js/webrtc.datachannel.js"></script>
</body>
</html>
In these pages we have a couple of textarea elements. The first one shows the text received from the remote peer and we type text to send in the second one. There is also a button element to start connecting with remote peer. The script tags include the Socket.io.js file, instantiating the socket and our JavaScript file webrtc.datachannel.js. All the code to establish a connection and exchange data resides in our JavaScript file which looks like below:
//To iron over browser implementation anomalies like prefixes
GetUserMedia();
GetRTCPeerConnection();
GetRTCSessionDescription();
GetRTCIceCandidate();

//Initializing a peer connection
var caller = new window.RTCPeerConnection();
var remoteCaller = new window.RTCPeerConnection();
var dataChannel = caller.createDataChannel('myChannel');
var remoteDataChannel;
var remoteUserMessage = document.getElementById("remoteUser");
var sendMessage = document.getElementById("self");

//Handler for receiving remote channel
caller.ondatachannel = function(channel){
    remoteDataChannel = channel.channel;
};
dataChannel.onopen = function(){
    console.log("Channel Opened");
};

dataChannel.onclose = function(){
    console.log("Channel Closed");
};

dataChannel.onmessage = function(event){
    remoteUserMessage.value = event.data;
};

dataChannel.onerror = function(){

};
//Listen for ICE Candidates and send them to remote peers
caller.onicecandidate = function(evt){
    if(!evt.candidate) return;
    console.log("onicecandidate called");
    onIceCandidate(caller, evt);
};

//onaddstream handler to receive remote feed and show in remoteview video element
caller.onaddstream = function(evt){
    console.log("onaddstream called");

};

function GetRTCIceCandidate(){
    window.RTCIceCandidate = window.RTCIceCandidate || window.webkitRTCIceCandidate
                || window.mozRTCIceCandidate || window.msRTCIceCandidate;

    return window.RTCIceCandidate;
}
function GetUserMedia(){
    navigator.getUserMedia = navigator.getUserMedia || navigator.webkitGetUserMedia
                    || navigator.mozGetUserMedia || navigator.msGetUserMedia;
    return navigator.getUserMedia;
}
function GetRTCPeerConnection(){
    window.RTCPeerConnection = window.RTCPeerConnection || window.webkitRTCPeerConnection
                        || window.mozRTCPeerConnection || window.msRTCPeerConnection;
    return window.RTCPeerConnection;
}
function GetRTCSessionDescription(){
    window.RTCSessionDescription = window.RTCSessionDescription || window.webkitRTCSessionDescription
                    ||  window.mozRTCSessionDescription || window.msRTCSessionDescription;
    return window.RTCSessionDescription;
}

//Create and send offer to remote peer on button click
document.getElementById("makeCall").addEventListener("click", function(){
    caller.createOffer().then(function(desc){
        caller.setLocalDescription(new RTCSessionDescription(desc));
        socket.emit("sdp", JSON.stringify({"sdp": desc}));
    });
});

sendMessage.addEventListener("keyup", function(evt){

    remoteDataChannel.send(sendMessage.value);
});
//Send the ICE Candidate to the remote peer
function onIceCandidate(peer, evt){
    if(evt.candidate){
        socket.emit("candidate", JSON.stringify({"candidate": evt.candidate}));
    }
}

//Communications with the remote peer through signaling server
socket.on("connect", function(client){
    //Connection established with the signaling server
    console.log("connected!");

    //Listening for the candidate message from a peer sent from onicecandidate handler
    socket.on("candidate", function(msg){
        console.log("candidate received");
        caller.addIceCandidate(new RTCIceCandidate(JSON.parse(msg).candidate));

    });

    //Listening for Session Description Protocol message with session details from remote peer
    socket.on("sdp", function(msg){
        console.log("sdp received");
        var sessionDesc = new RTCSessionDescription(JSON.parse(msg).sdp);
        caller.setRemoteDescription(sessionDesc);
        caller.createAnswer().then(function(sdp){
            caller.setLocalDescription(new RTCSessionDescription(sdp));
            socket.emit("answer", JSON.stringify({"sdp": sdp}));
        });
    });

    //Listening for answer to offer sent to remote peer
    socket.on("answer", function(answer){
        console.log("answer received");
        caller.setRemoteDescription(new RTCSessionDescription(JSON.parse(answer).sdp));
    });
});
This code like in the previous section establishes a RTCPeerConnection between peers. It then creates a data channel from the RTCPeerConnection object. It also waits for the remote channel to be passed into the ondatachannel handler. Furthermore, the code sends the text from the second textarea element through the remote channel in the keyup event handler.


7. Code in Action
To see all of this in action we need to run the following commands at the root of the project:
> npm install
followed by
> node index.js
To look at the getUserMedia demo we navigate to the http://localhost:8090 URL and click the Show Webcam button.
For the RTCPeerConnection API demo we need to navigate to http://localhost:8090/RTCDemo1.html in one tab and http://localhost:8090/RTCDemo2.html in the other. We need to click the Make Call button.
And lastly, for the RTCDataChannel API demo we need to navigate to http://localhost:8090/RTCChannelDemo1.html and http://localhost:8090/RTCChannelDemo2.html in two separate tabs.
8. Download the Source Code
This was an example of the WebRTC APIs.
You can download the full source code of this example here : WebRTC Tutorial for Beginners

WebRTC technology is bound to transform online communication as we know it and set the future trends for other integrated technologies to come. But one has to be careful when using because it has a security flaw for chrome and Mozilla users. It can leak your original IP even if you are using a VPN. Source:http://bit.ly/2gLiCWT
Important: If you still have code that relies on createObjectURL() to attach streams to media elements, you need to update your code to simply set srcObject to the MediaStream directly.
https://developer.mozilla.org/en-US/docs/Web/API/URL/createObjectURL
Hello ,ihave downloaded the code and seen the results on localhost, i was just able to show webcam click event futher events were not working
can u please eleborate the same
Hello,
Did you try the other two pairs of webpages, WebRTCDemo1.html & WebRTCDemo2.html as well as RTCChannelDemo1.html & RTCChannelDemo2.html?
Best Regards,
Siddharth Seth
basic demo of getUserMedia does NOT work with firefox/chrome/brave. Works for Microsoft-Edge
Hi,
The Browser APIs have raced ahead since this article’s example implementation circa 2017. Just had a look at the code in the file, webrtc.demo.js, line number 12 Switch to below code for cross browser compatibility.
document.getElementsByTagName(“video”)[0].srcObject = stream;
Best Regards,
Siddharth Seth
rtcDemo1.html doesn’t work. It opens the two video windows and the connect button, but I get: GET file:///D:/socket.io/socket.io.js net::ERR_FILE_NOT_FOUND
I copied your code exactly and invoked it with
d:/folder/rtcDemo1.html
What can I do to fix it?
Uncaught (in promise) DOMException: Failed to execute ‘setRemoteDescription’ on ‘RTCPeerConnection’: Failed to set remote answer sdp: Called in wrong state: kStable on http://localhost:8090/RTCChannelDemo1.html